After we’ve investigated this issue thoroughly, we realized that there are actually several different underlying causes why you’ll see this problem occurring. Here’s a short list of culprits that you should be aware of: Now that we’ve gone over every potential reason why you might find your PC stuck at the ‘Restarting…’ screen, let’s get to the fixing part. Follow the instructions below to troubleshoot the issue away and get past the ‘Restarting…’ screen.
1. Force Shut Down and Power Cycle
It turns out that one of the situations, where you will encounter this issue most frequently, is a typical boot glitch that comes after the incorrect installation of a Windows feature update. If this situation applies, you can resolve the problem by performing a forced shutdown or a power-cycling process.
If you’re experiencing this issue on a PC, you can force a PC by pressing the power button until the power gets interrupted. Once you’ve done this, unplug the power cord and wait for 60 seconds or more in order to drain the power capacitors.If you’re experiencing this issue on a laptop, press and hold on to the power button for 60 seconds. Your laptop should turn off after a few seconds, but keep the button pressed until the 60-second mark to make sure that the power capacitors are drained. Next, take out the battery and leave your laptop without a battery for a few minutes.
Once you’ve successfully forced a shutdown and power cycling procedure, boot your Windows 11 PC normally and see if you can get past the ‘Restarting…’ screen. If the problem is still not fixed, move down to the next method below.
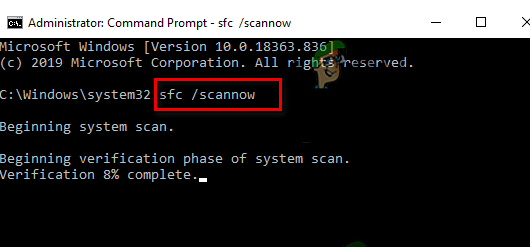
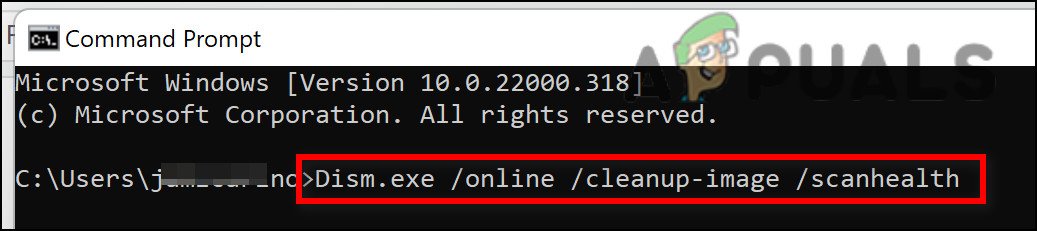
2. Deploy SFC & DISM Scans
Your Windows PC likely has some sort of system file damage with a login component if the method above didn’t allow you to get past the ‘Restarting…’ screen. The next action should be to launch DISM (Deployment Image Servicing and Management) and SFC (System File Checker), two built-in programs that can address the most frequent causes of system file corruption. Although SFC and DISM are essentially identical, it is more probable that the corruption problem will be resolved if they are done directly following one another. It should be noted that while SFC gets healthy system files from a local area, DISM obtains files via Windows Update in order to replace faulty counterparts. By using an elevated CMD prompt, you may conduct an SFC scan to look for system file corruption. Note: Even if the instrument appears to have frozen in the middle of use, it is preferable to carry on with this procedure (or prematurely quit the CMD window). The success notification will eventually be sent to you once the transaction is complete. The SFC scan will end once your machine has restarted. After the subsequent startup is complete, perform a DISM scan. IMPORTANT: Before starting this step, check the strength of your Internet connection. Restart your computer to see if the problem has been fixed after appropriately executing the DISM command. If the problem is still not solved, proceed to the technique below.
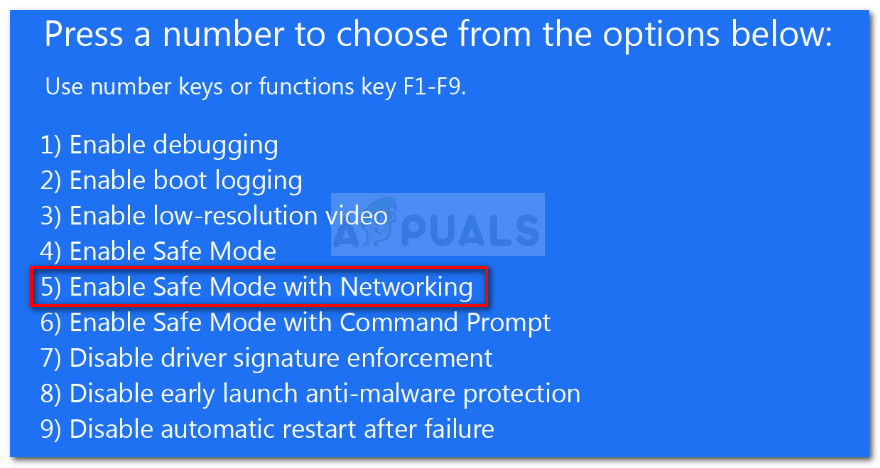
3. Boot in Safe Mode
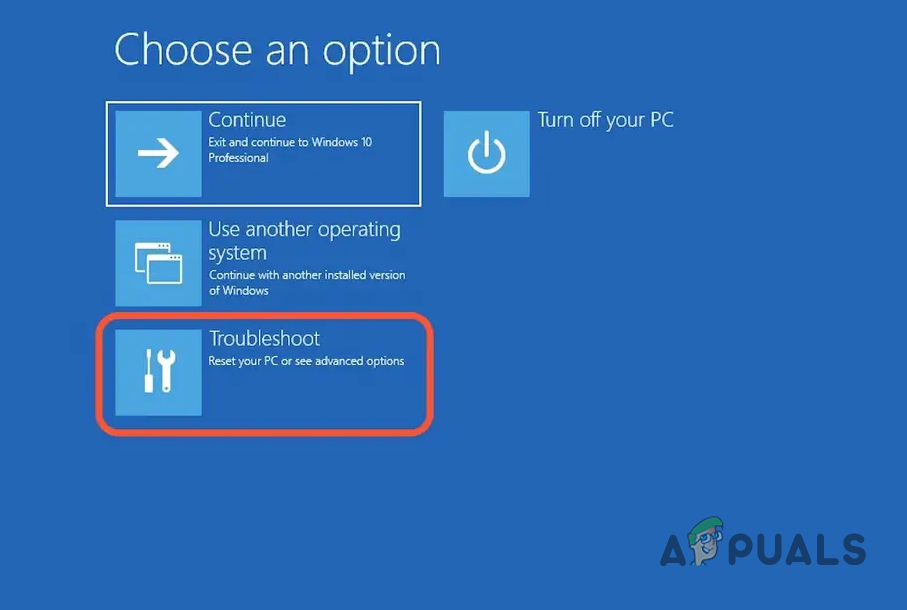
In rare situations, you can encounter this problem as a result of intervention from a third party that prevents your Windows 11 PC from successfully installing a newly installed feature update. By starting your computer in Safe Mode with networking and letting it do the upgrade, you can entirely prevent this problem. If you decide to use this repair approach, Safe Mode is absolutely necessary because it’s the only way you’ll be able to proceed past the “Restarting…” screen. To boot in Safe mode and see if this allows you to get past the ‘Restarting…’ boot loop, follow these steps: For further instructions on how to implement this strategy, refer to the table below: If this method didn’t work for you or booting in Safe Mode didn’t allow you to get past the boot loop, move down to the next method below.
4. Leave the battery drain completely (Laptops only)
As it turns out, if you’re having this problem on a laptop, there’s a good probability that some harmful data is being kept around between restarts and is causing this behavior. Many impacted individuals reporting the same type of issue have reported that the issue was resolved when they let the laptop battery totally discharge. We’ve managed to find a few users who dealt with this issue on Windows 11 laptops and they’ve managed to fix the issue by leaving the laptop’s battery to drain completely overnight (by leaving the laptop on). Note: This operation will ensure that the power capacitors are completely drained so the next startup is conducted without any remnant cached data. It’s IMPORTANT to make sure that your laptop is not set to enter sleep or hibernation mode while you’re leaving the battery to discharge. If this method was not applicable or you’re looking for a different fix, move down to the next method below.
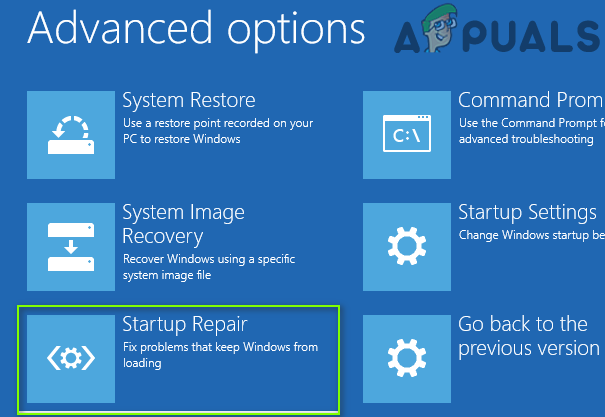
5. Perform a Startup Repair
It turns out that this specific problem can also be brought on by a discrepancy that affects the boot-related data and causes your computer to become stuck on the Restarting screen. Perform a startup repair in Windows 11’s recovery menu to resolve this problem. A Windows automated troubleshooter called Startup Repair is designed to solve booting-related issues. This system recovery tool checks your computer and fixes any issues it discovers. However, in order to use this method, you must access Windows’ Advanced settings, which may be accessed in the Recovery Menu. The steps to carry out a starting repair via the Recovery Menu are as follows: If this approach didn’t solve your issue, move on to the one after that.
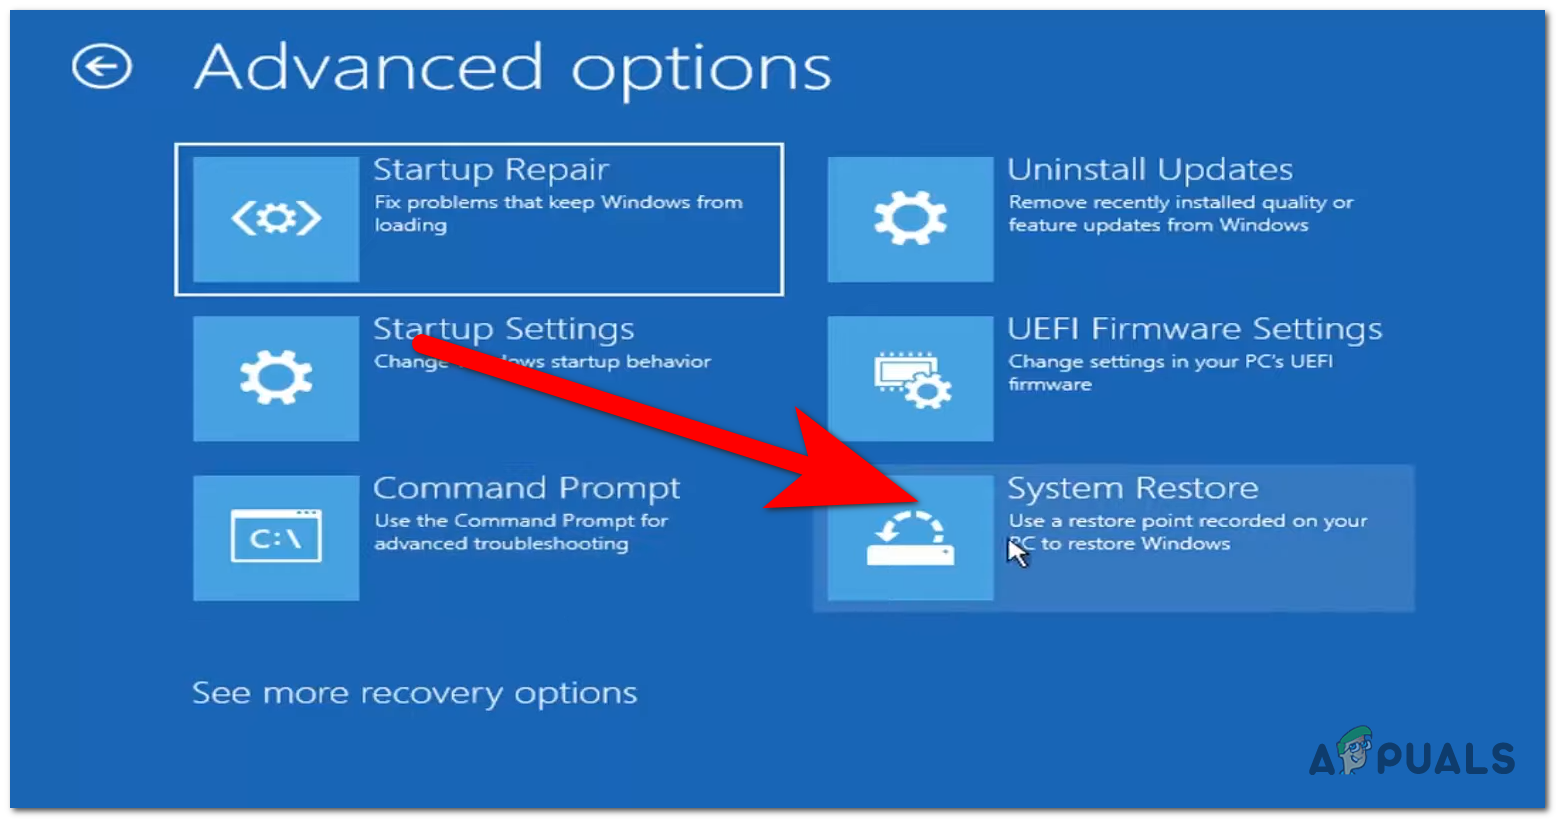
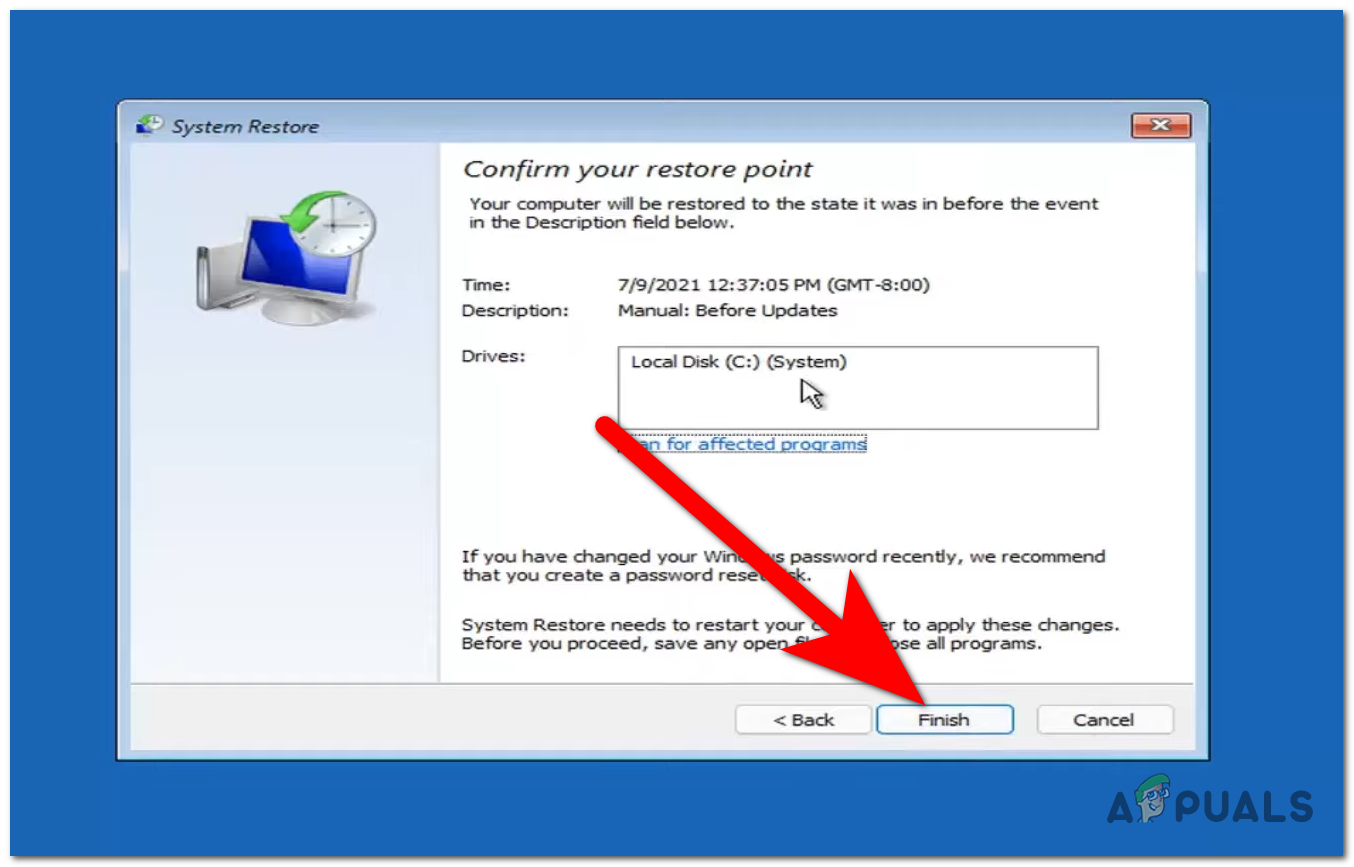
6. Perform a System Restore
It turns out that this situation may have been generated inadvertently by freshly installed software, a feature upgrade, or an AV scan. The simplest way to solve the problem is to run a system restore and return to a healthy state where this issue is not occurring because there are numerous potential culprits that you should look into. This tool allows you to restore your entire Windows installation to a stable state where the problem never occurred in order to fix significant errors. Your operating system must have previously taken a snapshot that can be used to roll back the Windows installation to a previous time in order to employ this remedy, though. However, Windows should be set up to often save System Restore Snapshots if you haven’t changed the default behavior (after every installed Windows update). Important: Be warned that this approach would essentially reverse any changes made after the snapshot was first created before attempting it. After the snapshot was taken, any user preferences, game downloads, or software installations will be gone. Use the following instructions to see how to restore your system if you decide to do so: Continue to the next method below if your computer still won’t boot into Windows 11.
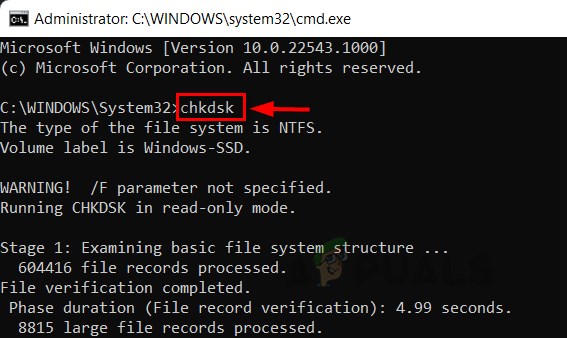
7. Deploy a CHKDSK scan
If you’re still using a traditional (HDD) drive, the first thing you should do is run a CHKDSK scan to determine whether this behavior is actually related to a failing disk sector that is beginning to fail. After using this kind of scan, the corrupted sectors will be swapped out for their unused counterparts. Numerous users who have experienced this issue claim that it may also happen if the HDD or SSD that is now housing your OS installation starts to malfunction. By running a CHKDSK scan to replace corrupt storage sectors with good ones, this scenario can be validated and your storage hardware’s lifespan lengthened (for a few more months). If you were still using a standard HDD and some of the storage sectors used to store system files were beginning to degrade, a persistent “Restarting…” boot loop would develop. By replacing damaged sectors with healthy ones, running a Check Disk Scan will help you extend the life of your HDD in this circumstance. Try launching a CHKDSK scan from an elevated CMD prompt to rule out this possibility. Widespread Activate a CHKDSK scan Note: Thankfully, Windows’ integrated CHKDSK program can check for errors and corruptions and fix any logical errors and damaged data that might have been left behind by a forcible deletion attempt. Open CHKDSK in an elevated CMD window to give it the rights it needs to fix damaged files. Regardless matter the Windows version you’re running, the procedures should work. Restart your computer when the CHKDSK scan is finished to check if you can escape the boot loop. Try the following technique if the problem persists.
8. Uninstall the latest quality update or feature update
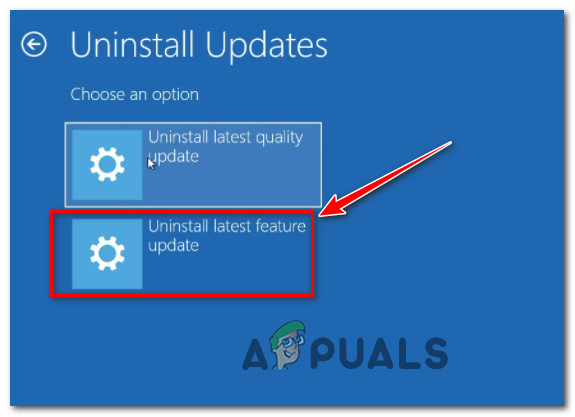
It turns out that a recent problematic update that was loaded on your machine could also be the cause of your issue. If this situation applies, you can resolve the problem by going to the Recovery menu and removing the most recent quality update or feature update (depending on which one got installed last). If none of the aforementioned solutions worked for you and the problem only became apparent after you installed a pending Windows update, it’s likely that Microsoft released yet another flawed update that led to the black screen problem on Windows 11. Usually, if you find yourself in this situation, you should be able to resolve the problem by forcing Windows Recovery on your computer. Once inside, you can quickly uninstall the most recent feature update to try to fix the issue. Note: Remember that a poor update may not be the sole source of this problem. In this situation, deleting the most recent update will compel your OS to install it again properly. Alternatively, it might have been brought on by an unexpected system interruption while your system was busy installing the pending update. To force Windows 11 to boot into Windows Recovery mode and delete the most recent quality update or feature update, adhere to the steps below: Continue to the method below in the event that the issue is still not resolved.
9. Remove non-essential peripherals
The possibility that your existing PSU is insufficiently powerful to power all the internals and attached peripherals is one improbable explanation, but once it is formally validated by Microsoft, it is a viable one. You can put this hypothesis to the test by unplugging all auxiliary devices from your computer and seeing whether you can go past the “Restating…” prompt. Note: Although we are unable to provide you with a comprehensive list of circumstances in which this issue can arise, you can try disconnecting all auxiliary devices in order to isolate the issue’s root cause. You may encounter this boot loop if your power supply unit (PSU) is insufficient to support all of the USB-connected devices in your system. This is because your system is unable to supply the necessary power. Specific configurations with external hard drives connected through USB have been observed to experience this. If this scenario describes your current circumstance, try taking out the external hard disk (whether necessary), and see if the issue is resolved. If the error stops occurring after you disconnect external devices and you want to fix it without sacrificing any functionality at all, there are two distinct approaches you can take:
Purchase a higher PSU that can supply your USB-connected devices with additional power. Of course, desktop arrangements are the only ones where this is applicable.Purchase a USB hub that has an external power source. If the problem is with a laptop or ultrabook, this should be the solution. Hubs for USB that have built-in power supplies will lessen the burden on your PSU.
Continue to the final approach below if this one isn’t appropriate for your situation or didn’t help.
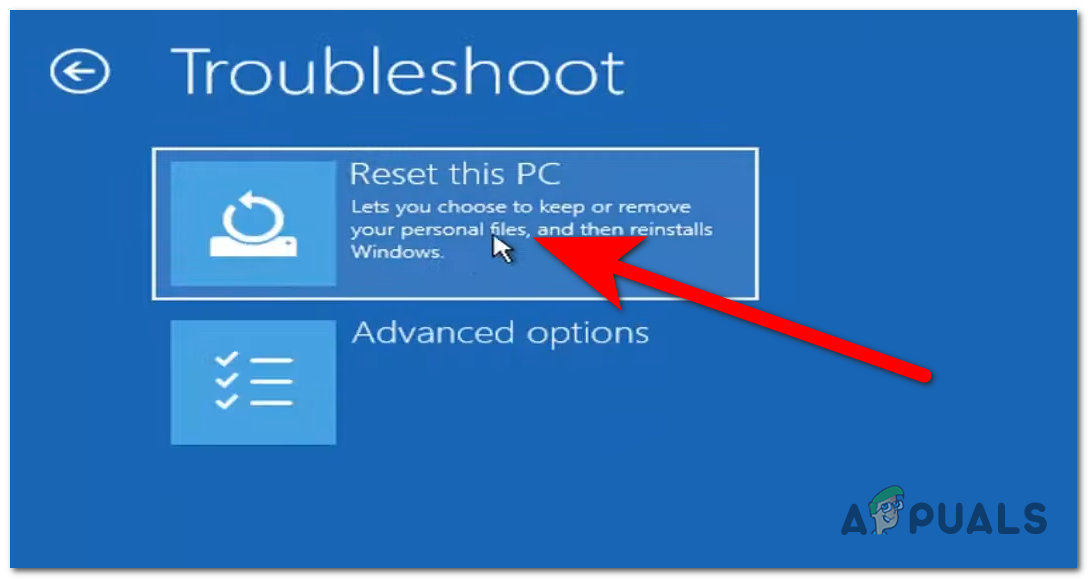
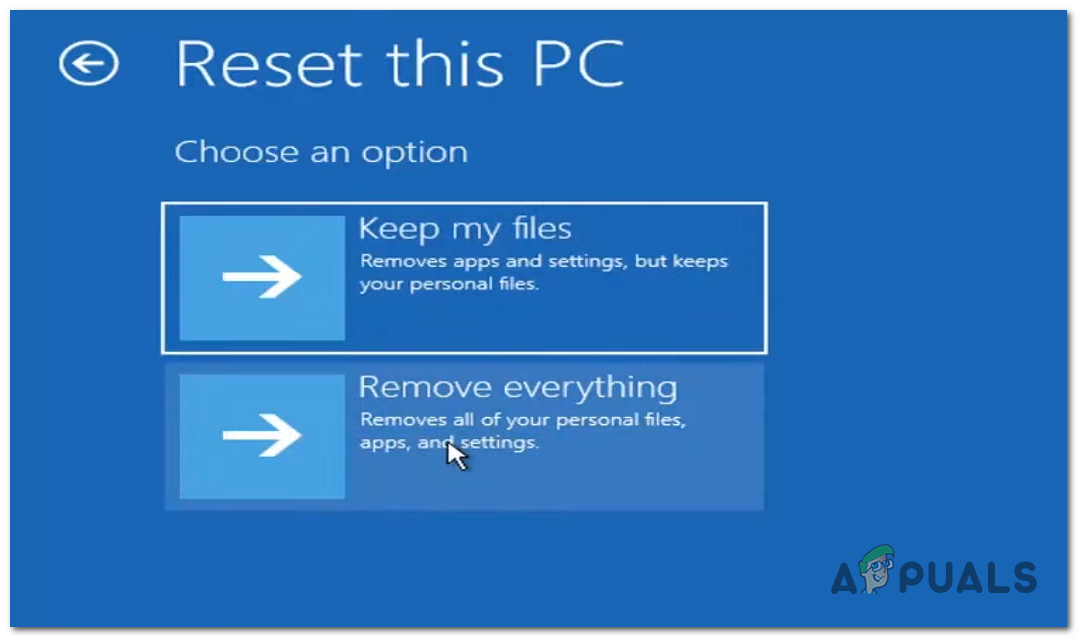
10. Perform a Reset Procedure
Try resetting your computer as a last resort to see if that resolves the problem with Windows 11 not booting. This can be done from the Windows Recovery Menu, and it’s a quick operation that will just take a few minutes, but it can be essential for fixing this mistake. All you need to do is enter the Troubleshoot area of the Recovery Menu and then select the Reset this PC option. Your personal files are either available for retention or deletion, so you may decide which course of action to take. Note: It is advised that you remove everything to essentially perform a factory reset, even though you will probably want to save your personal stuff. Your issue should be resolved because all potentially corrupted files will be recovered in this manner. The steps you must take to reset your computer are listed below in case you are unfamiliar with them:
Windows Stuck in a Restart Loop? Here Is the Fix!Stuck at Lock Screen on Windows 11? Here’s the Fix:Phasmophobia Stuck at Loading Screen? Here’s How to FixWorld War 3 Stuck at Initializing Screen? Here’s how to fix