In this guide; i will walk you through the steps to create a snipping tool shortcut on the Windows 10 desktop.
Snipping Tool in Windows 10
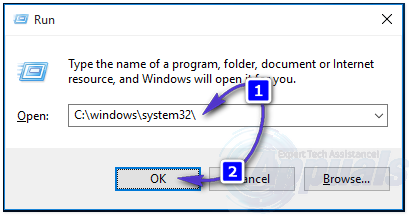
There are many ways to run Snipping Tool in Windows 10 but the easiest of all is to create a short cut on the desktop so you can access it anytime you want. Hold the Windows Key and Press R. In the run dialog, type the following file location.
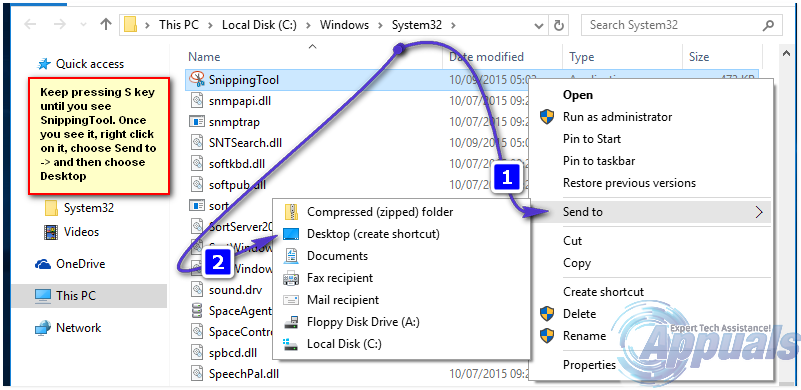
Then Click or Press OK. Once done, it will take you to the Window Explorer listing all the files in c:\windows\system32\ – From here, Click on any file once to highlight it and then repeatedly press the S key until you see the file called SnippingTool.exe
You should now have the snipping tool visible on your Desktop. You can use it by double clicking on it.
How to Get Snipping Tool on Windows 10Fix: Windows Snipping Tool Shortcut not WorkingWindows 11 Snipping Tool not Working? Try These FixesWindows 11 Renovates The Snipping Tool, Now Packed With Screen Recording…