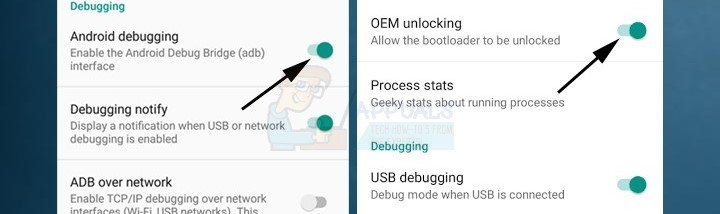
Before we begin let’s state some facts first, This method works on phones that are on android marshmallow only, Nougat is still not supported. To do this method you’ll need to unlock your bootloader, if it is not unlocked, unlocking it can result in a full wipe of your smartphone, so you should backup all the data on your phone before hand. Now that we have gotten these out of the way, here’s the Prerequisites. First, we’ll need to unlock your bootloader, motorola offers unlocking bootloader codes but we’ll need to a few steps first. On your phone, open Settings -> About Phone then click on the “Build Number” about 7 times, once you see a Developer message press back and go to Developer Options, tick the “Allow OEM Unlock” and the “USB Debugging” and “Android Debugging” options.
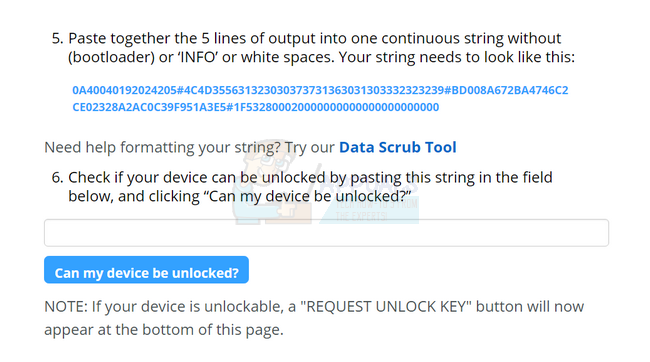
Now on your laptop you should install minimal fastboot and ADB, you can find it in this link. After you download it follow the installer’s instruction and create a shortcut on the desktop, open that shortcut and you will see a command line, Now head to your phone and boot it into the bootloader by powering off then holding power+Volume Down buttons. Connect the phone to the laptop using your USB cable and on the command line type “adb devices” if your phone shows up you’re good to go if it does not then you should try installing the motorola drivers from here. Then type in “mfastboot oem get_unlock_data”, you’ll see a string of random characters presceded by a “(bootloader)”, copy the random characters and paste them in a notepad, make sure that they are on one string, without the (bootloader) or the white spaces. Next head to the motorola website here, click next, log into your motorla account, copy the string of random characters and paste it in the “Can my device be unlocked?” text bar, then press Request Unlock Key, in a few minutes of less it should arrive to your email.
Once it does, head back to the command line then type “mfastboot oem unlock
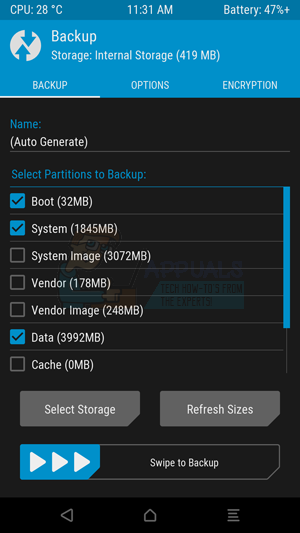
Go back to TWRP’s menu then go to Advanced -> Terminal then type in this code echo “SYSTEMLESS=true” > /data/.supersu now to make sure that what we did was done correctly, go back to the Advanced menu and then File manager -> /data folder and make sure a “.supersu” file is there, once you make sure go back to the main menu and head to Install menu, find the SuperSU file you copied to your phone earlier and swipe to confirm the flash. And then reboot your phone, once rebooted you’ll phone will be rooted with the SuperSU ready to use! If something goes wrong durigng the flash, you’ll have the backup you did earlier and you can always boot to TWRP and recover it!
How to Root the Moto G6 with TWRP and Magisk BetaFix: root User’s Home Directory is /rootHow to Root Your Nexus Phone using CF-Auto-RootHow to Root Your Samsung Phone Using CF-Auto-Root