How to Make a Smoke Alarm using a Smoke Sensor?
Now as we know the abstract of our project, let us start working on this project.
Step 1: Components Used
The best approach to start any project is to make a complete list of components. This is not only an intelligent way to start a project but it also saves us from many inconveniences in the middle of the project. A list of components of this project is given below:
Step 2: Studying the Components
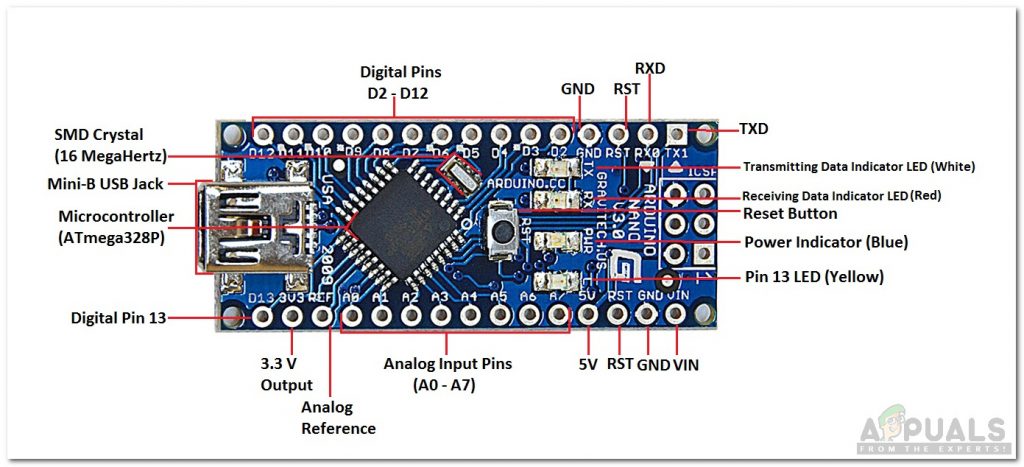
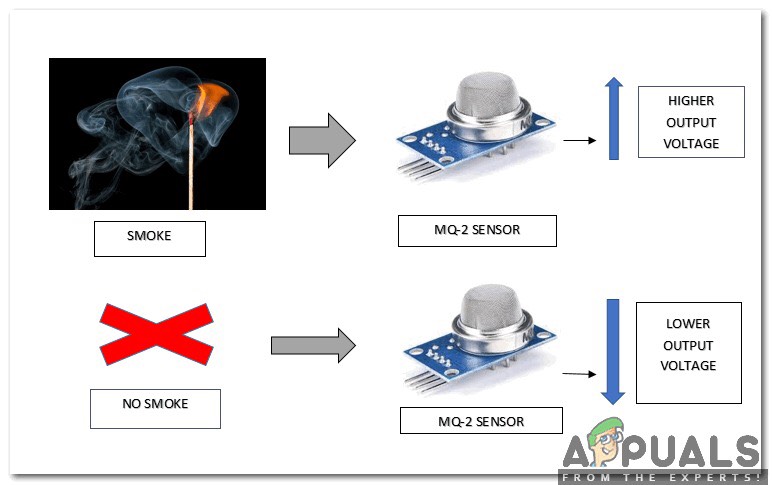
As we have made a list of components that we are going to use in our project. Let us move a step ahead and go through a brief study of how these components work. Arduino Nano is a microcontroller board that is used to perform various tasks in different circuits. The microcontroller that Arduino Nano uses is ATmega328P. We burn a C Code on this board to tell it how and what operations to carry out. MQ-2 is the most common Metal Oxide Semiconductor (MOS) type gas sensor. It is very sensitive to smoke and other flammable gases like LPG, Butane, Propane, Methane, Alcohol, Hydrogen, and Carbon Monoxide, etc. When the gas comes in contact, it uses a simple voltage divider network to detect the smoke. When the smoke is detected, its voltage increases. The change in internal resistance depends on the concentration of gas or smoke. It has a small potentiometer that is used to adjust the sensitivity of this sensor.
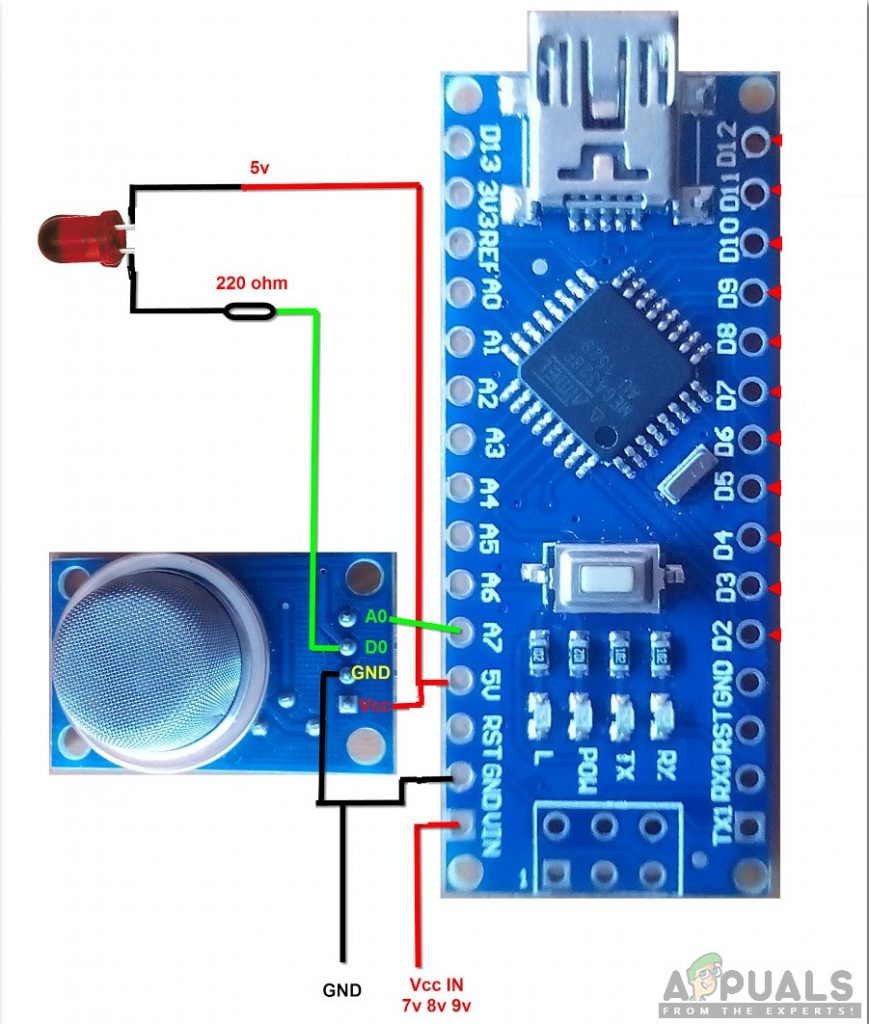
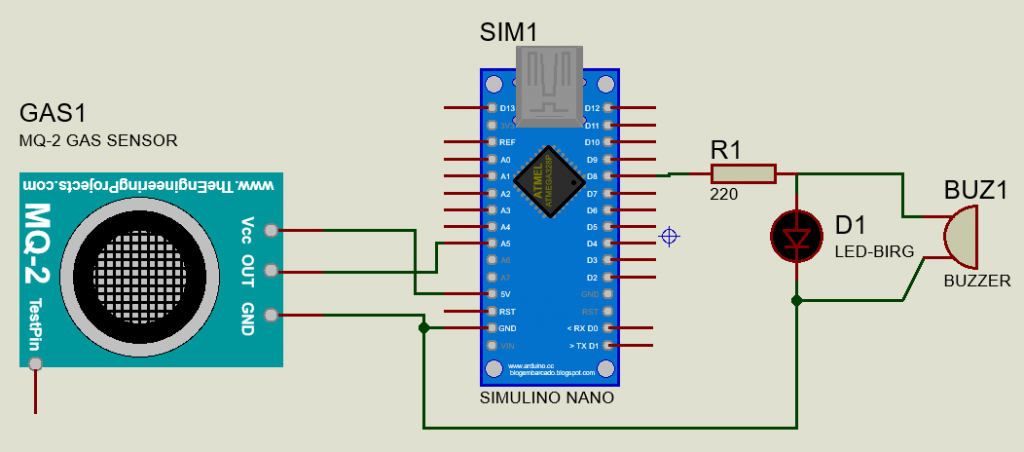
Step 3: Assembling the components
Now as we know the main idea behind the working of each component. Let us assemble all the components and make a working circuit.
Step 4: Getting started with Arduino
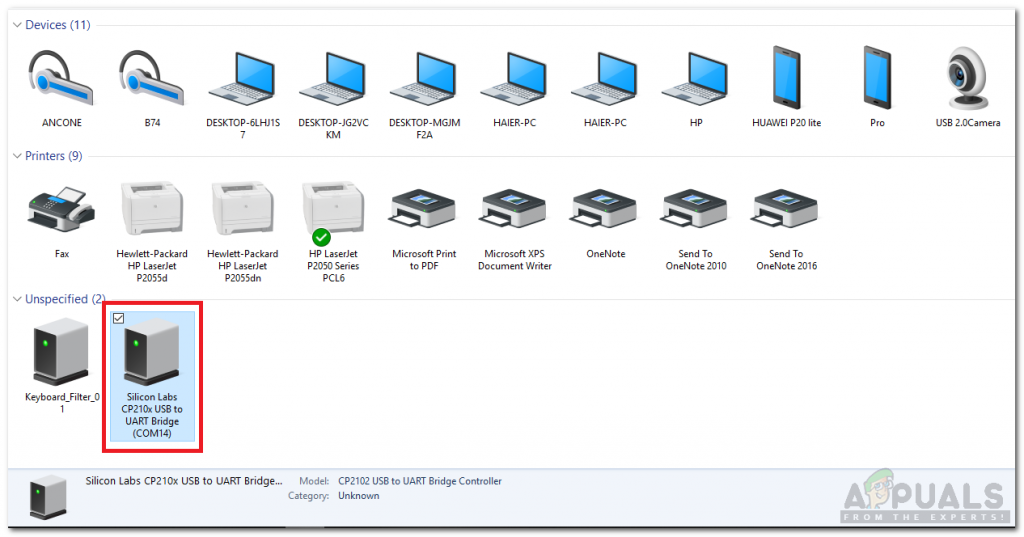
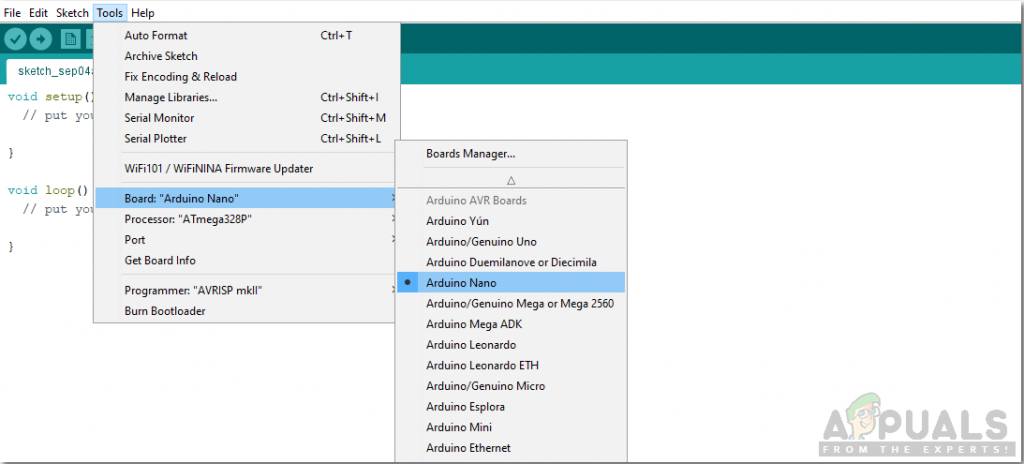
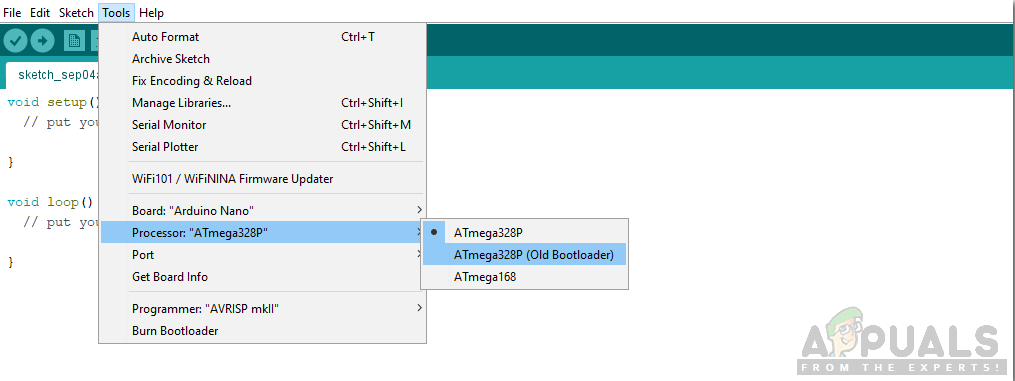
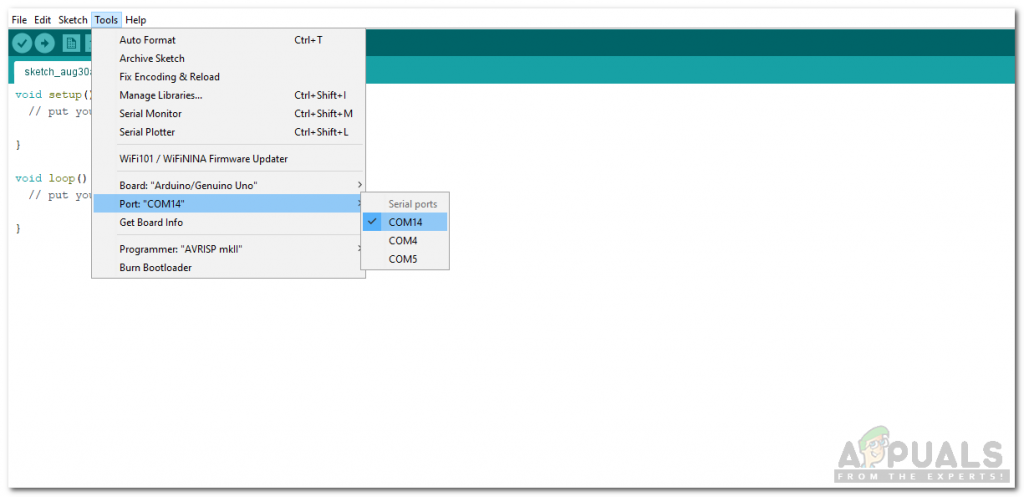
If you are not already familiar with the Arduino IDE, don’t worry because a step by step procedure to set-up and use Arduino IDE with a microcontroller board is explained below. Download the code by clicking here.
Step 5: Code
The code is pretty well commented and self-explanatory. But still, it is briefly explained below.
- The pins of Arduino that are connected to the sensor and the buzzer are initialized at the start. The value of the threshold is also set here in a variable named sensorThres.
- void setup() is a function in which all the pins are set to be used as OUTPUT or INPUT. This function also sets the baud rate of the Arduino Nano. Baud Rate is the speed at which the microcontroller board communicates with other sensors. the command, Serial.begin() sets the baud rate which is mostly 9600. The baud rate can be changed according to our wishes.
- void loop() is a function that runs repeatedly in a loop. In this loop, an analog value from the sensor is being read. This analog value is then compared to the threshold value that we have already set at the start. If this value is greater than the threshold value, the buzzer and led will switch on, otherwise, they will remain switch off. Now as we know how to use a smoke sensor to sense different gases and switch on an alarm to notify anyone nearby, we can make our smoke alarm instead of buying an expensive one from the market because the smoke alarm that we can make at home is low cost and efficient.
How To Make A Security Alarm Using PIR Sensor And Arduino?How To Move Dishes Around Your Kitchen Shelf Using A Robot?How To Make A Digital Thermometer Using Arduino?How To Make Obstacle Avoiding Robot Using Arduino?