In 2019, Microsoft announced the release of a new version of WSL, and it was named WSL 2. This new version of WSL supports running graphical Linux apps on a Windows PC and utilizes a fully-operational Linux kernel with better file I/O performance and faster system calls. Another excellent achievement in WSL 2 as it is supported on the Home version of Windows 10, whereas, WSL only supported Windows 10 Pro.
Requirements to Enable the WSL Feature
A user’s PC must meet the following requirements to enable the WSL feature: If your PC does not meet these requirements, then you may have to use WSL 1 version only and you may follow the guidelines below but skip the parts related to WSL 2 (like setting the default version to WSL 2). If your PC meets the system requirements of WSL 2, you may follow the guidelines discussed below:
Install the WSL Through PowerShell
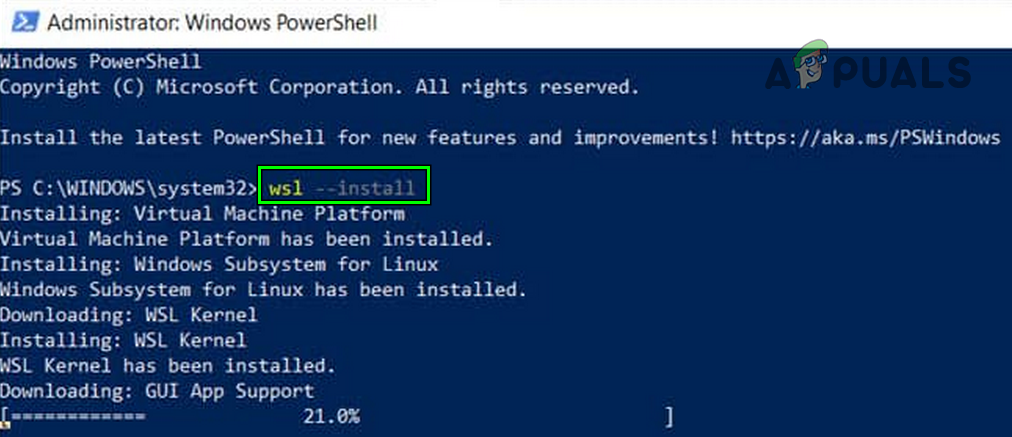
Microsoft has made it easier for its users to use a single PowerShell command to install the WSL feature along with the default Ubuntu installation (that can be changed). This PowerShell command will enable the required WSL component, download and install the latest Linux kernel, set WSL2 as the default, and install Ubuntu. So, follow the steps below to set up WSL with a single command (this command is supported only on Windows 10 2004 or above): You may use the Ubuntu app in the Windows Start menu or use the Windows Terminal app to explore different Ubuntu features.
Install a non-Default Linux Distro Through the PowerShell Command
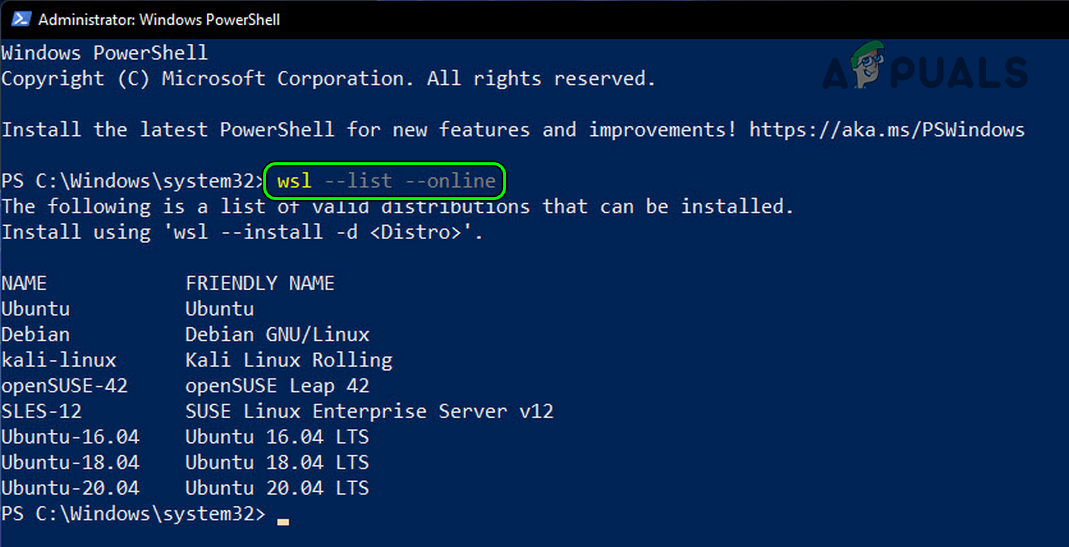
What if a user wants to install a different distribution than the default Ubuntu? So, don’t worry, here is a simple process: Upon restart, set up the Linux distro as per your requirements (as discussed later).
Install a Custom Linux Distro
There can be users who may need to use a Linux distro that is not available in the Microsoft Store and those users may use the official Microsoft reference page to import any Linux distribution to use with WSL as discussing it here is not in this article’s scope.
Install Multiple Linux Distros in WSL
If a user wants to use multiple Linux distros, he can do the same by using the (already discussed) following command in the PowerShell (do not forget to replace the
Install WSL on a Server
If you are installing WSL on a server machine, then you can reference the Official Microsoft Windows Server Installation Guide of WSL.
Installing WSL in a VM-Based Windows
If a user is installing the WSL feature in a VM-based Windows, then he may execute the following in the host’s PowerShell (Admin) to expose the virtualization flags of the host to the VM:
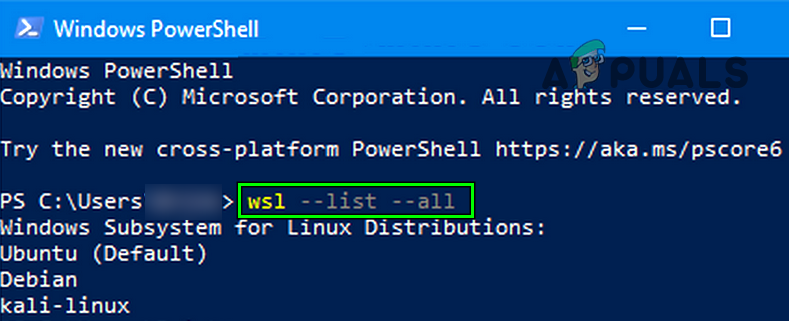
Confirm the Installation of Linux Distribution and WSL Version
Now, to confirm if the Linux distributions are successfully installed and the WSL version is set to WSL 2, a user may execute the following (one by one) in the PowerShell (Admin):
Use the GUI Method to Install WSL
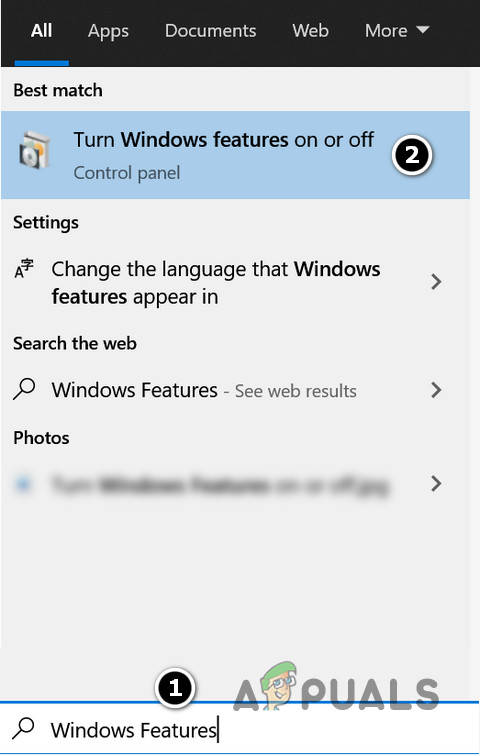
Many Windows users do not prefer a command-line method to install applications/utilities. Also, WSL version 1 cannot be installed by using the single PowerShell Command discussed earlier. Moreover, the users with Windows 10 version 1903 and 1909 cannot use the WSL install method. So, here is a more GUI-based method to use WSL on a Windows PC.
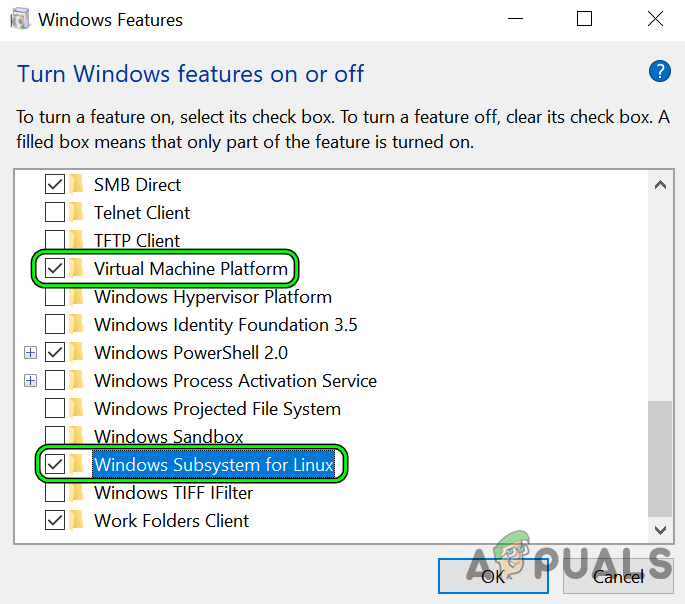
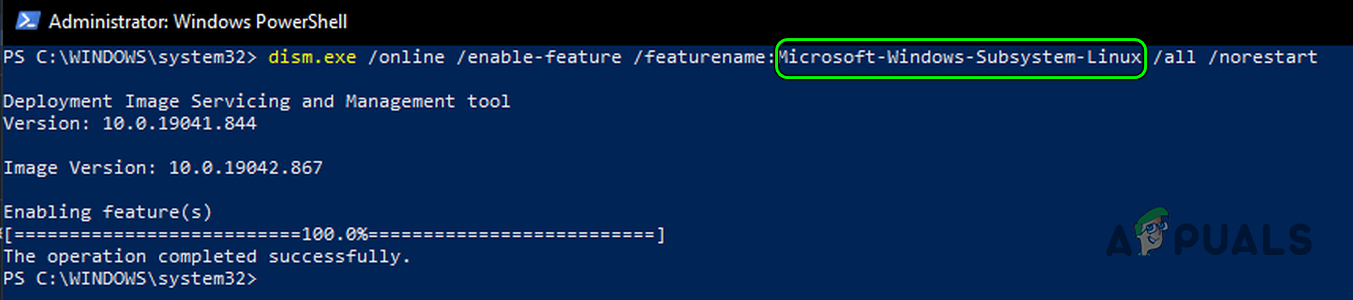
Enable the WSL Feature on Windows 10
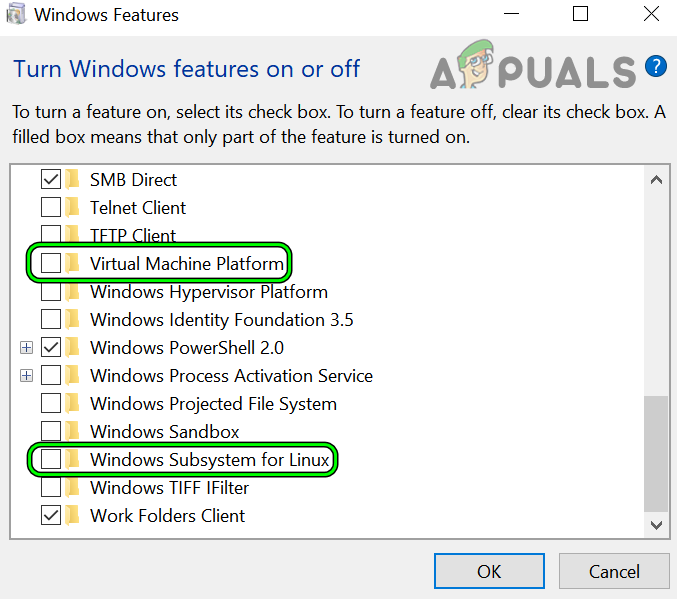
The Windows Subsystem for Linux (WSL) can also be enabled by executing the following in the PowerShell (Admin): The Virtual Machine Platform can be enabled by executing the following in the PowerShell (Admin): For Windows Version 2004 or higher: For Windows Version 1903 and 1909:
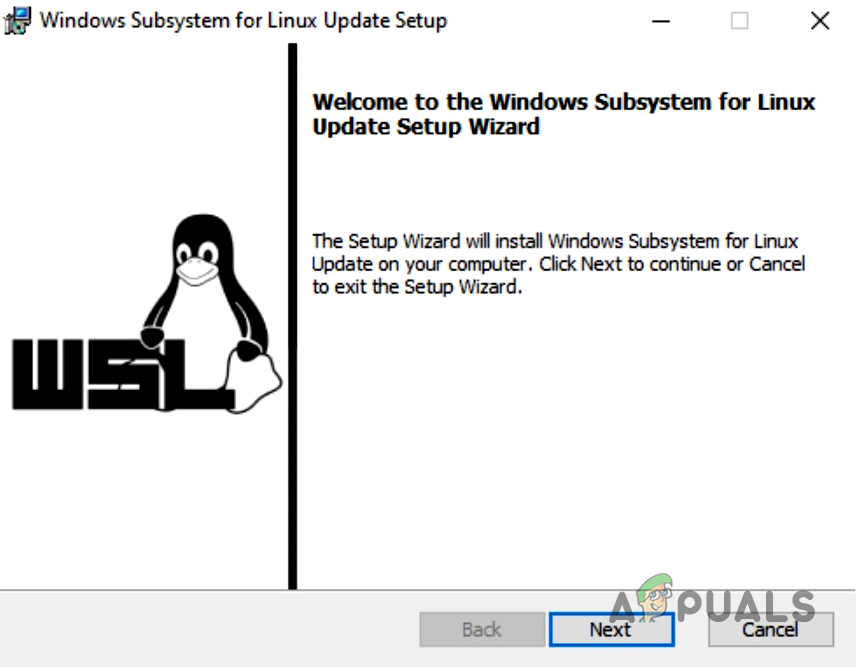
Download and Install the Latest Kernel Update of WSL
After enabling the required features, a user must update the WSL kernel.
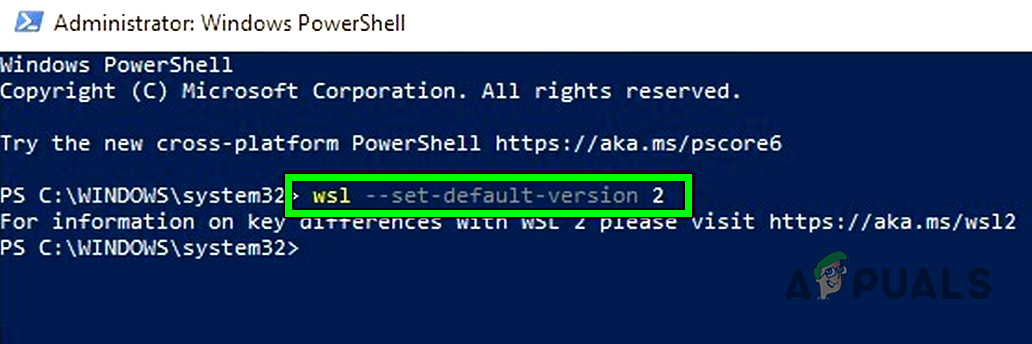
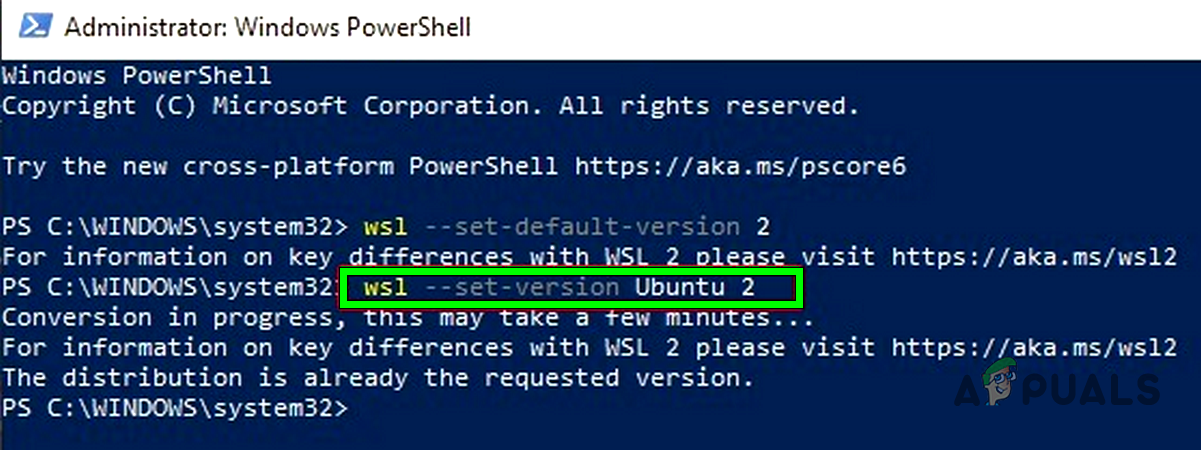
Set the Default Version of WSL to WSL 2
After updating the WSL kernel, a user must set the default WSL version to 2. But before that, check which version of WSL is set as default by executing the following in the PowerShell (Admin):
If WSL 2 is not the default, then open the PowerShell (Admin) and execute the following:
This will change the WSL for all new installations of Linux distros to WSL 2. If a user has already installed a distro with WSL, he may execute the following (make sure to replace the
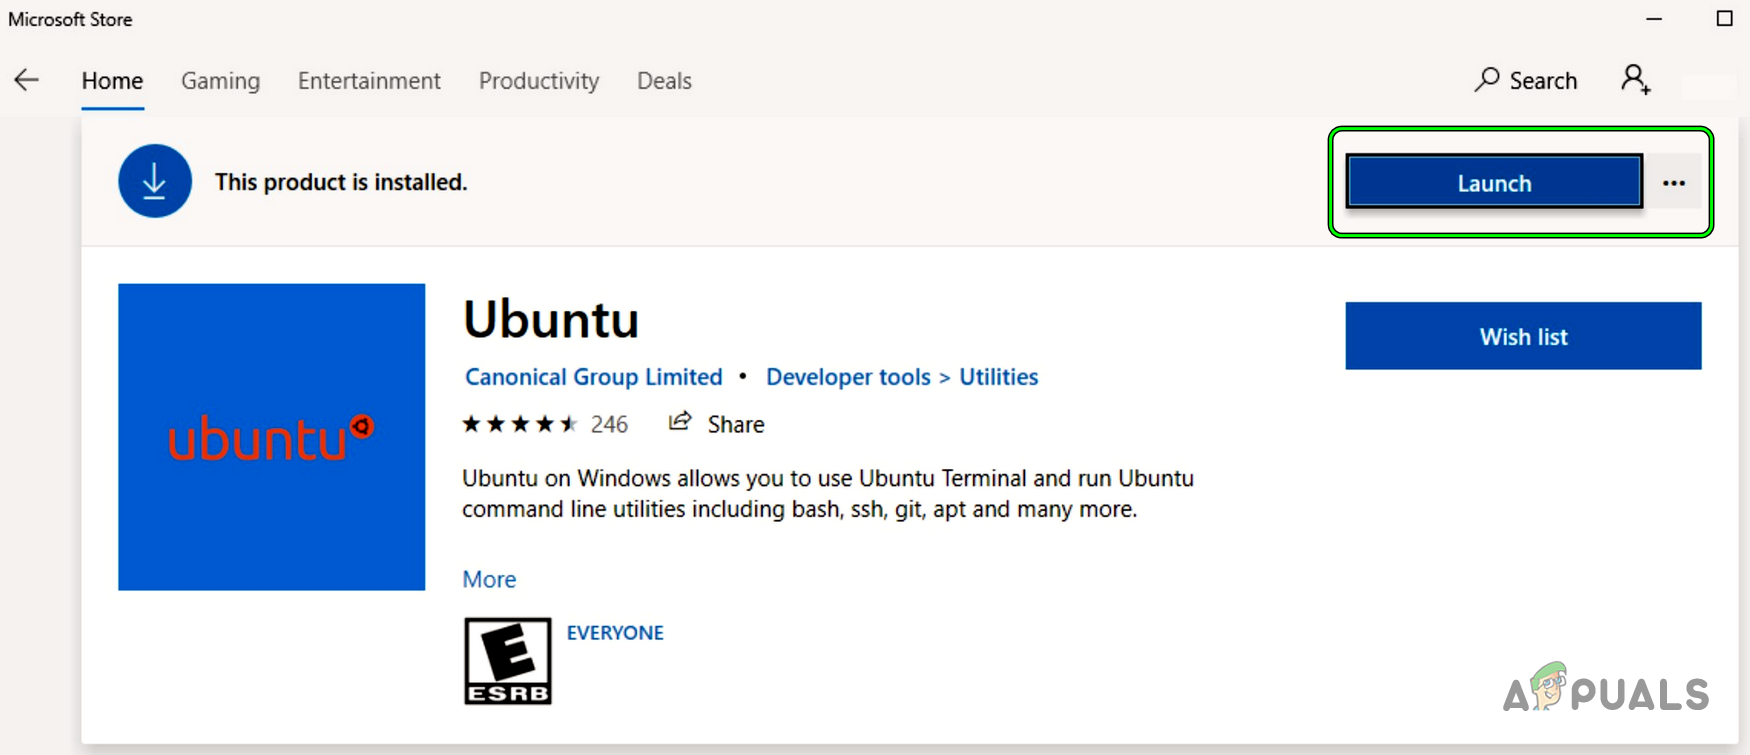
Install a Linux Distro from the Microsoft Store
After setting up the default WSL version to 2, a user must install a Linux distro.
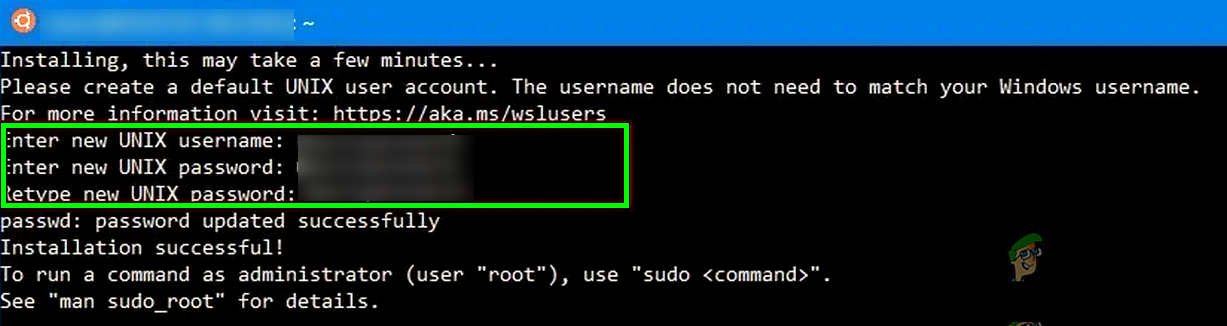
Configure the Linux Distro After the Install
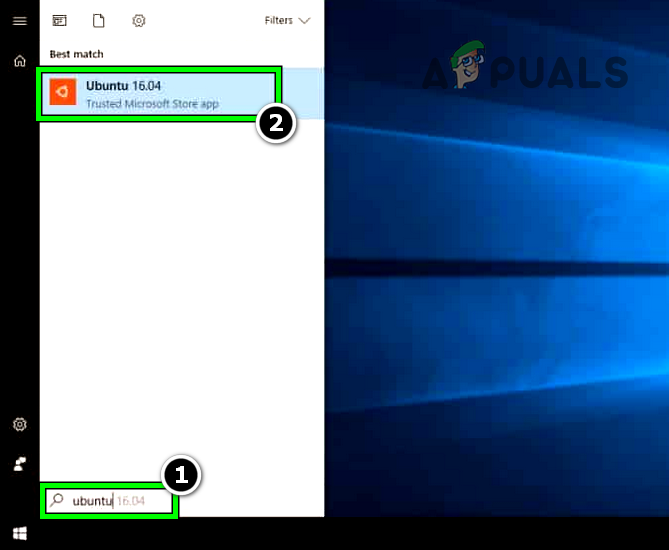
Methods to Open a Linux Distro in WSL
There are several methods to open an installed Linux distro in Windows:
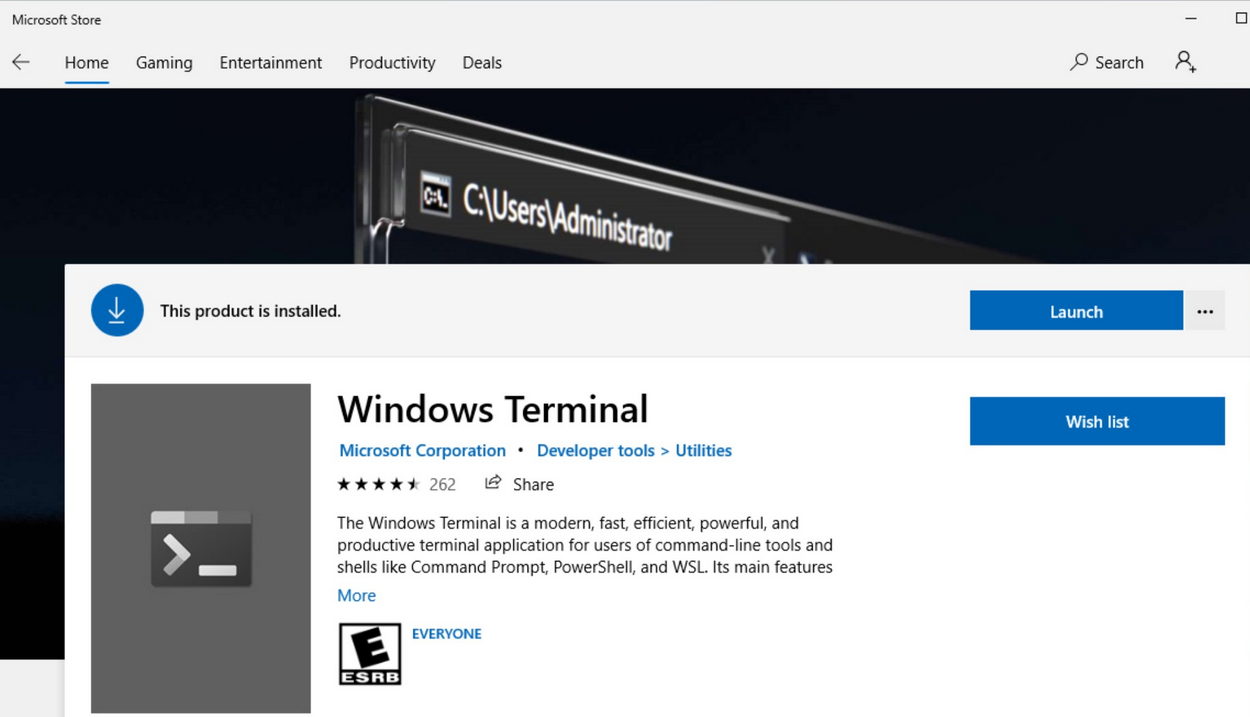
Install the Windows Terminal
Windows Terminal is a Microsoft terminal emulator that supports multiple tabs and is a replacement for Windows console. The usage of WSL becomes very easy with the Windows Terminal. To Install Windows Terminal:
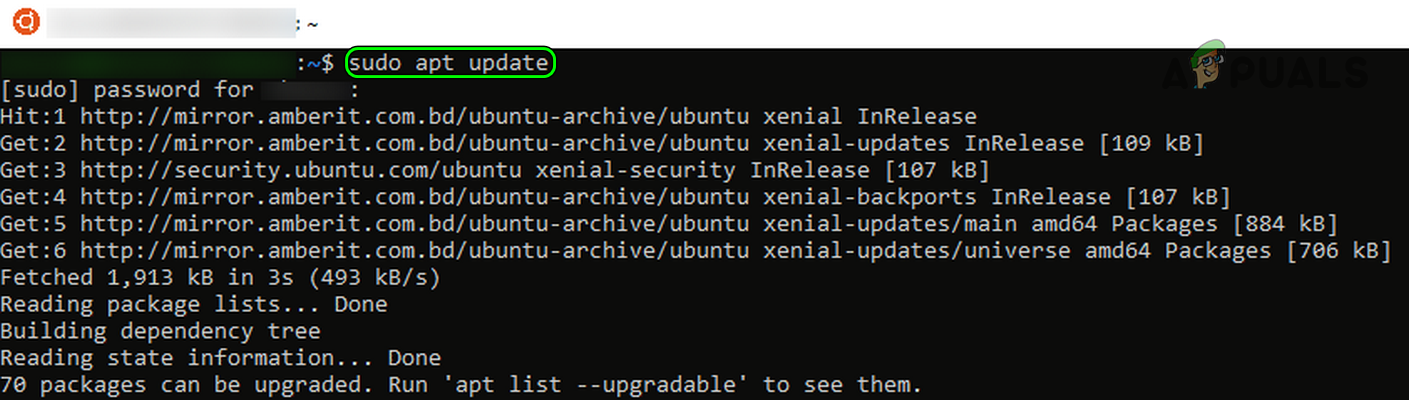
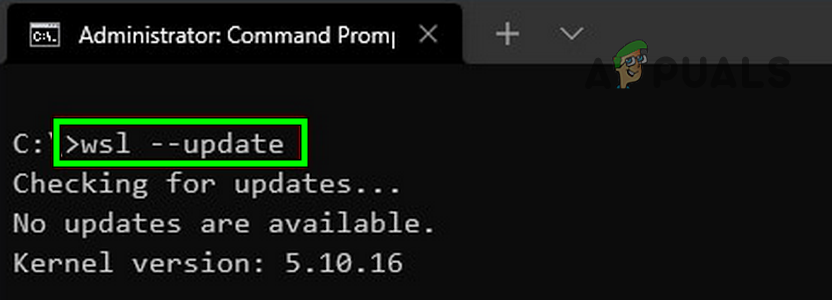
Update the Linux Distros and Kernel to the Latest Build
After configuring the Linux distribution, the first step should be to update it as Microsoft does not auto-update these distros. To do so, execute the following in the Linux bash: To update the WSL kernel, execute the following in the PowerShell (Admin): To check the general status of the WSL, execute the following in the PowerShell (Admin):
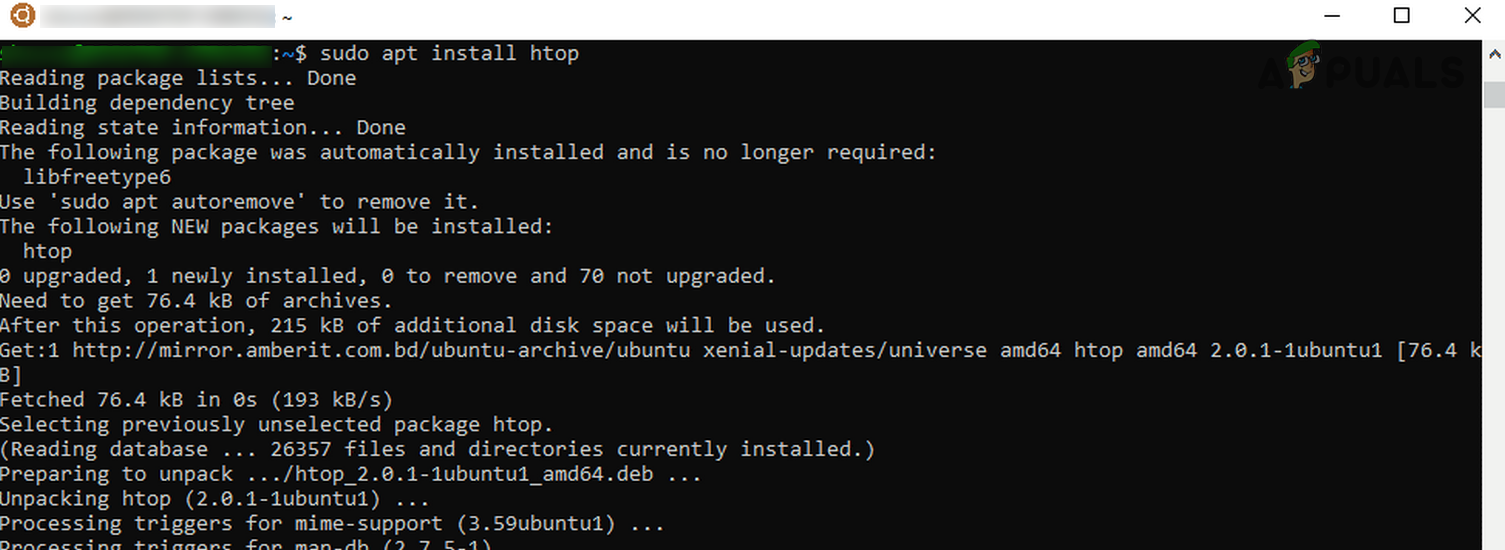
Install Common Linux Packages
Once the distro is updated, a user may want to install different Linux packages in WSL. A user may use the APT package repository and execute the following in the bash (e.g., to install htop): And htop can be launched by executing the following in the bash: To install GUI Win-Kex for Kali-Linux, a user may execute the following (one by one) in the bash: Once installed, you may run Win-Kex in different options. The details can be found in the Official Kali documentation.
WSL and Windows File System
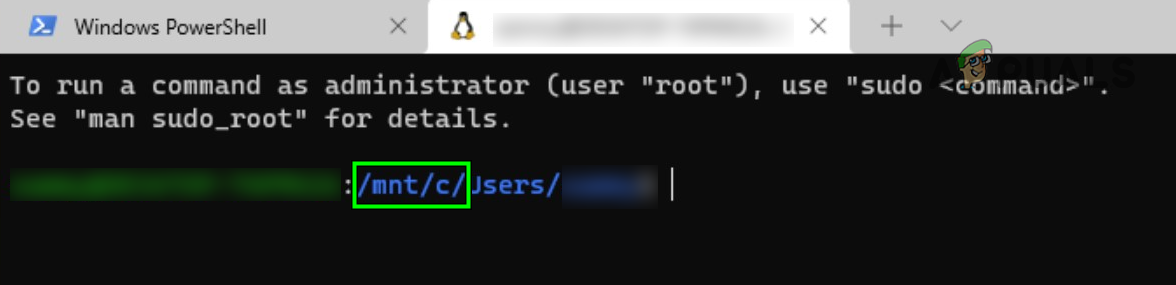
Where are the Linux files located in Windows? A natural question comes to a user’s mind. WSL has its File System installed on the following location (do not change or delete files in the directory): During usage, a user may have to access the host’s file system in WSL. To do so, execute the following in the bash:
Enable the WSL1 Feature
There can be times where a user requires to install WSL1 (not WSL2) and to do so, simply follow the above steps, just skip WSL parts. To change the default WSL, a user may execute the following in the PowerShell (Admin): Afterward, the user may install a new Linux distro to fulfill his requirements (as discussed earlier). If the WSL version cannot be changed to 1, execute the following in the PowerShell (Admin): Then, reboot your system and upon reboot, disable the Virtual Machine Platform. Afterward, your system is configured to use WSL 1.
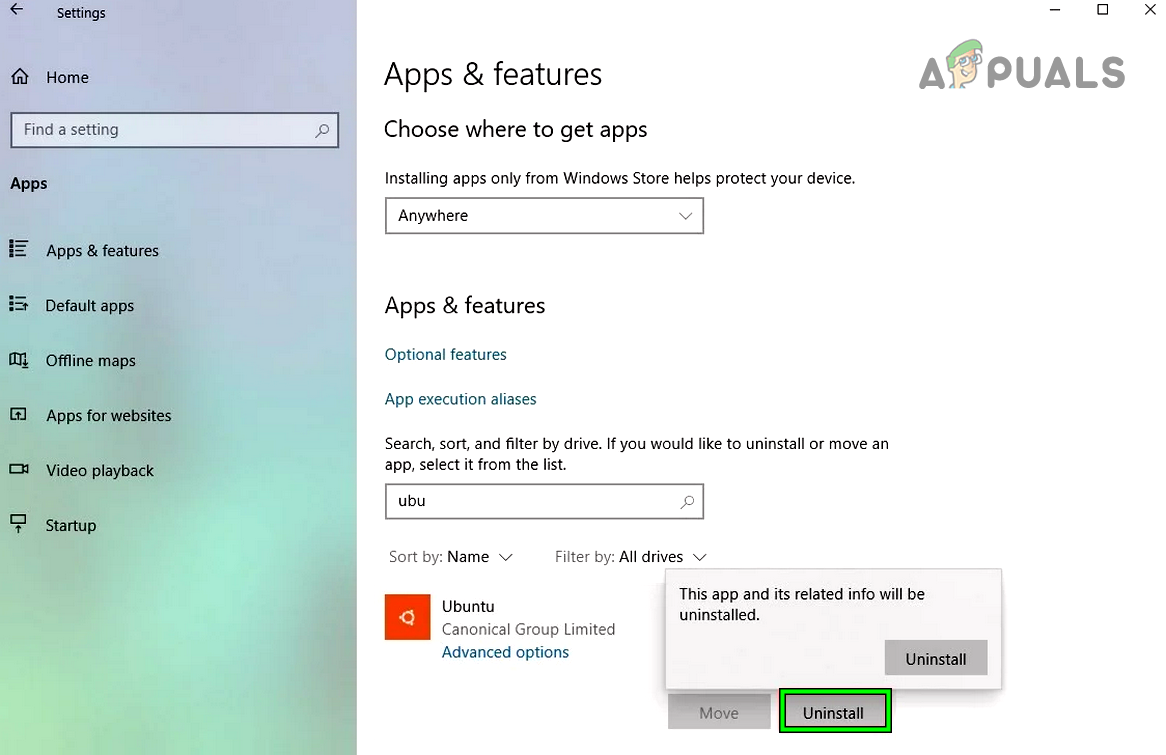
Remove WSL and Linux Distro from the System
If you are done with WSL and want to remove it from the system, a simple process to do it is: So, that’s it, we hope that this article has served its purpose and cleared the basic ideas of WSL.
How to Fix ‘Failed to fork on WSL with Ubuntu’ Error in Windows 10How to Fix WSL Register Distribution Error 0x80370102 on Windows 10?FIX: WSL Not Working After Upgrading to Windows 11How to Fix ‘The WSL Optional Component is not Enabled. Please Enable it and Try…