How To Setup Raspberry Pi And Configure OpenCV On It?
Now, let’s move towards setting up Pi and doing operations mentioned as under step by step to install OpenCV on it. Installing OpenCV on Pi is a lengthy process and it takes around 4 hours to complete so if you have a shortage of time don’t start the installation, refer to this tutorial when you are free. Along with this Pi is heated up when it has been turned ON for a long time and time taking operations are performed on it so, keep it in a cool place when you are working on it.
Step 1: Components Used
Step 2: Selecting the Raspberry Pi Model
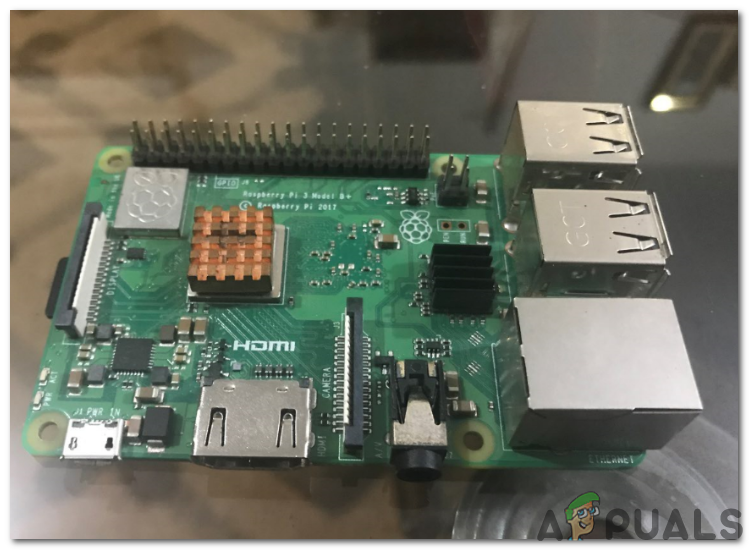
Several models of raspberry pi are available in the market. Except for raspberry pi zero, any model can be preferred. This is because on Pi zero setting up a network is a very tiring job. The latest models like 3A+, 3B+ or 4 can be purchased. The new Raspberry Pi 3 is the quickest and most dominant gadget the Raspberry Pi Foundation has released to date. So, in this project, we will use the Raspberry Pi 3B+.
Step 3: Connecting The Peripherals
After choosing Raspberry Pi we will connect keyboard and mouse to the Raspberry Pi. After connecting them use the HDMI cable to connect Pi with the Television. After making these connections we are ready to proceed further.
Step 4: Choosing The Operating System
Firstly, we will need an SD card with an appropriate operating system. When picking the OS, nowadays there are various alternatives, from “conventional” Raspbian to devoted media working frameworks, and even Windows 10 IoT. There is no need for lots of applications hence, we should leave the Central Processing Unit (CPU) and Random Access Memory (RAM) as much as we can for the media streaming application. One problem is that Arch Linux is recommended for people who have quite a lot of Linux knowledge. They’re very front line and we’re bound to keep running into issues when introducing third-party applications and libraries. Thus, if this is your first establishment of a home theater, we suggest picking Raspbian Lite. It’s command-line driven, and can without much of a stretch designed to keep running in “headless” mode, i.e. accessed entirely remotely over the system with no requirement for a console or screen.
Step 5: Make Sure That Raspberry Pi Is Up To Date
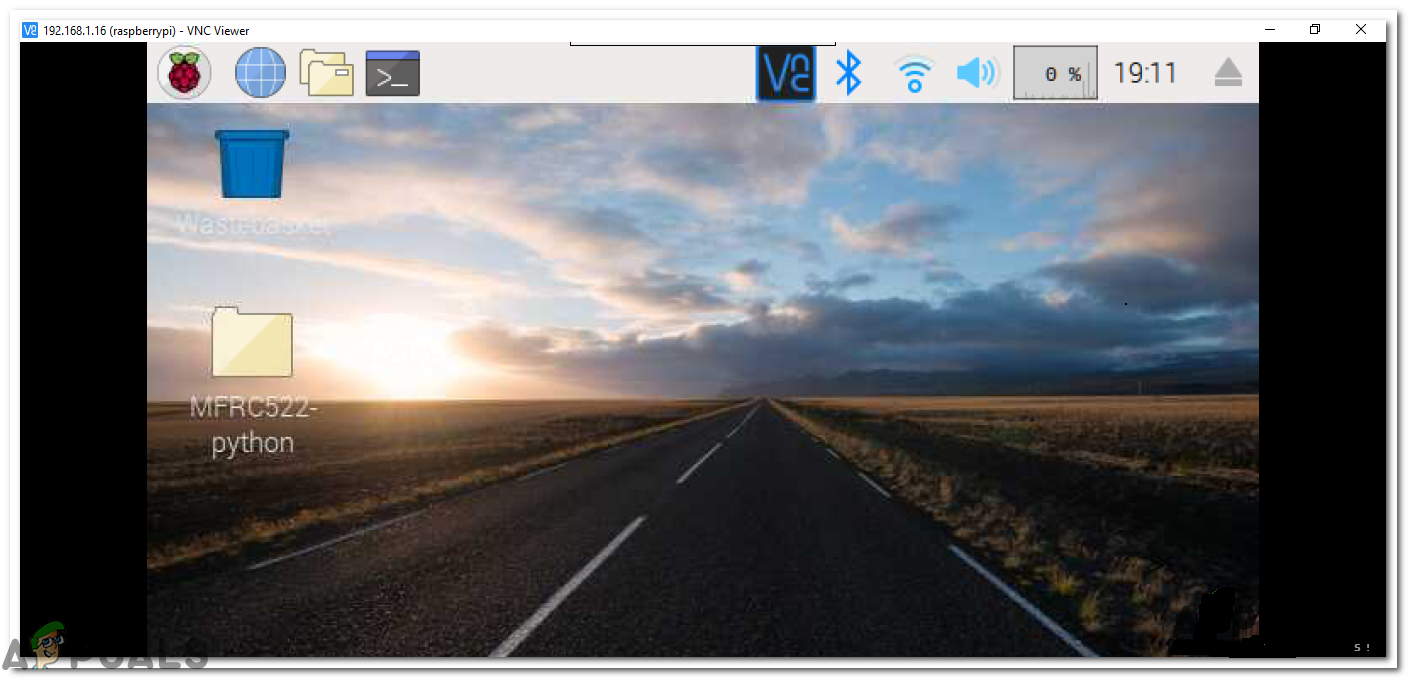
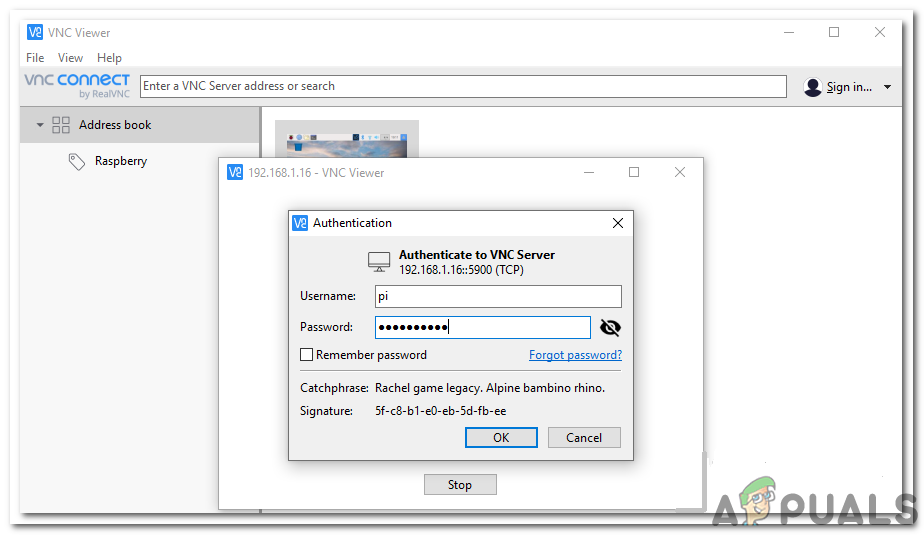
Keep the sources of your Pi up to date otherwise, the outdated software will cause some problems. Enable the Virtual Network Computing (VNC) viewer on your Pi, then connect your Raspberry Pi with the VNC viewer. The link is provided below for downloading VNC and then connecting it with Pi. VNC Viewer Now, open the terminal and run the following command : Then, Numerous packages will be installed and if asked press Y and then Enter to install them properly.
Step 6: Login To Raspberry Pi
The default username of the Raspberry Pi is pi, and the default password is raspberry. These are the default login details and on your first login use these details to log in to pi. You can change these details too whenever you want.
Step 7: Creating Enough Space On Raspbian For OpenCV
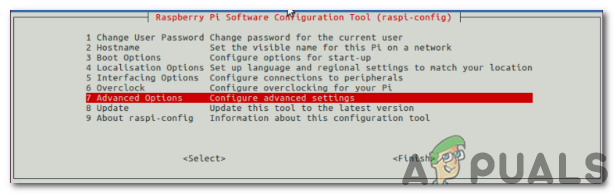
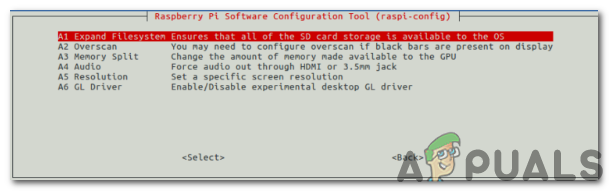
OpenCV acquires large memory so we need to expand the file system and allocate all of the space to the memory card. We will go to the command prompt of raspberry and type the following command: A window will appear and it will look like this: Now, we will click on Advanced options and there we will find an option “Expand Filesystem”. Select that option. We will press the Enter button and then hit the Finish button. At this stage, our Raspberry Pi needs to be rebooted for the changes to take effect. Type the following command to reboot it: After rebooting we will check whether our file system has expanded and all of the space is included in the SD card or not. By executing df -h command we can verify that our disk has expanded: The one who is using an 8GB micro SD card may be using 50% of the available space, so deleting Wolfram Engine and LibreOffice can free up around 1GB of space. (Remember that this step is optional).
Step 8: Installing Dependencies
Before going for and dependancies we need to update and upgrade the existing packages that are installed on Pi: Then, Now, we will install some developing tools which will help us in configuring OpenCV build: To perform the different operations on images we need to load the several image formats from the hard drive. Those formats include JPEG, PNG, etc. For loading these image formats we will install some I/O packages: Along with these images I/O packages we will also install video I/O packages. After installing these video packages we will be able to load various video file formats. The OpenCV library accompanies a sub-module named highgui which is utilized to show pictures to our screen and manufacture essential GUIs. Before compiling that sub-module we need to install the GTK development library: Several matrix operations can be performed on an image by checking the size of the image and then reading pixel values. We can also convert those pixel values into binary form and then modify that binary digits to regenerate an image. In raspberry pi, we have some limitations when providing input hence these libraries are important and need to be installed. Therefore, those results can be made better by installing some extra dependencies: Some people will be working on Python 2.7 and some will be working on Python 3. The header files of Python 2.7 and Python 3 need to be installed for compiling OpenCV along with Python bindings: In the new version of Raspbian Python 3 is already installed and a msg may appear at the Lx Terminal stating that “Python 3 is already the latest version”. This step is important because we can face error regarding the header file named as Python.h while running the command make to compile OpenCV.
Step 9: Downloading OpenCV Source Code
As we are finished with installing the dependencies we will look for the archive folder of OpenCV version 3.3.0 from the official directory of OpenCV. We are installing the whole package of OpenCV so we need to include opencv_contrib as well. Download it from the official site and then unzip it. While downloading these directories keep one thing in mind that the version of OpenCV and opencv_contrib should be the same i.e they should be 3.3.0 otherwise there will be compiling errors during installation.
Step 10: Python 2.7 or Python 3?
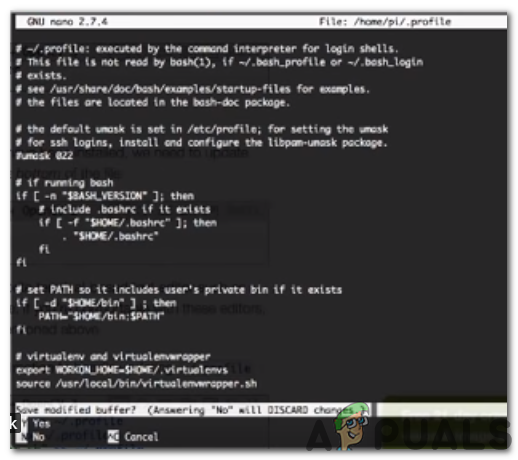
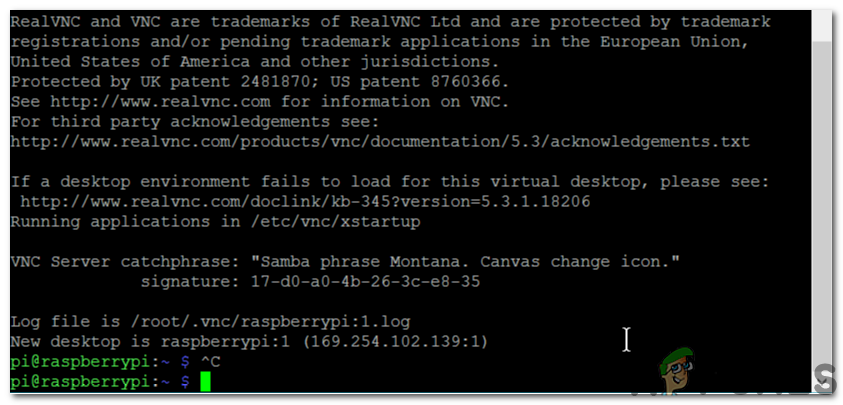
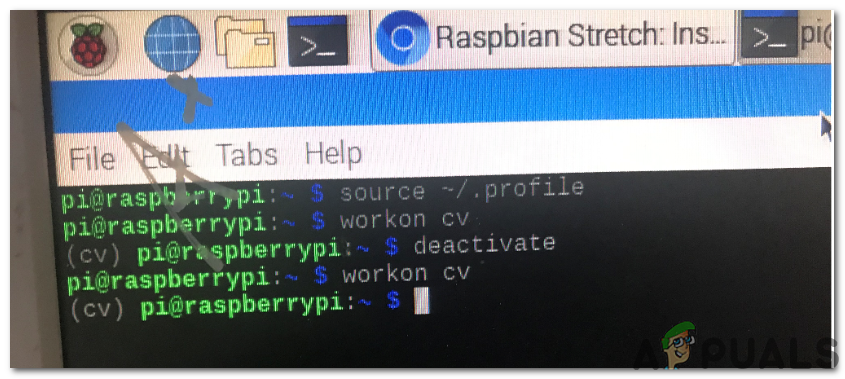
Performance-wise python 2.7 is better than python 3 but in OpenCV, there is not much difference. We need to install pip on Raspberry before compiling OpenCV. It is a package management system that is used to install the software packages that are used in Python. These packages may be present in the latest raspbian by default but it is better to verify it by using the following commands. After installing pip two packages are highly recommended and need to be installed while working on OpenCV. The first one is virtualenv and the second one virtualenvwrapper. We can’t import OpenCV directly in Python so we will create a virtual environment and then work in that environment. A virtual environment is an exceptional tool that is used to keep the conditions required by various projects in discrete places by creating separate Python environments for every one of them. After installing these packages we need to update our ~/.profile file which is the hidden file in our home directory to include the following lines at the end of it. Type the following command to enter the directory: When the directory is opened scroll down and includes the following lines: After including these lines press ctrl+x, save it by pressing Y and exit. Anytime we launch the terminal and we log into our Pi this dot file will be automatically loaded for us. As we are already logged in we would manually type source ~/.profile to load the contents of the file. Creating Python Virtual Environment: We need to create a virtual environment using python 2.7 and python 3. It will create an environment named cv on Python 2.7. Anyone who wants to create an environment on Python 3 should type the command mentioned below: Verifying That We Are In The Virtual Environment Named As “cv”: When we reboot the pi we will not remain in a virtual environment and we need to type in two commands mentioned below to go into virtual environment mode. The picture below indicates that we are not in the virtual environment mode: So, by typing the two commands mentioned above we will be able to access our virtual environment. If we want to leave the virtual environment we will type deactivate: Installing NumPy On Raspbian: The only dependency that we need to install OpenCV on Raspberry is Numpy. Type the command mentioned below to install Numpy on Raspberry Pi. It will approximately 10 minutes to install:
Step 11: Compiling And Installing OpenCV
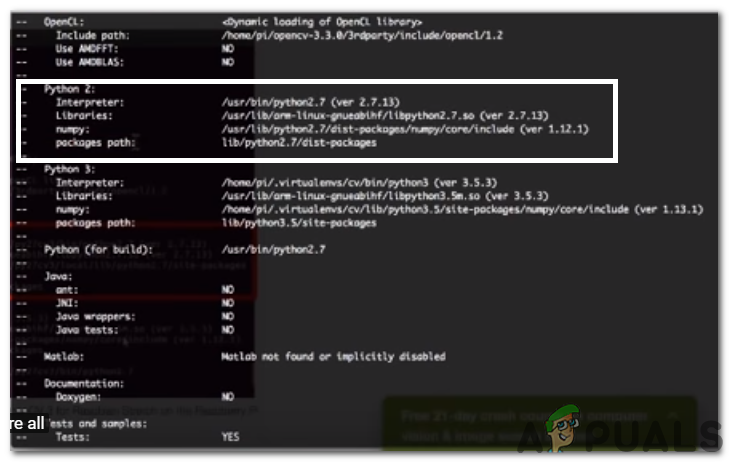
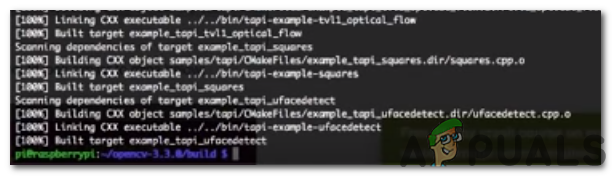
We will compile and install OpenCV in the Virtual Environment so make sure that you are working into the CV virtual environment. If we are not in the virtual environment the OpenCV will fail to compile. Now, change the directory to home directory, sub-directory open cv 3.3 and then make the build directory. After making the build directory paste the last five lines in the CMake directory. It will check for certain libraries set paths, python versions, etc. Our installation will be completed by running this final command: Now, we are finally ready to compile OpenCV. Type make command and it will start the compile process. It will take approximately four hours to compile hence, it is preferred to start compilation before you sleep at night so that when you wake up in the morning the OpenCV is compiled. Typing one command “make” will compile using only one core. Although it a bit time taking process but it has less probability of errors. Using the command of make -j4 and make -j2 could result in overheating of the Raspberry Pi and it could also result in compilation errors: We will install OpenCV 3 on Raspberry Pi by using the following command. Running this command will copy the respective files into their locations: A couple of steps are left now when we are using Python 2.7 or Python 3.
Step 12: Finishing The Installation
Return to the home directory by typing cd~. Python 3: We will sym-link the OpenCV bindings into our cv in python 3 directory because we compiled OpenCV and python bindings for python 3. That’s it!. Now, we have installed OpenCV onto Raspberry Pi. We will now check for it in the virtual environment.
Step 13: Testing OpenCV
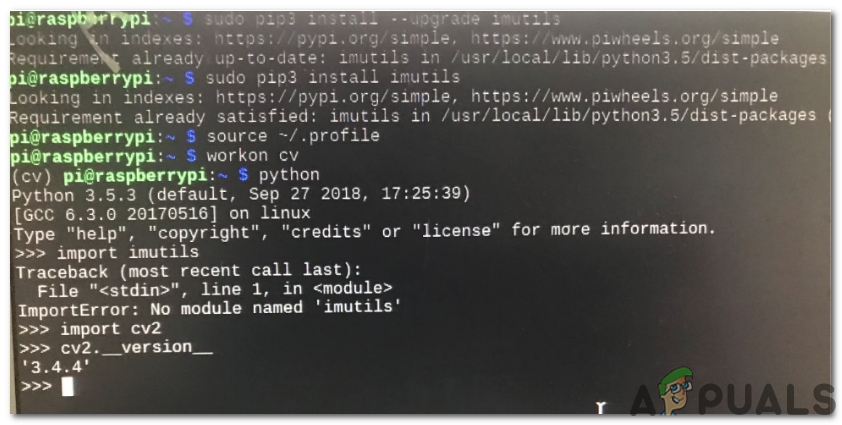
Open the LxTerminal and write the source command followed by the workon command. As we have entered the virtual environment mode we will import OpenCV bindings by typing python and then import cv2. If there is no error msg it means that it has been imported successfully. After that, we will check our OpenCV version by typing the following command: We have installed OpenCV on Raspberry 3B+. Now we can perform numerous image processing operations in Python like Digit Detection, Face Recognition, etc.
How to Automate Your Sprinkler Control to Detect Weather conditions Through…How To Make Home Theater Using Raspberry Pi?How To Make IOT Smart Garage Opener Using Raspberry Pi?How To Perform Video Streaming Using Raspberry Pi?