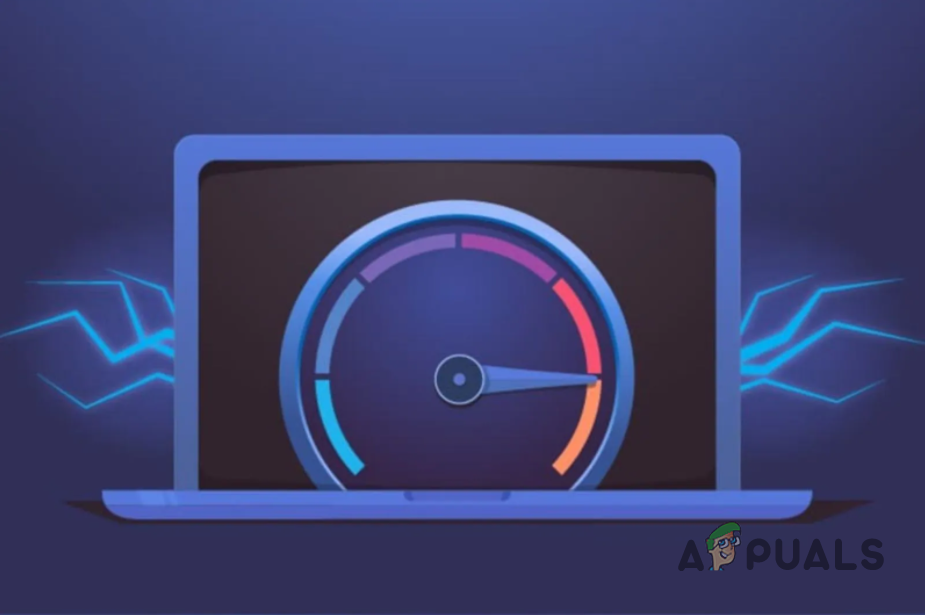
This is because there are other factors that can degrade your internet speed on your computer which can include your Windows internet settings and more. In addition to that, in this modern era, a slow internet connection can seriously affect your productivity and mood. As such, in this article, we are going to show you how to increase your internet speed in Windows. As it turns out, the main question that comes to mind is how? When you are using your computer, your internet connection is a resource that is distributed throughout the system across different processes. This happens even when you are not actively using certain processes as they take away some of the speed, secretly in the background. On top of that, there is a certain Windows policy that keeps 20% of your internet speed for its own purposes. This means that you are actually using 80% of the speed provided by your internet service provider. We are going to go through that and much more options down below that will help you in increasing your internet speed. So, with that said, let us get started and jump right into it without any further ado.
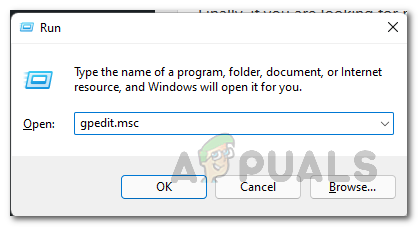
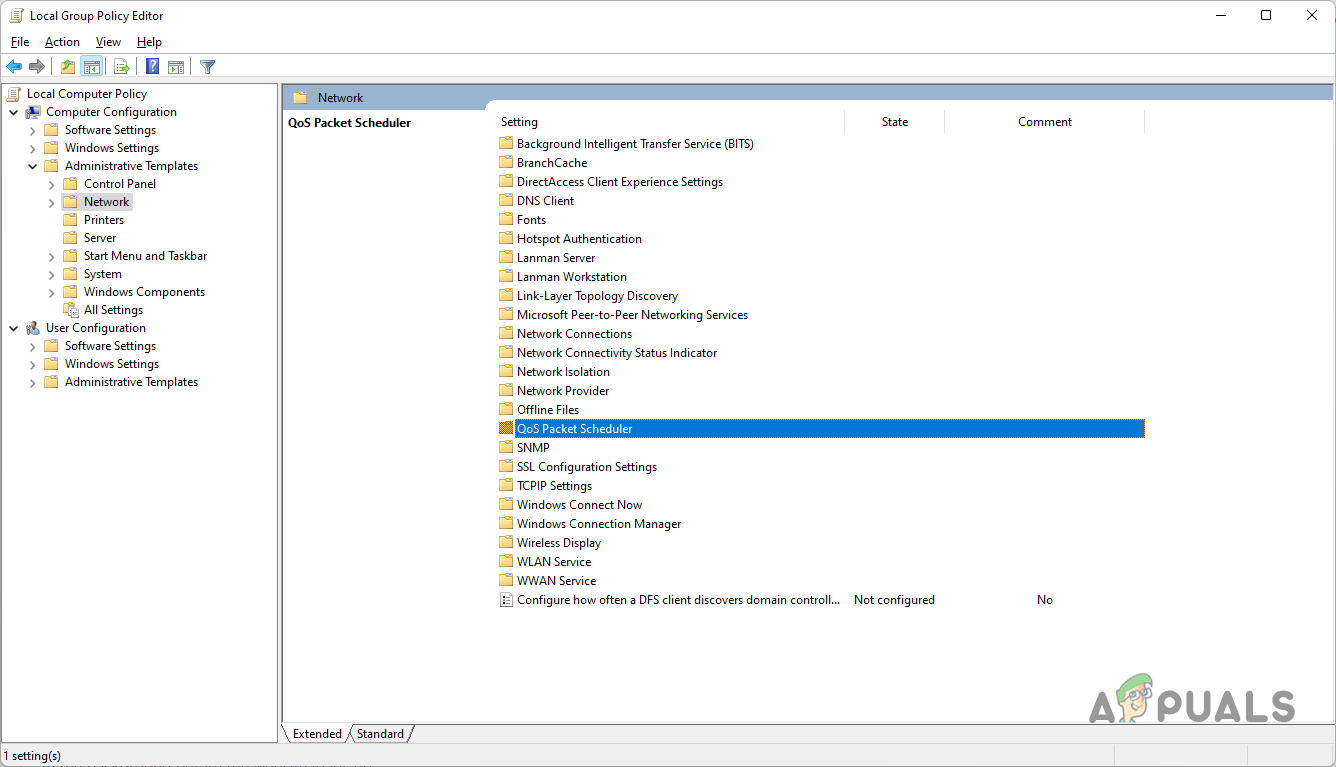
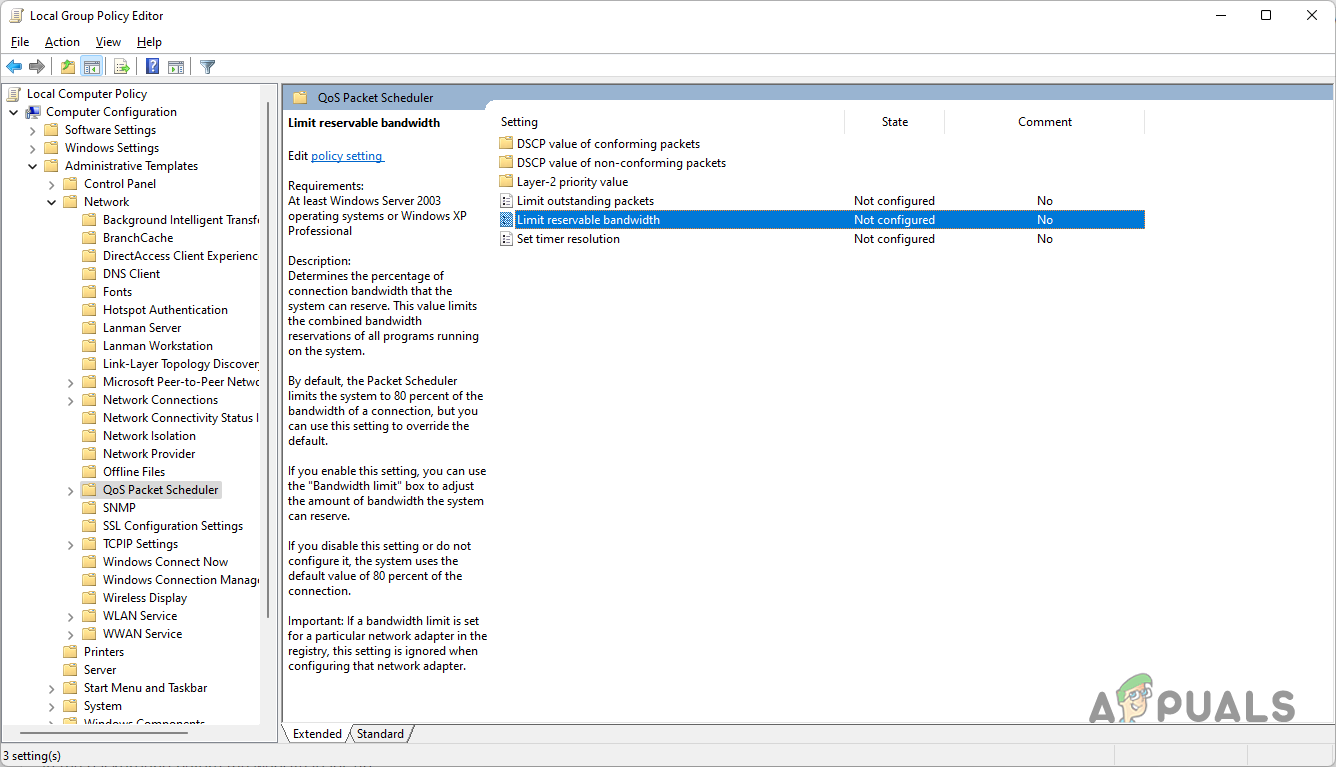
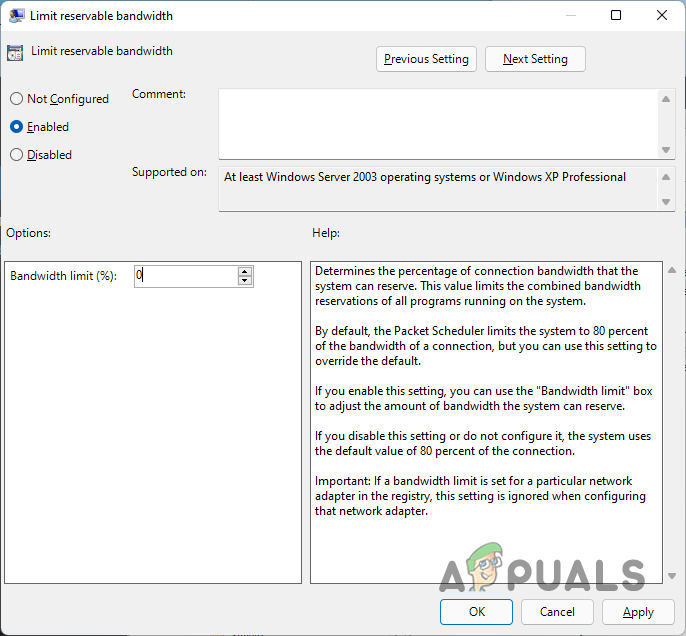
Remove Limit Reservable Bandwidth
The first thing that you should do in order to increase your internet speed in Windows is to remove the default bandwidth limit that is set by Windows. As we have mentioned above as well, when you are using Windows, you are essentially using 80% of your total internet speed as the remaining 20% is reserved for Windows purposes. This includes Windows updates and other stuff. However, fortunately, you can easily remove this limit from your computer so that you are able to use all of your internet speed. To do this, follow the instructions that are given down below:
Change DNS Server
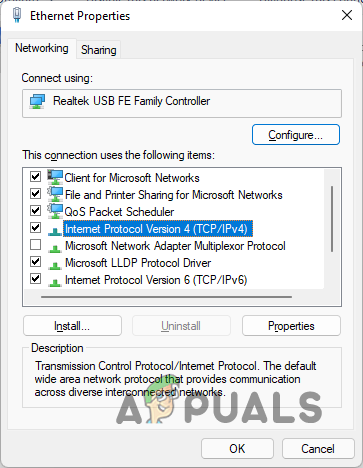
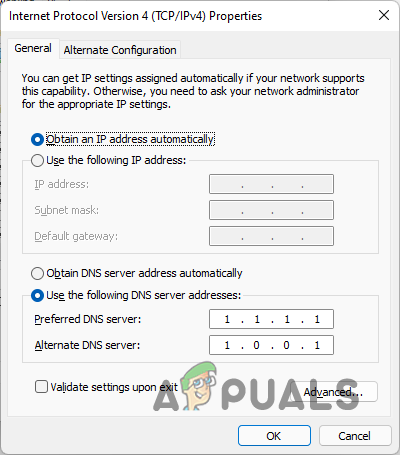
Domain Name System or DNS indirectly impacts your internet speed. This is because DNS servers impact how quickly a website loads on your computer. As such, if you are using a DNS server that is being slow or not good enough, browsing can become quite troublesome. As it turns out, when you install Windows, a DNS server is automatically set up for you that is provided by your internet service provider or ISP. DNS is essentially the address book of the internet. This is because it knows which domain name is linked to which IP address. When you are trying to open a website, a DNS lookup is done in the background before the website loads up. As such, if you use a faster DNS server that performs these lookups quickly, your internet speed will be impacted, albeit indirectly. Instead of the default DNS server, we would recommend using the public DNS server provided by Google and it is quite safe to do so. To change your DNS server, follow the instructions that have been given down below:
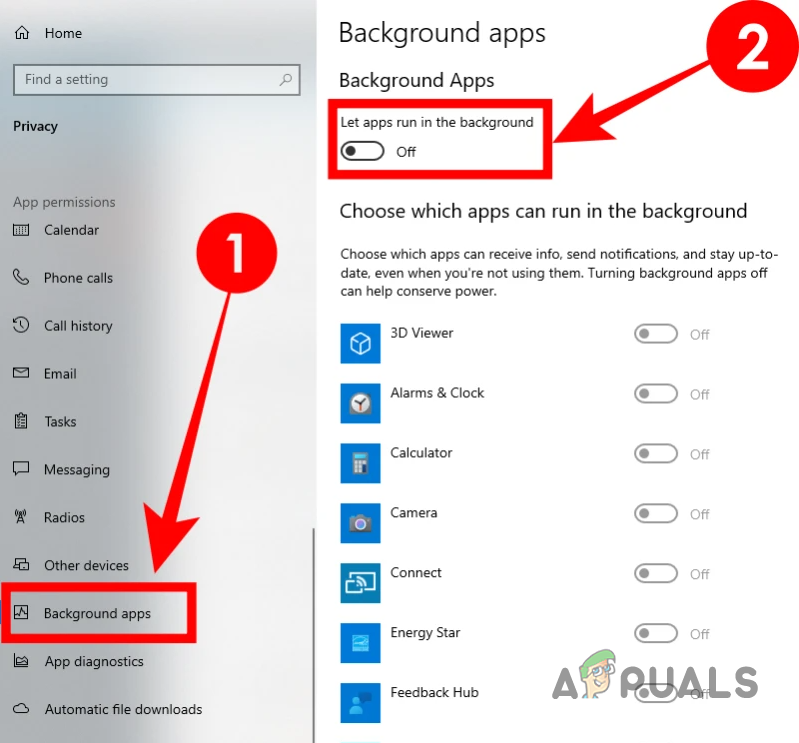
Turn off Background Apps
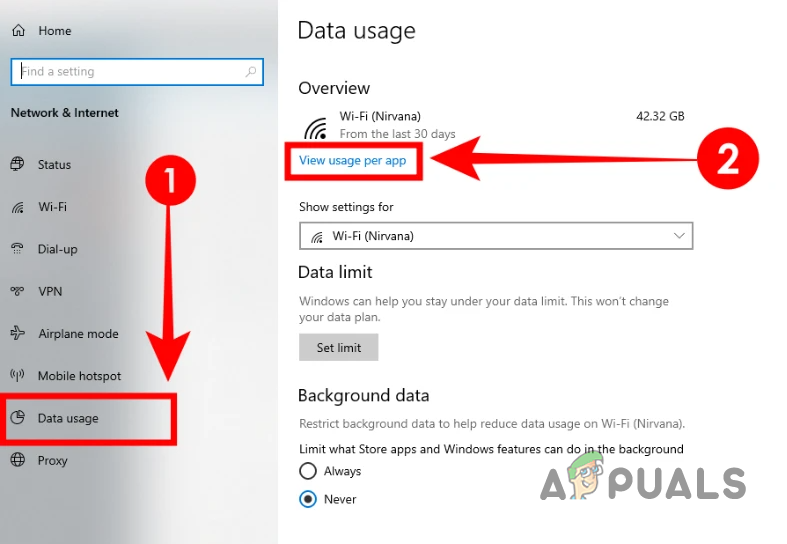
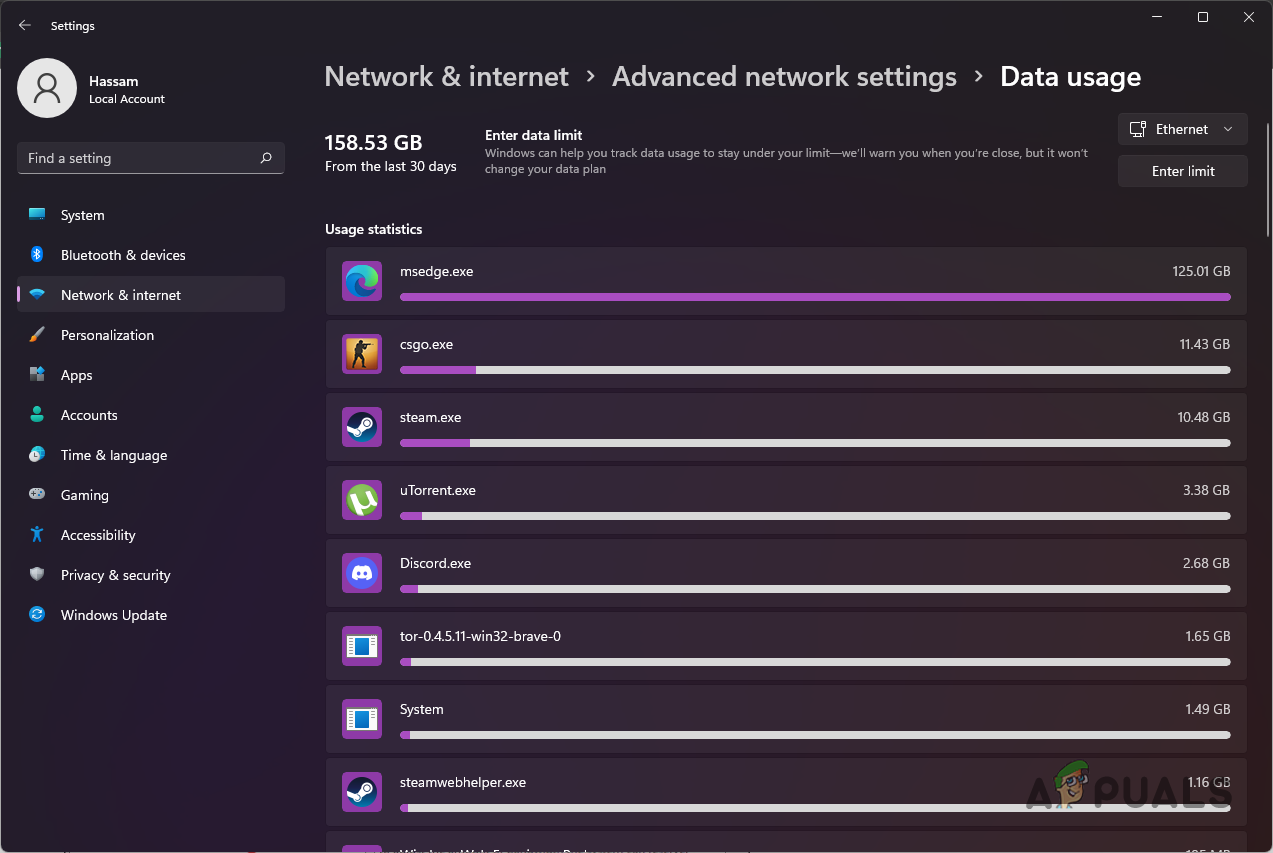
As it turns out, the background apps running on your computer often use your internet for their own purposes. As such, this can affect your internet speed especially when an update is being downloaded. Therefore, in order to overcome this, you can disable the background apps on your computer and save up the internet bandwidth that is being used. This is pretty easy to do, follow the instructions that have been provided down below: In case you are not sure about which background apps to close since you are not aware which application is hogging your bandwidth, there is a way using which you can find out the data hogging apps. Follow the instructions down below to find them:
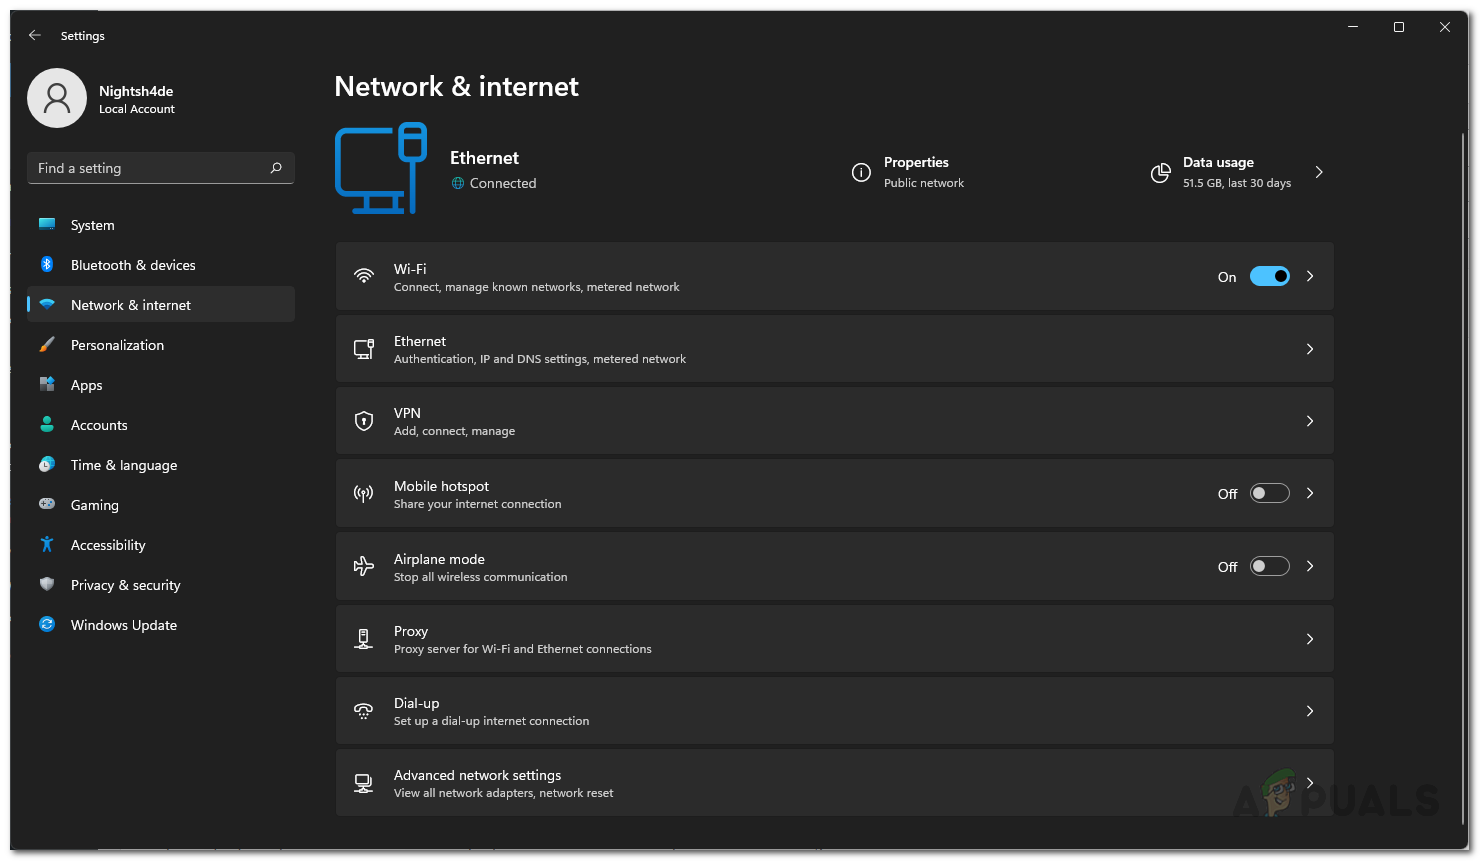
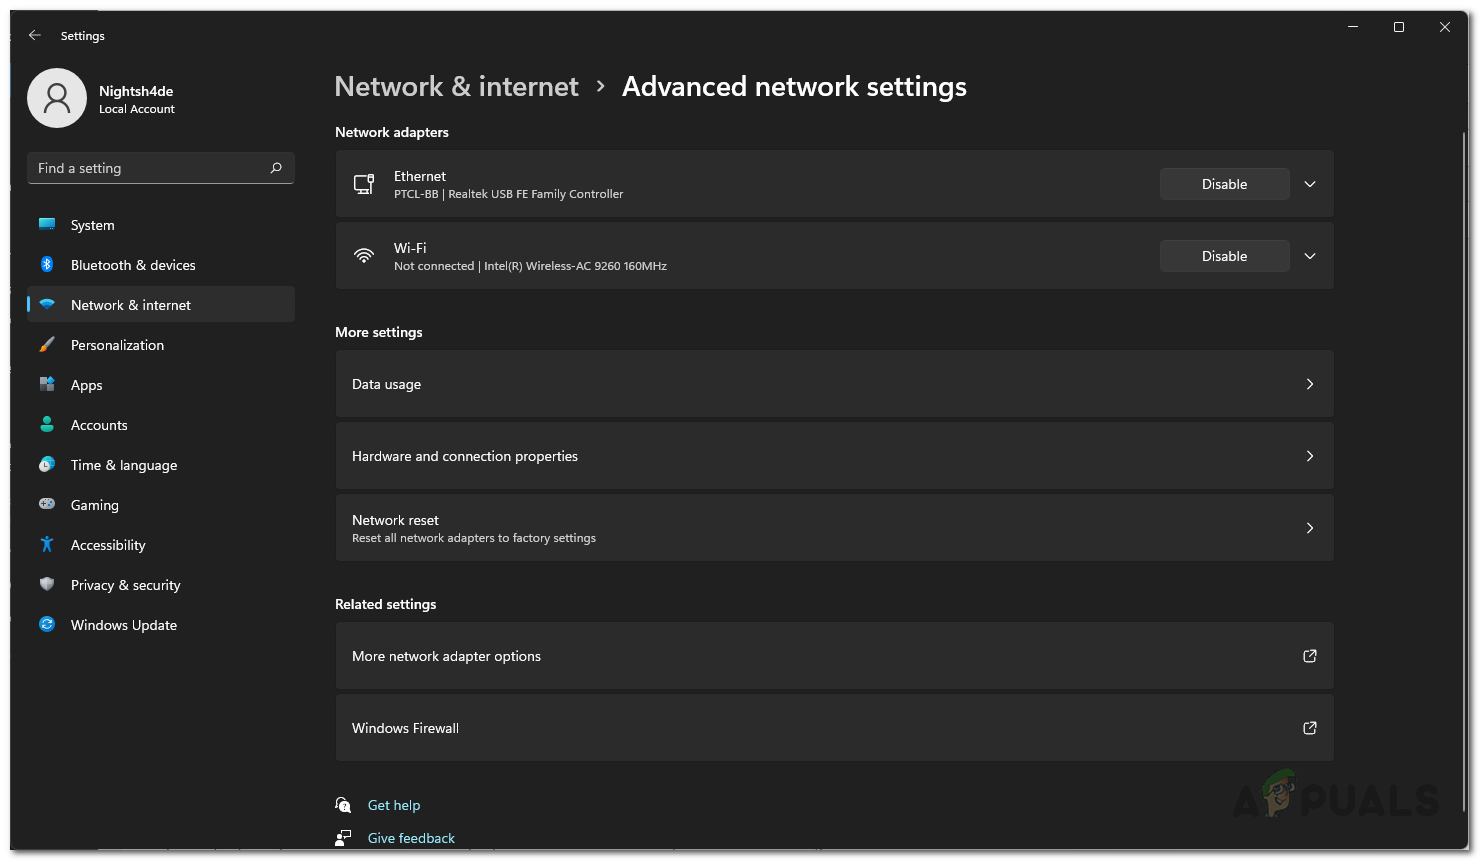
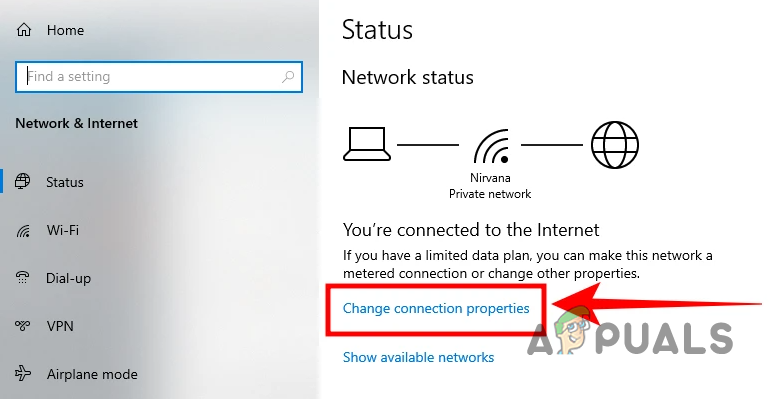
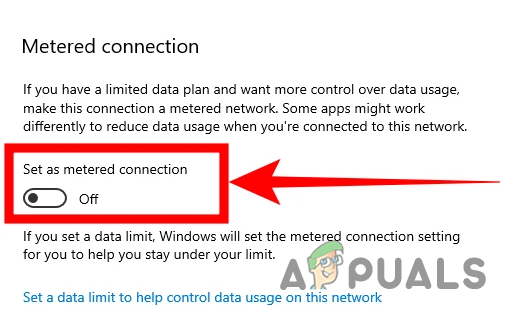
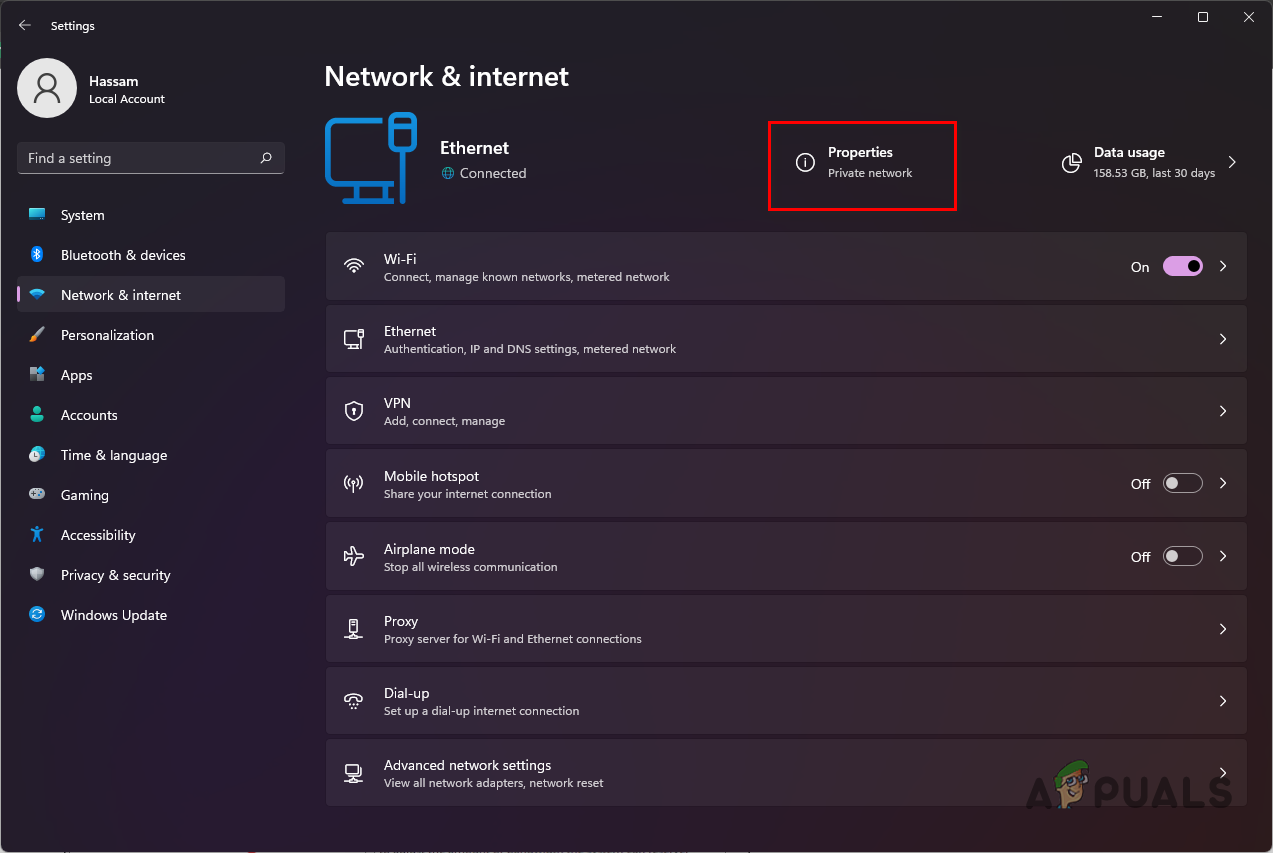
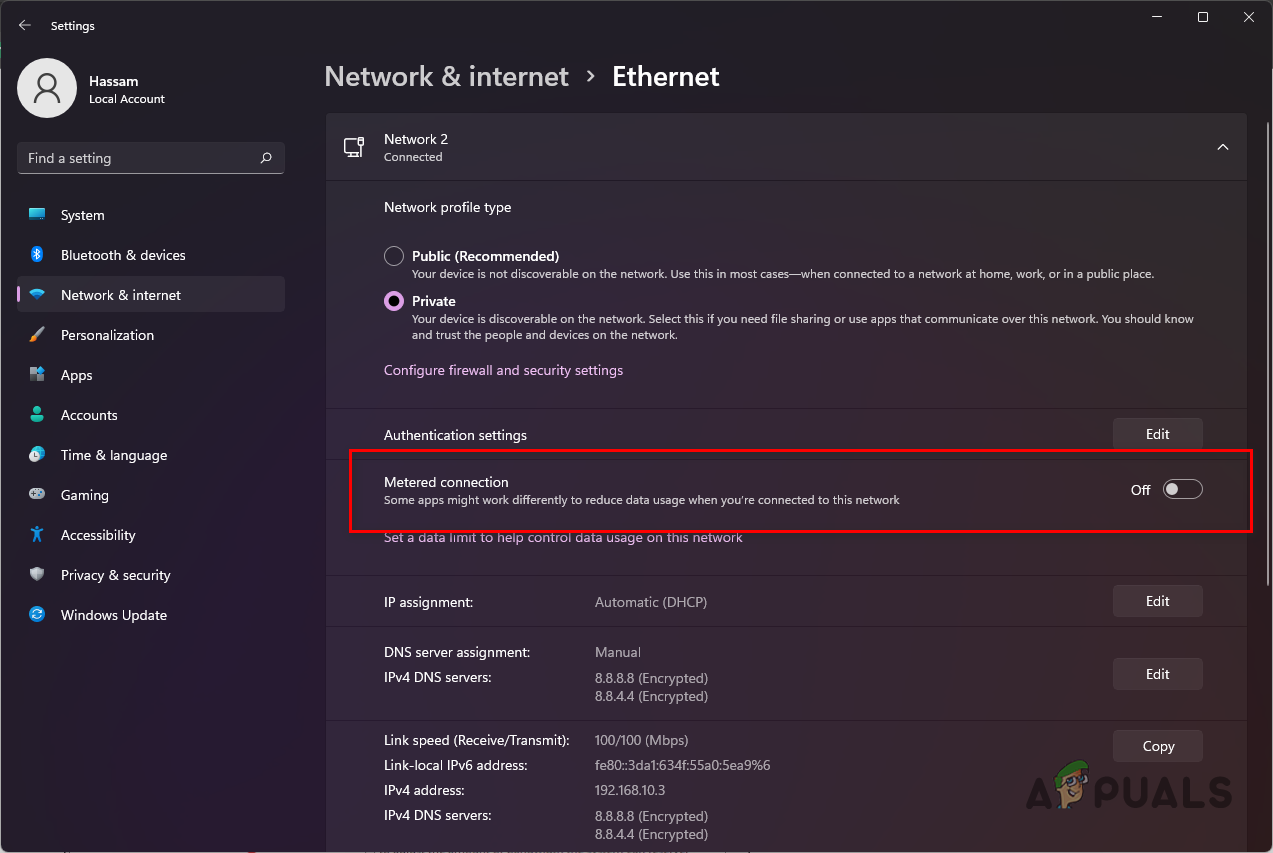
Disable Metered Connection
A metered connection is essentially an internet connection that has a data limit placed on it. Due to this limit, if your internet connection is set as a metered connection, your download and upload speed will be affected. As such, it is important to ensure that your internet connection is not set as metered connection. Follow the instructions down below to do this:
5 Ways Increase your Download Speed in Google ChromeMicrosoft Releases Optional Update For Windows 10 That Fixes Internet…How to Optimize Ubuntu Internet Speed with MTU SettingsHow to Add Internet Speed Indicators in The Status Bar
![]()