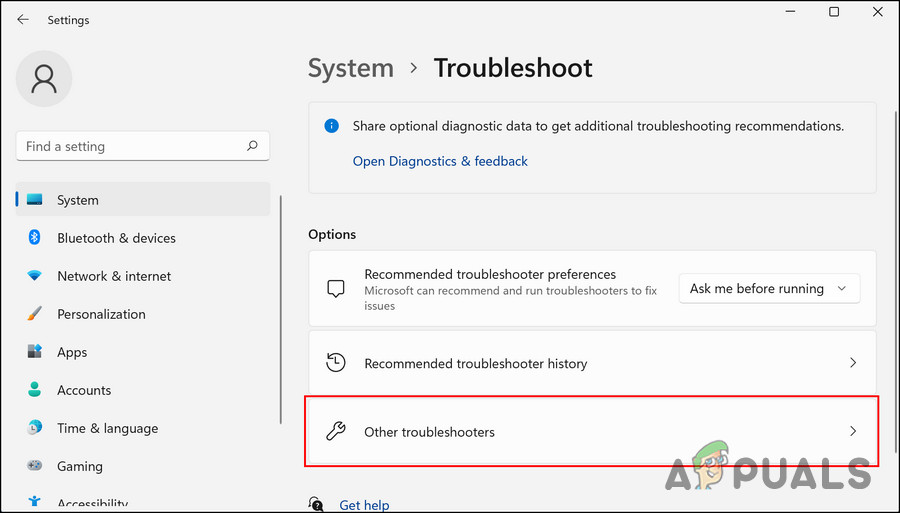
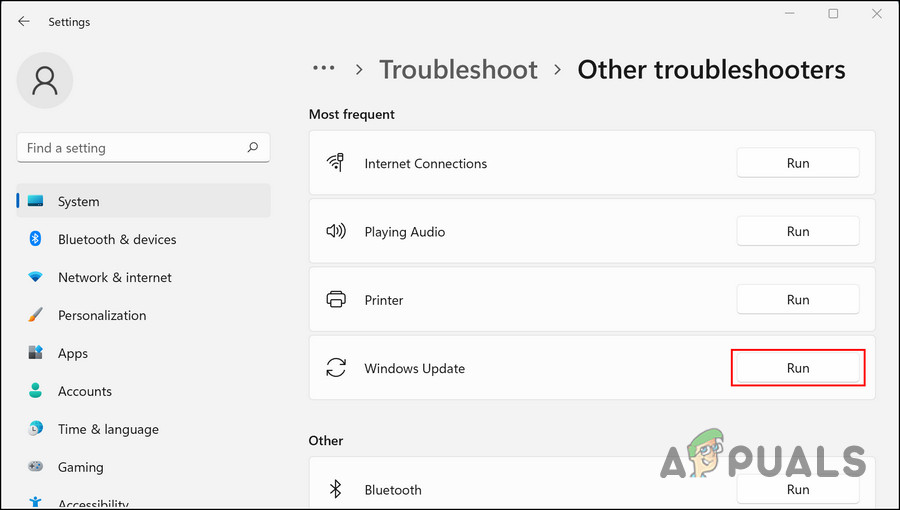
1. Run the Windows Update Troubleshooter
The most appropriate tool to use in this case will be the Windows Update troubleshooter. This tool can be found in the Settings app and can fix most of the issues preventing you from installing the updates. Here is how you can run the tool: While you are at it, you can also make use of the two other troubleshooters Windows comes with – SFC and DISM. Both tools can be run using the Command Prompt and work by scanning the system for issues. If a problem is identified, they will resolve the problem as well.
2. Reset the Windows Update Services and Cache
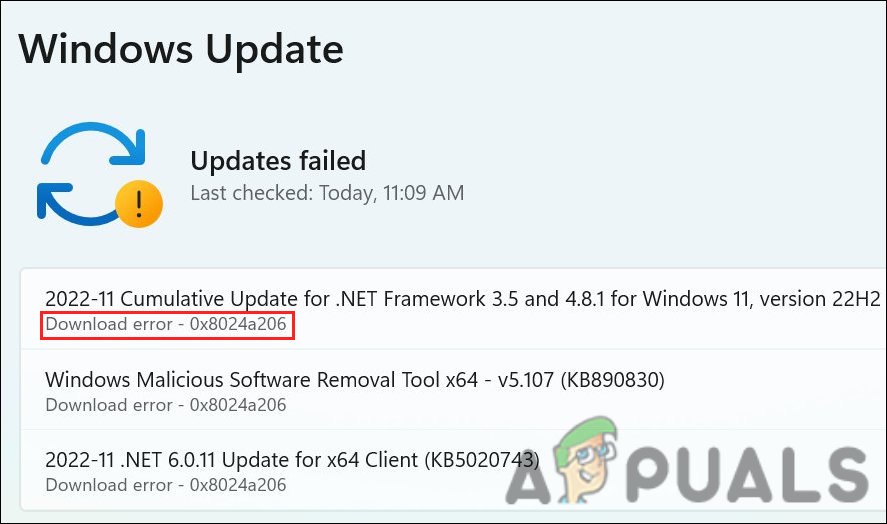
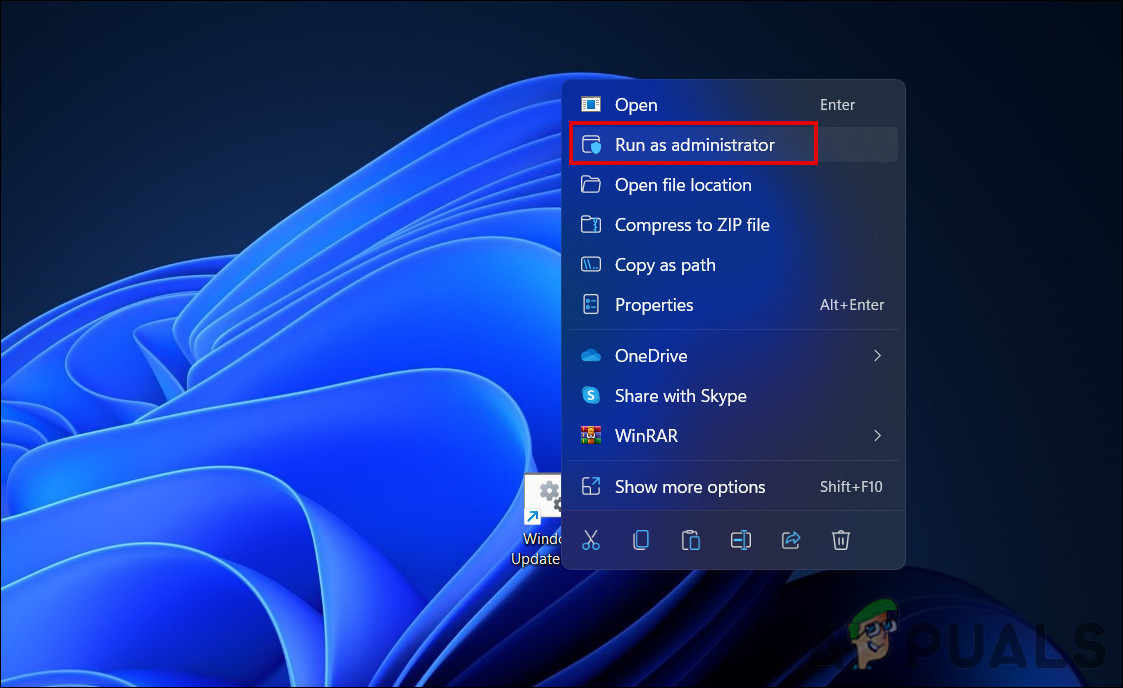
When installing updates, it is important to have the relevant services enabled and working properly. It may be difficult to install the update if any of these services aren’t working. The best solution is to reset the required components and services to their default values. We have created a batch file that will allow you to perform this action without having to manually reset all the services individually. What you need to do is install the file and run it. It will reset the Windows update services and cache, resolving the issue at hand. Here is all that you need to do:
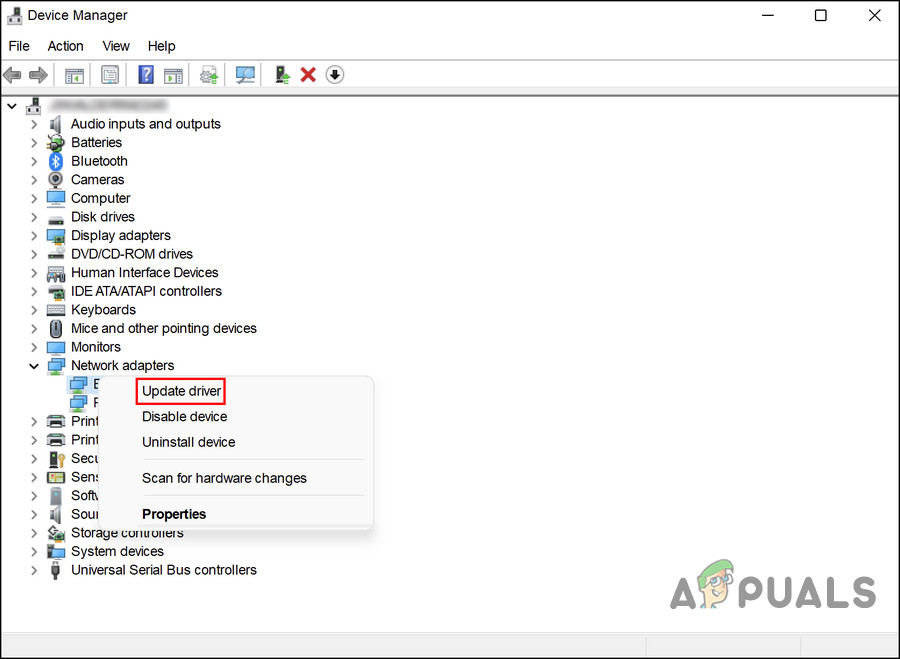
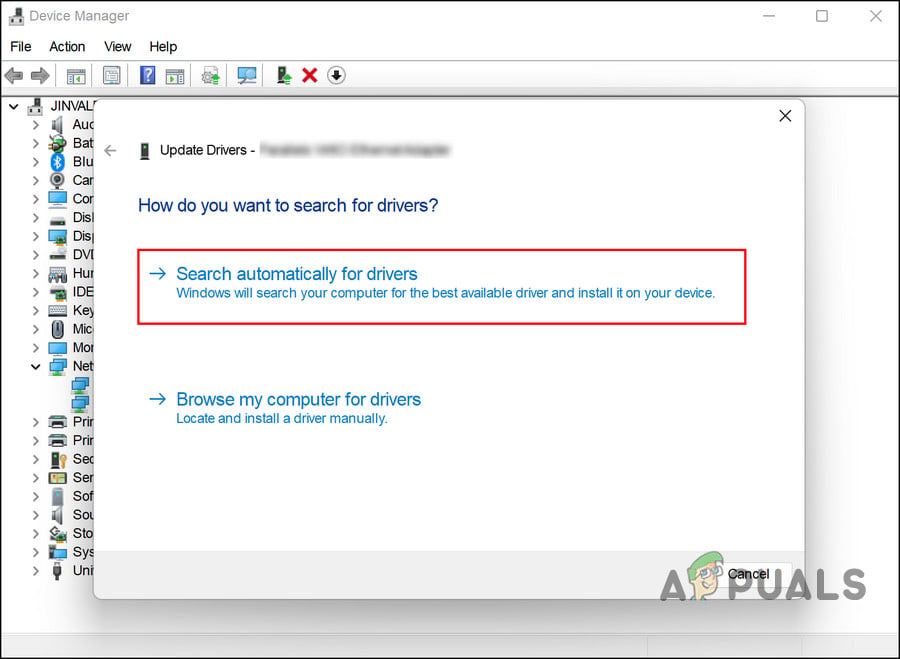
3. Update the Network Driver
In some cases, where the users were facing an issue with the WiFi service as well, the outdated network driver was to blame. If this scenario is applicable, then updating the network driver should fix the problem at hand. Here is how you can proceed:
4. Install the Updates Manually
Another easy way of installing the updates that your system automatically cannot install is by using the Microsoft Update catalog, which is a directory of all the updates released by Microsoft. You can search for the required update there using the KB number and then install it manually. Since the update will be directly installed on the system, you will be able to skip the download error. Follow these steps to proceed: Hopefully, you will be able to install the update without any problems.
5. Perform a Reset or a Repair Install
By this point, if you still haven’t discovered a viable solution, conventional troubleshooting methods won’t be effective. The final option is to reset Windows to its default state, which will give your system a fresh start. By choosing this method, you will essentially be removing all applications you installed yourself on your computer and restoring Windows to its original configuration. You can also perform a repair install, in which case your personal files and programs will not be affected by the fresh Windows installation. The problem can be solved using either method, so you can choose your preference.
Fix: Windows Update Error “We Couldn’t Connect to the Update Service”[SOLVED] One of the Update Services is not Running Properly in Windows UpdateLast Free Update For Windows 7 Released, KB4534310 And KB45343140 Are The Final…How to Update the Windows Update Agent to the Latest Version