What is msmpeng.exe?
The Microsoft Malware Protection Engine, or Msmpeng.exe, is the main executable of the built-in antivirus program for Windows 10 computers. Also known as the Antimalware service executable, this program runs in the background and scans your computer for threats such as harmful software, viruses, worms, and so on. Once these threats are identified, the program will quarantine or delete them.
What causes High CPU Usage by msmpeng.exe?
After investigating this issue, we realized this particular issue is actually rooted in a lot of different potential culprits. Here’s a list of scenarios where you can expect to experience an unusually high CPU usage caused by the MsMpEng component: Now that we went over every potential cause that might be facilitating this behavior, let’s get to the part where we get to the bottom of this issue and fix it. Below you’ll find a collection of verified methods that other affected users have successfully used to treat a scenario where the MsMpEng process takes up an unusually high amount of CPU resources.
1. Deal with System file corruption
The first thing you should do when you start troubleshooting this issue is to ensure that there are not any corrupted system files that are facilitating the apparition of this issue. To make sure that’s not the case, you have two options: If you already followed one of the options above and ensured that the high usage of MsMpEng.exe is not caused by some type of system file corruption, move down to the next method below.
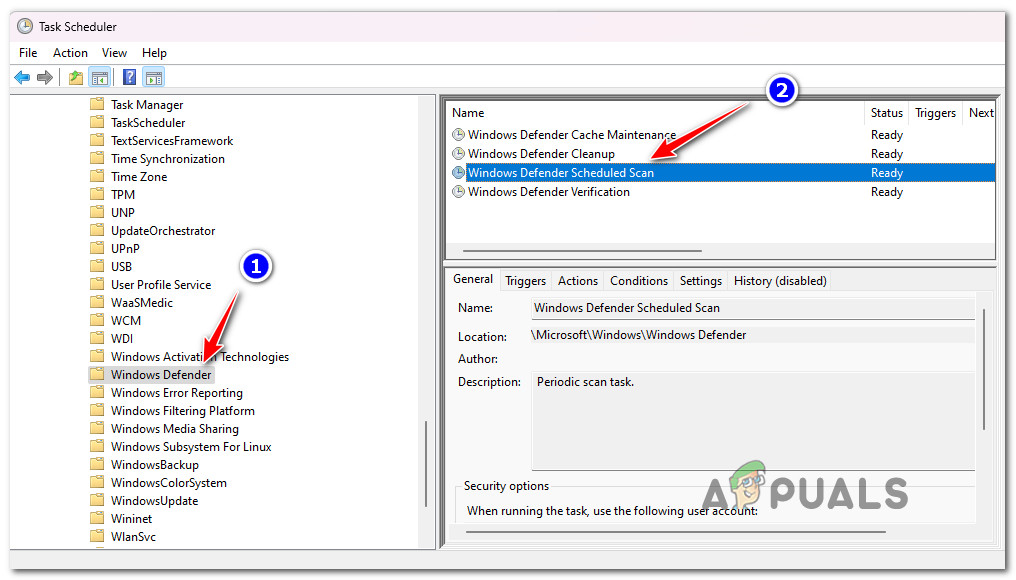
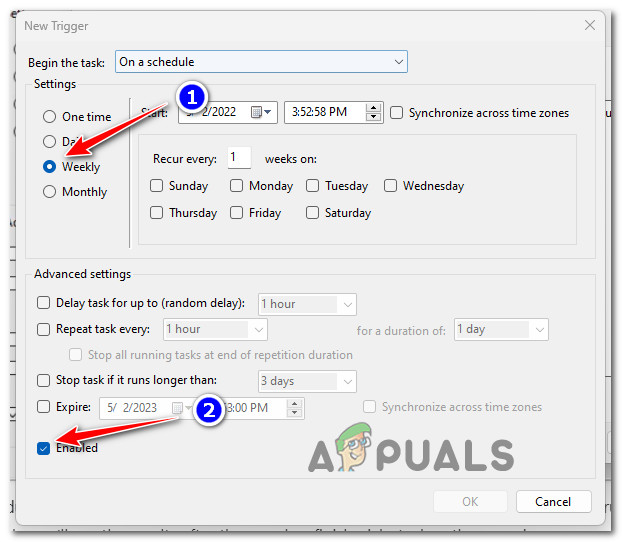
2. Lessen the frequency of MsMpEng.exe related task
Many users who are impacted by this behavior report that it is often caused by an administrative task related to MsMpEng running at very frequent intervals. To resolve this issue, you can use Task Scheduler to reduce the frequency of the task that launches the MsMpEng process. In order to do this, you’ll need to access the Task Scheduler utility (under Administrative Tools and modify the Windows Defender Scheduled scan task (under Windows Defender) so that it only occurs once a week or once a month (depending on your preference). Note: This will help tremendously in scenarios where you are running Windows 10 on a low-end PC with not a lot of CPU processing power available. For step-by-step instructions on lessening the frequency of MsMpEng.exe task, follow the steps below: In case the same problem is still occurring despite the fact that you’ve just reconfigured the frequency of the scan, move down to the next method below.
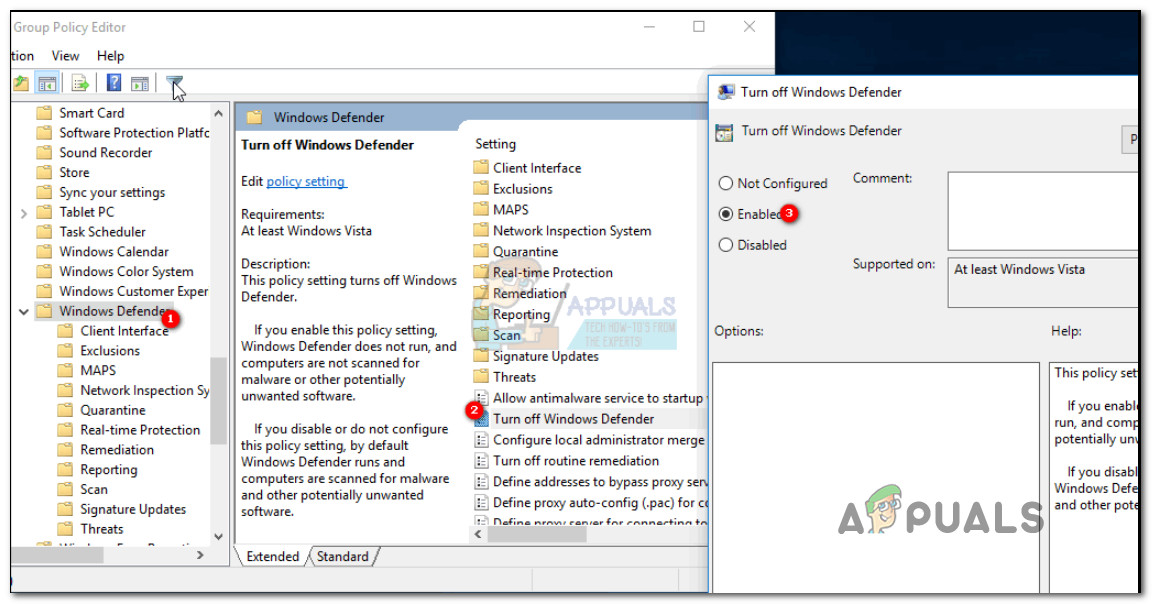
3. Disable the Windows Defender Overlap
It seems that this problem can also occur when Windows Defender is running at the same time as another third-party antivirus. This often happens when you’re using a security solution from a smaller company that isn’t verified by Microsoft. In this case, you’ll need to turn off Windows Defender forcibly the best way to do it is via the Local Group Policy Editor. Note: This method works on the Windows Enterprise and Pro Editions of Windows 10, as well as more advanced versions of earlier OS. If you can’t use the Local Group Policy Editor, then fall back to the Registry tweak directly under. Here’s what you need to do in order to disable a potential Windows Defender overlap: In case this method didn’t work in your case or you’re looking for a different approach, move down to the next method below.
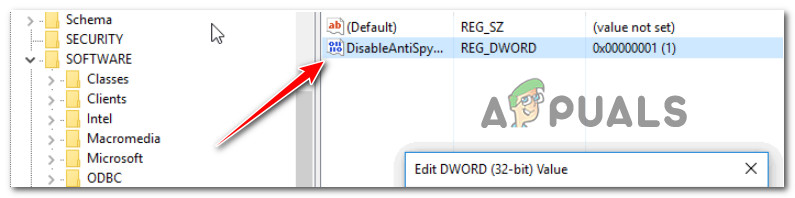
4. Disable the AntiSpyware Function
Insiders of the Windows 10 community say that this issue might be caused by a Registry key that is still disabled even though Windows Defender is no longer the active antivirus. To fix this problem, you will need to open the Registry Editor and change the value data of the DisableAntiSpyware key. Note: This method will only work as long as Windows defender is the active AV solution on your computer or it was disabled recently without being replaced with a different AV suite. Normally, once a new 3rd party antivirus takes the place of Windows Defender, the AntiSpyware function of Windows Defender should get disabled automatically. To investigate whether this scenario is applicable or not, follow the instructions below to use the Registry Editor to disable the antispyware function if applicable: If the problem is still ongoing despite you following the instructions above, move down to the next method below.
5. Scan for Malware
While it may sound ironic, a high CPU usage by the security file MsMPEng.exe can also indicate a virus infection. The MsMpEng.exe file might actually be malware in disguise, posing as a system process in order to gain access to the system’s resources. To be sure that this is not the case, you should run a deep scan with a reliable anti-malware program. There are a lot of options available when it comes to doing this, but our recommendation is to deploy a deep Malwarebytes scan since it’s one of the most robust security scanners that’s just as effective with malware as it is with adware. After you complete the scan, remove every infected instance as instructed, then restart your PC and open Task Manager again (Ctrl + Shift + Esc) to see if the CPU consumption is related to MsMpEng.exe has gone down. If the same kind of issue is still ongoing, move down to the next method below.
6. Adding Msmpeng.exe to the Windows Defender Exclusion list (if applicable)
This could appear to be a strange fix, but a number of users have testified that after they added MsMpEng.exe to the exemption list of Windows Defender, the CPU utilization decreased noticeably. This will work in cases where Windows Defender was enabled again after a prolonged stretch where another 3rd party antivirus was Turned on. Note: Since some malicious programs are known to disguise themselves as the Msmpeng executable in order to avoid being detected by security suites like Windows Defender, there’s also a possibility that Windows Defender (or a different 3rd party antivirus) will end up scanning the file continuously due to a false positive. If you previously followed Method 5 and ensured that your computer is not infected, you have nothing to worry about and this is probably just a false positive that is somewhat common on Windows 10 (when Windows Defender is being used by default). If this scenario is applicable, you can simply add the MsMpEng.exe file to the exclusion list and you’ll notice how this will immediately reduce the CPU consumption immediately. Here’s what you need to do: If the resource consumption is still high or Windows Defender is not your active antivirus, move down to the next method below.
7. Reverting a Bad Windows Defender Definition Update
Windows Defender has a long history of bad virus definition updates that can cause false positives. If you’re sure you don’t have a virus infection, you can remove the bad update by opening an elevated CMD prompt. Note: Strangely enough, this problem is almost exclusive to Windows 10 as Microsoft seems to have fixed this issue for their latest OS. Regardless, we’re still regularly seeing bad Windows Defender definition updates coming on Windows 10. If this scenario is applicable and you suspect that you’re experiencing this high CPU usage by MsMpEng.exe, the quickest way to fix it is to use an elevated Command Prompt interface to remove the bad update. Important: Keep in mind that this method assumes that you are actively using Windows Defender as the default security suite. For step by step instructions on how to do this, follow the instructions below: In case the same type of issue is still occurring, move down to the next method below.
8. Fixing the Process Mitigation Loop
A less common cause of this error is a scenario where the process mitigation feature actually causes an Exploit Protection loop. It’s possible that Windows Defender is continuously trying to disable the activity of a folder or program, but upon failing, it will try again endlessly. This facilitates High CPU usage. If this scenario is applicable, the proper fix is to address the process mitigation loop – this will stop the Exploit Protection Service which can drastically help you reduce CPU Usage. Note: Exploit Protection can cause a Loop where Windows Defender is trying to disable the activity of a folder/program but when it’s not successful it tries to do it again and again which ends up in High CPU Usage. In order to deploy this particular fix, follow the instructions below: If the problem is still not resolved or this method is not applicable to your particular scenario, move down to the final potential fix below.
9. Using a different antivirus
If none of the methods above have worked, one surefire way of getting rid of this issue permanently is to simply use an alternative antivirus. Go this route if every other fix featured in this article doesn’t work for you and you’re prepared to move away from the built-in Windows Defender suite. You can try to use an alternative AV scanner engine frequently such as “Malwarebytes”, but you still need a real-time antivirus that is less aggressive. Here are a few variants that you should consider:
BitDefenderNorton 360IntrustaWebroot
If you’re trying to figure out which of these options are right for you, consult this article where we analyze the 5 best antivirus suites for Windows 10. Note: Using another antivirus will basically disable the Windows Defender and use its own services/process to defend your computer and your computer will be used much anymore. So you will stay protected and your problem will be resolved as well.
How to Stop or Remove the Antimalware Service Executable on Windows 11[FIX] Service Host: Diagnostic Policy Service High CPU & Memory UsageFix: Avast Service High CPU UsageFix: High CPU Usage by Sppsvc.exe ‘software protection platform service’