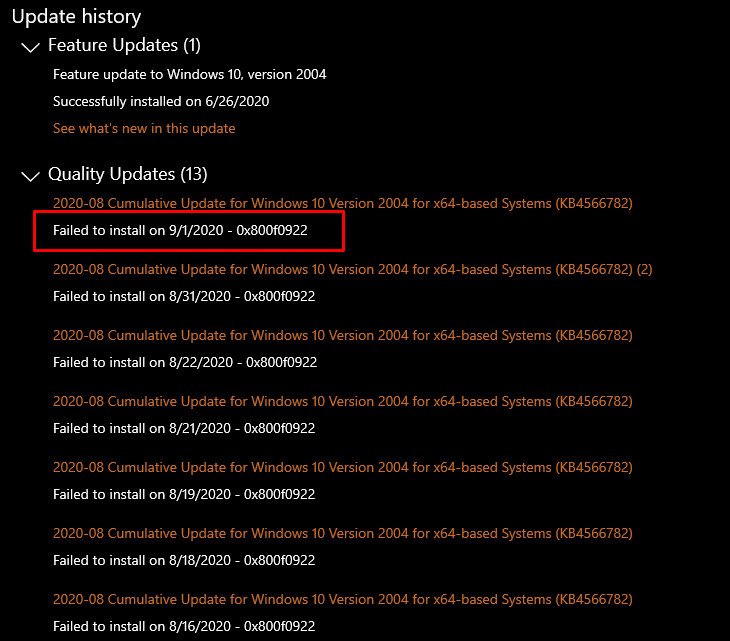
After investigating this particular issue thoroughly, we’ve discovered that there are actually a lot of different potential causes that might ultimately cause this particular error code. Here’s a list of potential culprits that might be responsible for triggering the 0x800F0922 error: Now that you are familiar with every potential scenario that might be causing this issue, let’s go over every potential fix that other affected users have successfully used to get to the bottom of this issue:
Run the Windows Update Troubleshooter
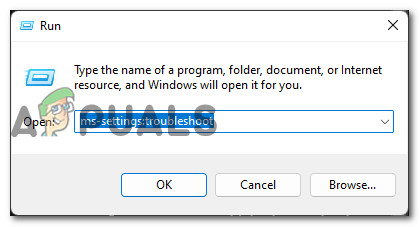
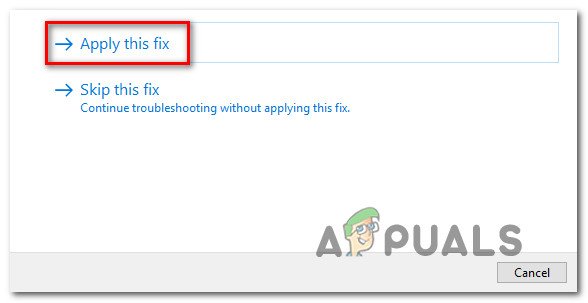
Before you move on to the more advanced fixes below, you should start by checking if your Windows installation is not able to resolve the issue automatically. Keep in mind that every recent Windows version (Windows 8.1, Windows 10, and Windows 11) will include a wide selection of automated repair strategies that your OS is capable of applying remotely if a viable scenario is identified. Follow the instructions below to deploy the Windows Update Troubleshooter and apply the recommended fix to resolve the 0x800f0922 error code: Note: In case the Windows Update manages to find a scenario that is already covered by a repair strategy, it will present it to you in a packaged form that you 1-click apply. In case the same kind of issue is still not fixed, move down to the next potential fix below.
Reset every Windows Component
One of the most scenarios that will cause any new WU update to fail with the same 0x800f0922 error is when one of the service dependencies is stuck in a limbo state or when the download is interrupted by the fact that your ISP assigned a bad DNS range. Both fo these scenarios can be resolved by opening up an elevated Command Prompt and running a series of commands that will clear the current DNS cache and restart every involved WU service dependency and clear any temporary folder used by the Windows Update component. Follow the instructions below to reset every Windows Component that might be causing this error during the installation of a pending Windows Update: If you still end up seeing the same 0x800f0922 error code when attempting to install a pending update, move down to the next potential fix below.
Enable 3.5 .NET Framework subcomponent (if applicable)
As it turns out, there are certain Windows Update that will fail with the 0x800f0922 error code due to the fact that a couple of 3.5 .NET Framework subcomponents (Windows Communication Foundations HTTP Activation and Windows Communications Foundation Non-HTTP Activation) are disabled at a system level. The fact that these two components are disabled won’t cause any issues for the most part, since they are all but deprecated at this point. But as it turns out, there are certain Windows Update that need these components enabled in order to install successfully. If this scenario looks like it could be applicable, follow the instructions below to access the Programs and Features screen and ensure that both Windows Communication Foundations HTTP Activation and Windows Communications Foundation Non-HTTP Activation are enabled under .NET Framework 3.5. Follow the instructions below for a step-by-step guide on how to do this: In case the same 0x800f0922 error code is still occurring, move down to the next potential fix below.
Disable built-in firewall while installing the update
Although this occurrence is rare, you should not exclude the possibility that your firewall is interfering with the installation of the pending update. This problem is much more common with 3rd party AV suites, but we also found a few user reports of it occurring with Windows Firewall. If you find yourself in this scenario and you suspect that your firewall might be to blame, you can est this theory easily by disabling the firewall functionality that is currently active. In case you’re using a third-party firewall solution, go ahead and temporarily disable it before rebooting and attempting to install the failing Windows Update once again. Note: Obviously, the exact instruction of disabling your 3rd party firewall will be different from tool to tool. Consult the official documentation for the exact instructions of turning off the real-time protection of your 3rd party firewall. On the other hand, if you’re using the built-in Windows Firewall, follow the instructions below for the exact steps of temporarily disabling it to see if it’s responsible for the 0x800f0922 error when you attempt to install certain Windows Updates: In case this method did not work in your case and you’ve confirmed that the firewall is not to blame for the WU error, move down to the next potential fix below.
Delete the main Edge directory (if applicable)
Keep in mind that you might expect to deal with this error in a situation where you previously attempted to delete the Edge computer but ended up leaving behind some remnant files. While Edge is not a required component on Windows 1-0, Windows 11 needs it in order to function properly and the latest Windows 10 feature updates need it to. In case the Windows update is failing because the installer detects that the Edge installation is missing from your computer, you should be able to fix the issue by deleting the main Edge directory. This might seem like a counter-intuitive thing to do, but doing this fill prompt your operating system to install Edge from scratch during the next system startup. Open File Explorer and navigate to the following location: Once you’re inside the correct location, right-click on Edge, then choose Delete from the context menu that just appeared. Once the folder has been successfully deleted, reboot your computer in order to force your Windows installation to reinstall the Edge component. After the next startup is complete, attempt to install the update that was previously failing once again and see if the issue is now resolved. If the problem is still not fixed, move down to the next potential fix below.
Reinstall Microsoft Edge
Keep in mind that under certain circumstances, it might not be enough for you to delete the main folder of Microsoft Edge. If the reason why you are unable to install certain feature updates on your Windows computer is due to some type of corruption affecting Microsoft Edge, reinstalling it is the only viable fix here. Follow these instructions to reinstall Microsoft Edge on your Windows PC. Note: This guide is confirmed to work on both Windows 10 and Windows 11. Once Microsoft Edge is reinstalled, reboot your computer and attempt to install the Windows Update that was previously failing once again. If the installation fails with the same 0x800f0922 error code or this method was not applicable in your case, move down to the next potential fix below.
Delete the contents of the temp folder
As it turns out, corrupted cache data that might interfere with the installation of the new update is not only stored inside the Catroot 2 and SoftwareDistribution folder. Another location that might store temp data that might be causing the 0x800f0922 error is the temp directory. Several affected users that we’re also dealing with this issue have reported that the problem was finally resolved after they navigate to the insides of the temp directory and deleted everything inside. For step by step instructions on how to do this, follow the guide below: If the 0x800f0922 error persists, move down to the next potential fix below.
Enable the On the App Readiness service
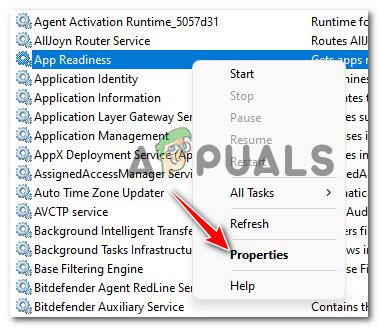
Another possible culprit that might be responsible for producing the 0x800f0922 error is the App Readiness Service. Note: The purpose of this service is to generate and maintain logs related to the installation of new WIndows Updates and Windows Store app updates. If this component is disabled, you can expect to see every pending update failing, as your OS is not able to generate log files for the update installations. In case your PC is dealing with this scenario, the solution is to access the Services utility and enable the App Readiness service. Once you do this and restart your computer, you should be able to install pending updates normally. Here’s what you need to do: In case the problem is still not fixed, move down to the next method below.
Deploy SFC and DISM Scans
If none of the methods above have allowed you to resolve the 0x800f0922 error code, you should assume that you’re Windows installation is affected by some type of system file corruption. But before you throw in the towel and go for a radical fix, you should start by using a couple of built-in utilities and see if your Windows installation is not capable of ‘repairing itself. Start by deploying an SFC (System File Checker) scan from an elevated CMD prompt and see if any evidence of system file corruption is identified. Note: SFC will replace any corrupted system file it finds with a healthy equivalent stored in a locally cached archive. Once the SFC scan is complete, reboot your PC, then deploy a DISM scan once the next startup is complete. Note: Keep in mind that DISM requires an active connection to the internet in order to download healthy files to replace corrupted equivalents. After the DISM scan is complete too, do one final reboot and see if the 0x800f0922 Windows Update error is now resolved. If the same kind of issue is still occurring when you attempt to install security, feature or cumulative Windows Updates, move down to the next potential fix below.
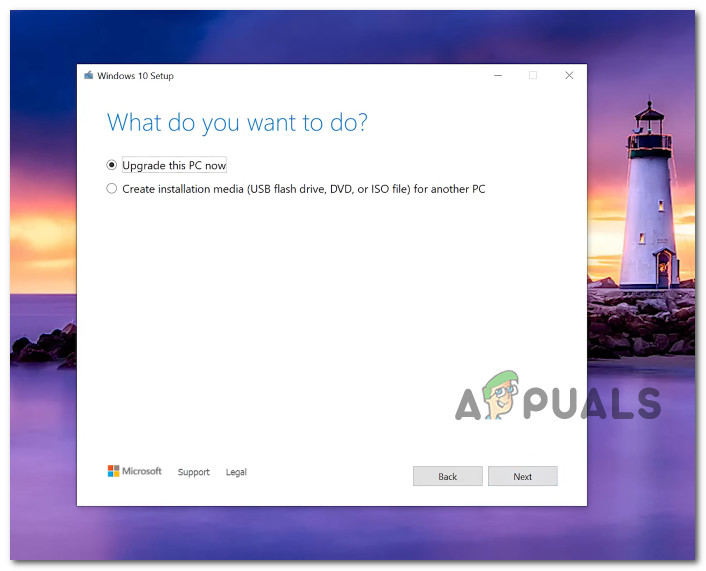
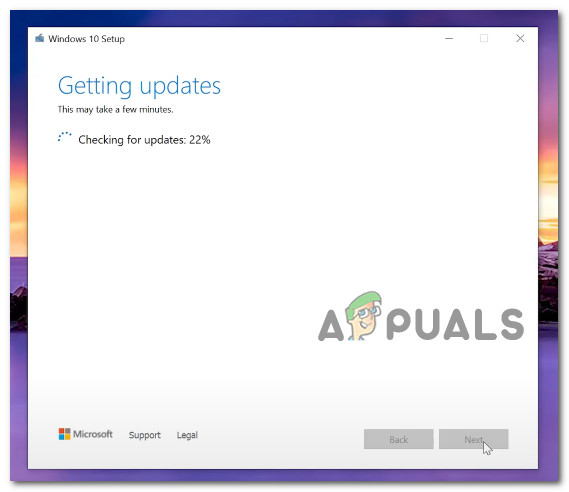
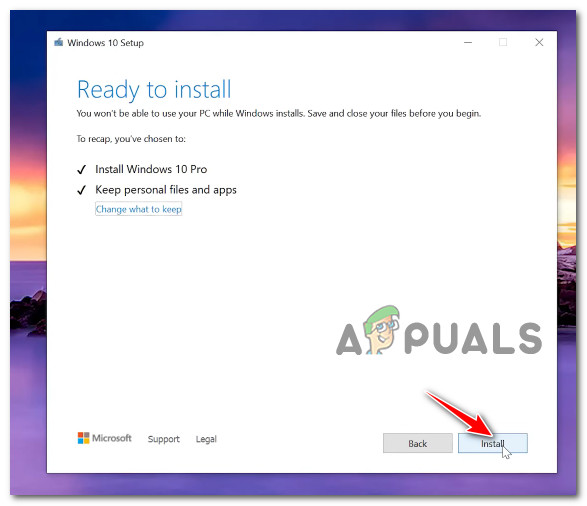
Upgrade via the Media Creation Tool (Windows 10 only)
In case your Windows Update component is broken beyond repair and you are not willing to perform a repair install or clean install procedure, the only other way that you can pursue is to use the Media Creation tool to directly install the latest build of your Windows installation. Note: This method will only work if you’re experiencing this issue on a Windows 10 computer. If you find yourself in this scenario and none of the methods featured above have made a difference for you, follow the instructions below to perform an upgrade to the latest OS build available via the Media Creation Tool: In case this method was not effective in your case or you’re looking for a fresh start, move down to the final potential fix below.
Repair install or clean install
If you’ve come this far and none of the methods featured in this article have been satisfactory, the only viable options by now are ways of refreshing your entire fleet of system files. You can do this in two different ways:
Clean installing – This will essentially reinstall your Windows installation. This will provide you with a fresh start if you’re looking for it, but keep in mind that you’ll end up losing any personal file that’s currently being stored on the same portion as your Windows installation.Repair installing – If you don’t mind a tedious procedure and you want to solve this issue while saving as much personal data as possible, go for this procedure. A repair install (in-place repair) procedure will allow you to replace every corrupted Windows file while keeping your personal files (including applications and games) intact.
Error 0x800f0831 Installation Failure, Windows Failed to Install the following…Microsoft Windows 10 Update Delivery And Packaging Technique To Get Combined…How to Fix ‘Updates you are trying to apply are not Dell-authorized updates’Fix: Windows 10 Updates failed Error 0X80242FFF