The computer frequently displays “STOP Error 0x119: VIDEO_SCHEDULER_INTERNAL_ERROR” when trying to open the same program. The windows runs very slowly and responds sluggishly to the mouse and keyboard input. The computer “freezes” periodically as well. The display also crashes every 10 or 15 minutes. In some cases, the display crashes before or immediately after the user logs in. There are numerous reasons for this particular error. The most common one is old, corrupted or incorrectly installed drivers. Drivers can be working just fine one day, and then the very next day stop working for various reasons, ultimately causing Error 0x119. After installing new hardware, the chances of facing this issue become very high. Keep it in mind that your VIDEO_SCHEDULER_INTERNAL_ERROR may not be related to hardware driver issues, but it is always a good practice to keep all your system drivers up to date to ensure high performance. Over time, your system can develop errors on HDD due to unintended, improper and repeated shutdowns, incomplete or corrupt installation of software. As a result, you may experience screen errors associated with VIDEO_SCHEDULER_INTERNAL_ERROR. Sometimes, video scheduler error may also occur due to RAM (memory) corruption. If you are experiencing “beep” codes on startup or random computer reboots, it is most likely that your memory is corrupted. If you have recently added a new RAM to your computer system, I recommend you to immediately remove it to ensure that it is not the cause of VIDEO_SCHEDULER_INTERNAL_ERROR. Below are some of the methods to try and fix VIDEO_SCHEDULER_INTERNAL_ERROR.
Method 1: Install all available Windows update
Sometimes, it may be as easy as updating Windows with the recent service pack or any other patch released by Microsoft to resolve your internal video scheduler error. In order to check for Windows update, click on the Start button. Type Update in the search box. Press Enter. The Window Update dialogue box will appear on your screen. Click on the Install updates button, if there are any updates available.
Method 2: Roll back to the previous driver
Sometimes, this error is also caused by inappropriate or corrupt video card drivers. Rolling them back may fix the problem for you. Hold the Windows key and press R. Type devmgmt.msc in the run prompt. Expand the Display adapters section by double clicking on it. Right click on the item listed below. Click on Properties. When the property window appears, select the Driver tab. Click on Roll back button.
PRO METHOD: Use DDU (Display Driver Uninstaller) for AMD/NVIDIA Cards
If nothing works, then you’ll have to go advance. There are two situations here, 1) where you are able to login, 2) where you’re not able to login, the aim is to boot the system into Safe Mode so it can load with basic drivers and minimal settings but before you go with the steps below, make sure you download DDU from here and copy it to an External Drive or if you were able to login, then have it downloaded and saved on your Desktop before you boot into Safe Mode.
For Windows 8/10
If you’re able to login, then Click the Start button from the lower right corner, Hold the SHIFT Key and whilst Holding the SHIFT Key and choose Shutdown -> Restart to get into Advanced Options. If you are not able to login, then restart PC and interrupt the reboot process when you see the Windows (logo)
screen, interrupt it 3 times and you the text below the logo shows “Preparing Automatic Repair”, when you see this and stop and wait for the system to take you to the Advanced Mode.
For Windows Vista/7
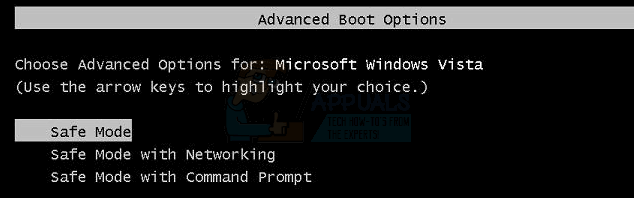
However, if you are using Windows 7 or Vista then Restart your computer and repeatedly tap F8 until you see theAdvanced Boot Menu. If you do not see this menu, start over again and repeatedly tap F8 key on your keyboard until you see this. When you see this select Safe Mode. You will be able to login into safe mode fine.
Windows 7 will take you straight to Safe Mode after you choose the Safe Mode option but for Windows 8 and 10, after the Preparing Automatic Repair message, it should take you to Advanced Options from there choose Troubleshoot -> Advanced Options -> Startup Settings -> (wait for the system to reboot),after the reboot choose Option 4 by pressing 4 on the keyboard to start into Safe Mode.
Once in Safe Mode, either copy the DDU file to your Desktop in a new folder if you saved it onto a USB or locate the file where it was downloaded and move it to a new folder, so the extracted files can stay within the folder, else it will be extracted where you’ve got the file saved. Once done, click the Display Driver Uninstaller icon and run it. Don’t worry, if it shows “Windows 8.1” as the system detected. Go ahead, and choose the Card Type from the drop down, then choose Option 1 which is Clean and Restart. After the Driver Cleaning has finished, the system will reboot back into Normal mode. Now, you can go to the manufacturer’s site to download and install the latest driver for your Graphic Card.
FIX: Steps to fix iPhone 6 Error 4013FIX: Steps to fix a corrupted pst or ost outlook data fileFIX: Steps to Fix Error ERR_FILE_NOT_FOUNDFix: You need to fix your Microsoft Account for apps on your other devices to be…