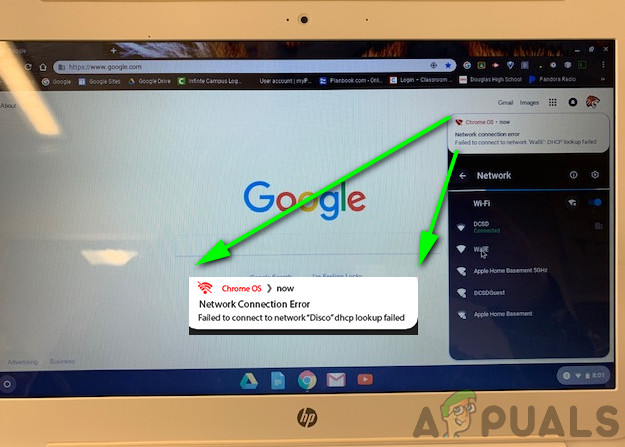
Usually, the affected user encounters the error when he tries to connect to a new network. However, there were some users who started to face it on a network that they were using for a long time. Before diving into more detailed solutions to fix the DHCP failure, try to connect to another network to rule out any hardware issue of the Chromebook. Also, check if other devices can connect to the problematic network. Contact the IT administrator of your organization if you are using a device managed by a school or company as the device may be restricted to connect to only some specific networks. Try to remove any other electro-magneto interference, i.e. any Bluetooth device or another router in the vicinity. Also, make sure the network is not set to use a hidden SSID. Moreover, if you are trying to use a VPN, then disable the VPN client. If you are using a Wi-Fi extender, then remove the Wi-Fi extender as Chromebooks have a known history of having issues with them. Moreover, if a device made for the US is used in another country like Germany, then the device may have compatibility issues with the router.
Solution 1: Restart Your Networking Equipment and Chrome
The DHCP error could be caused by a temporary software or communication glitch. To rule out any such issue, it will be a good idea to restart your networking equipment and device.
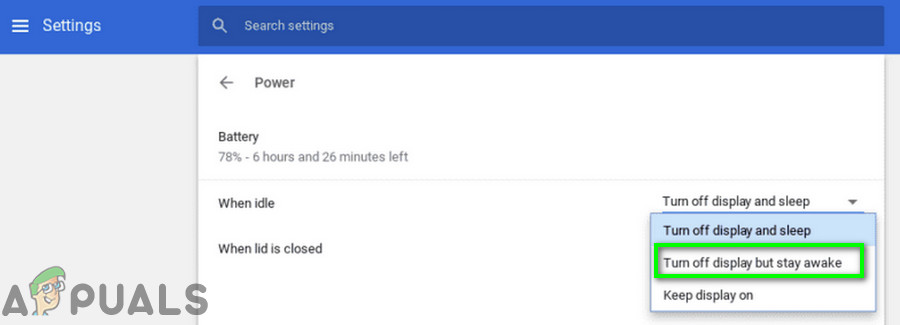
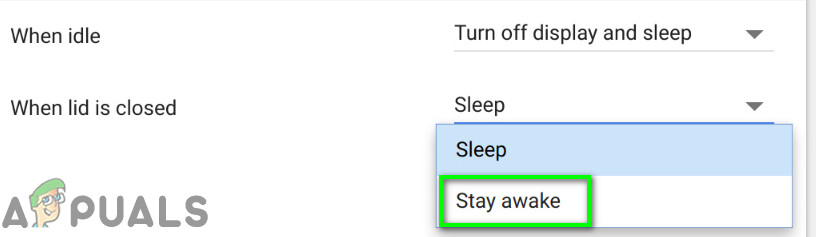
Solution 2: Change the Sleep Settings of Chromebook
Chromebook has a known bug in which if your Chromebook goes to sleep, then upon waking up, the device may fail to connect to the network and the DHCP failed message may be shown. In this case, changing some sleep settings of the Chromebook where it doesn’t go to sleep when the lid closes may solve the problem. Note: Do note that this will prevent your Chromebook from completely sleeping when you close the lid. Only the screen will turn off. This is a workaround, not a fix.
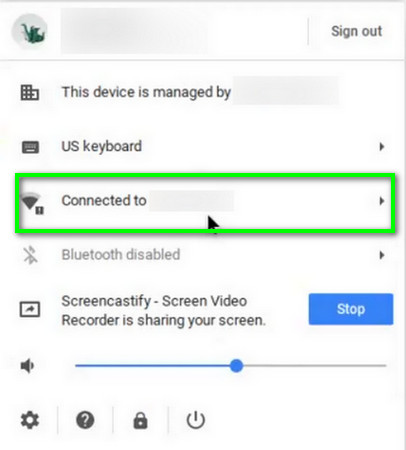
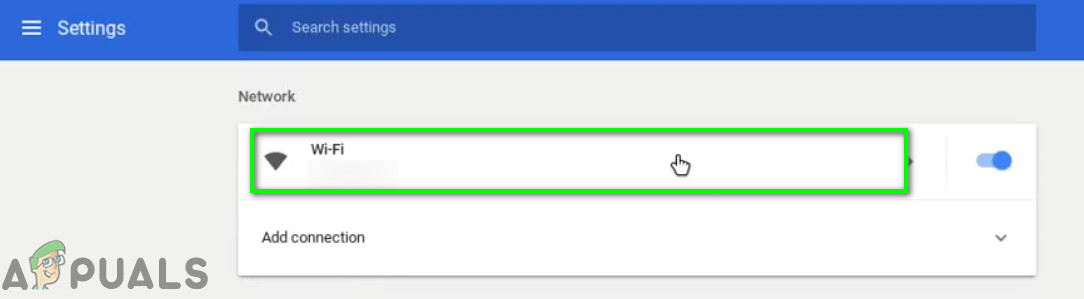
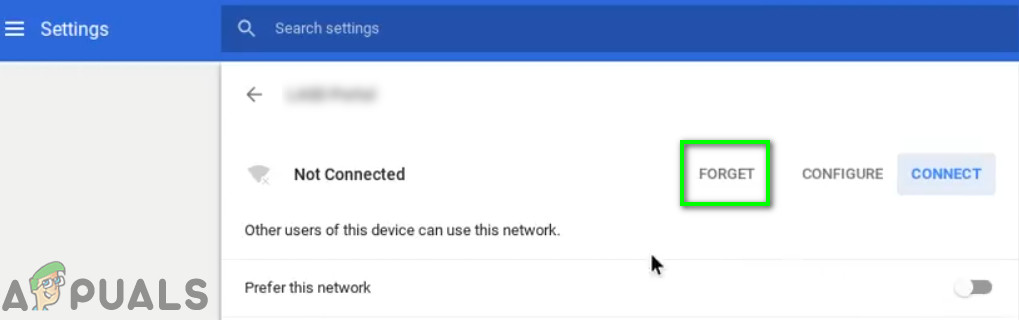
Solution 3: Reconnecting to the Wi-Fi Network
There can be a network glitch due to which the connection between your device and router might not be stable. To clear out any such problem, it will be a good idea to forget the network and then reconnect to it. Do note that you will be required to re-enter the password.
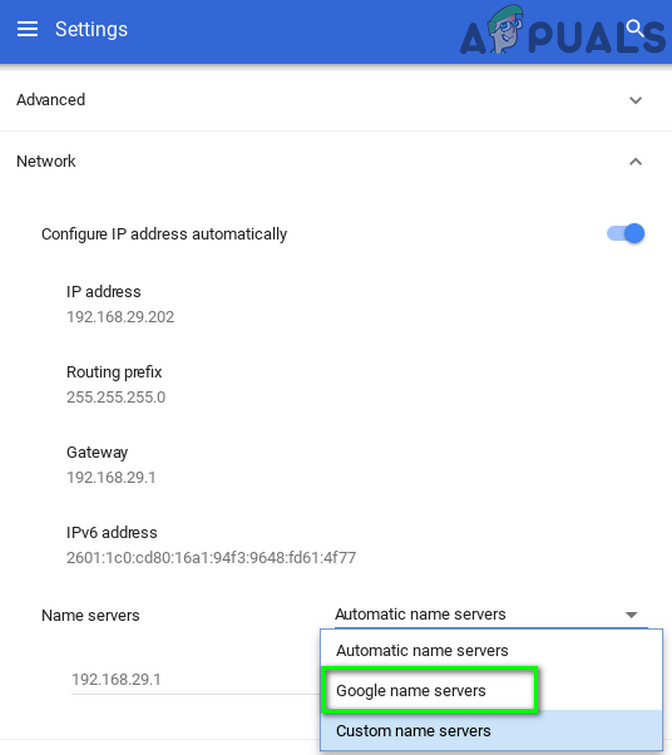
Solution 4: Use Google Name Servers for the Network
DNS servers play a vital role in the translation of the IP addresses into human-readable hostnames. If your device cannot query the DNS server, then it may return the DHCP failed error. In this scenario, switching to Google Name Servers may solve the problem.
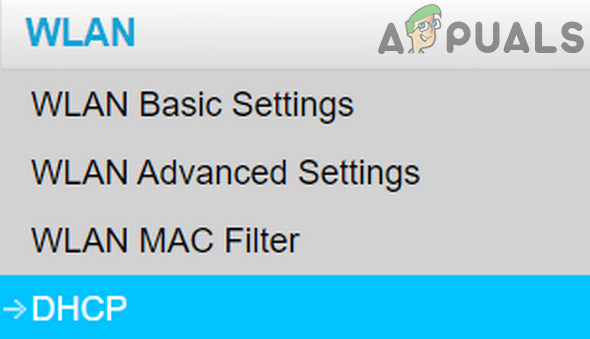
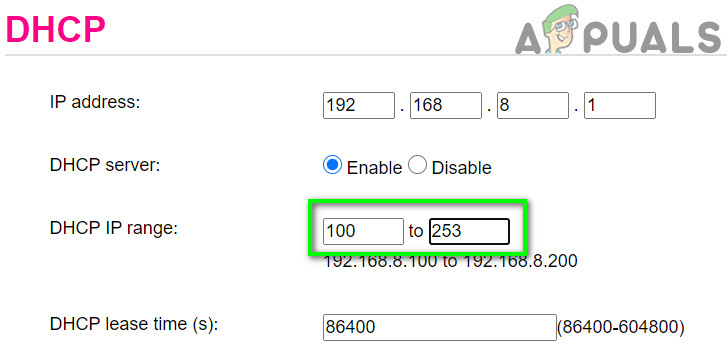
Solution 5: Extend the DHCP Range of Addresses of the Network
There can be a fixed number of devices that can connect to a DHCP server. If the limit of the number of devices that can connect to the DHCP server is reached, e.g. if your DHCP server has a limit of 10 devices and you try to connect 11th device, then you may encounter the DHCP error. In this case, try to remove some devices from the network or increase the limit of the devices that can connect to the network may solve the problem. The instructions may differ from router to router due to the make and model of the device.
Solution 6: Change the Frequency Band of Your Wi-Fi Network
With the continuously evolving network standards and speeds, now routers are capable of broadcasting at a higher frequency/band channel than ever before. If your router is broadcasting at a frequency that is not supported by your device, then you may encounter the DHCP failed error. In this case, switching to a network frequency recommended by your device may solve the problem. The instruction may differ depending upon the make and model of your router.
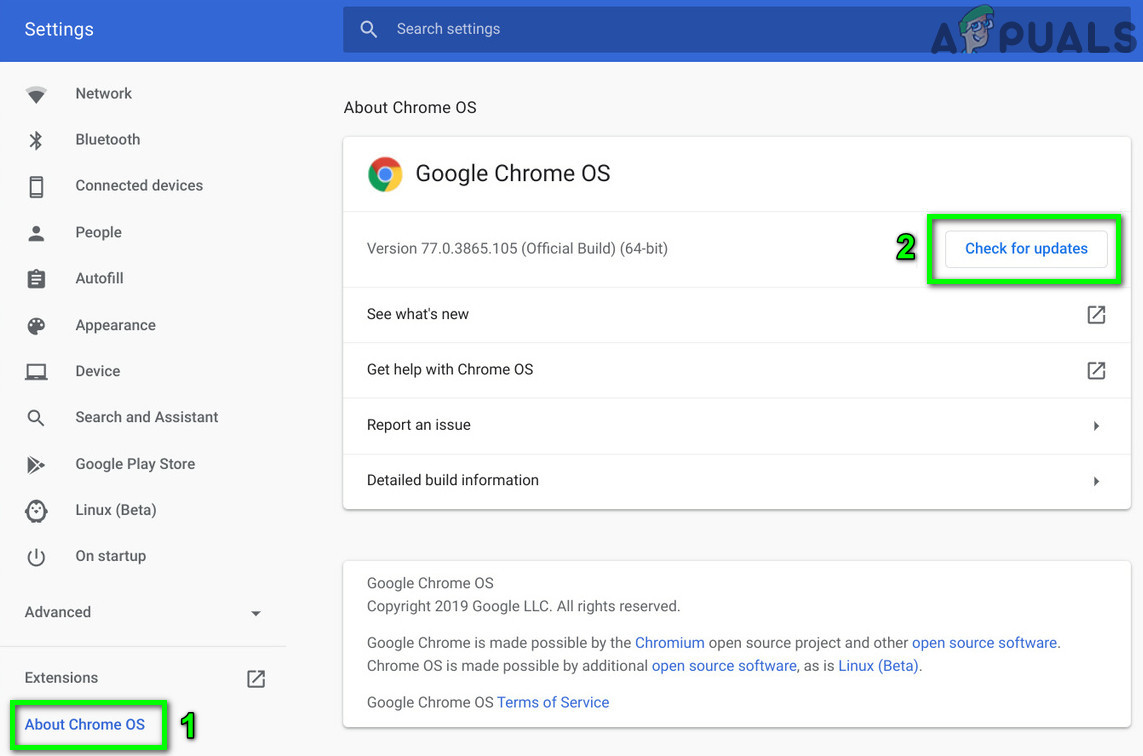
Solution 7: Update Chrome OS of Your Chromebook
The operating system of your device is continuously updated to satiate the ever-developing technological advancements and patch the known bugs. If Chrome OS of your device is outdated, then that could be the root cause of the issue. In this scenario, updating the OS of your device to the latest build may solve the problem.
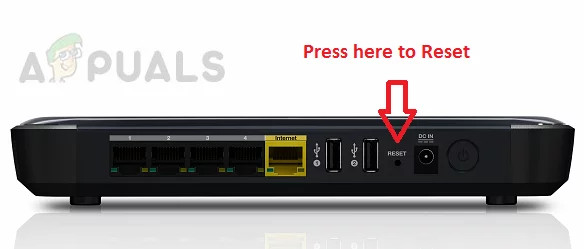
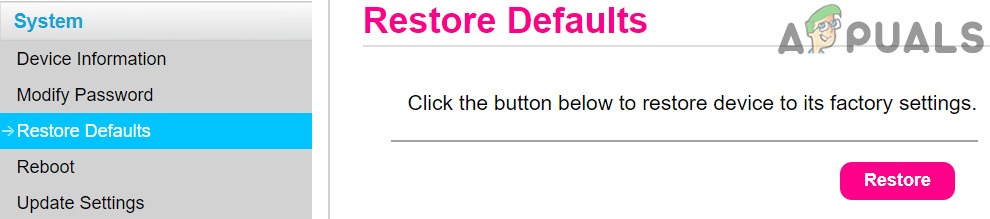
Solution 8: Reset Your Router/Modem to Default Settings
Corrupt firmware of your router/modem could be the root cause of the DHCP issue. In this case, resetting your router/modem to the factory defaults may solve the problem. It’s usually not a complicated process and helps solve many network related issues. But due to the diversity of make and models of router/modem, it is practically impossible to cover all the steps to reset your modem/router, but the general approach is the same. There are two methods to reset your router/modem; one is to use the button on the device (on some models, the power button can also be used to reset the device) whereas the other is to use the device’s web portal. You can also use the web portal of your device to perform the reset operation of your device If nothing has helped you so far, then try to either upgrade the firmware of your router or downgrade it (if everything was working fine before updating the router firmware). If the issue still persists, then visit an authorized technician shop of your Chromebook’s manufacturer to check the Chromebook for any hardware related issues.
What is IP Lookup and How to Use It?How to Lookup an ASCII Table in LinuxFix: DHCP is not Enable for WifiFix: Unable to Contact your DHCP Server Error on Windows 7, 8, 10
![]()

![]()