We have listed different troubleshooting methods below, and we recommend going through them first. Then, proceed with the one that suits your situation the best.
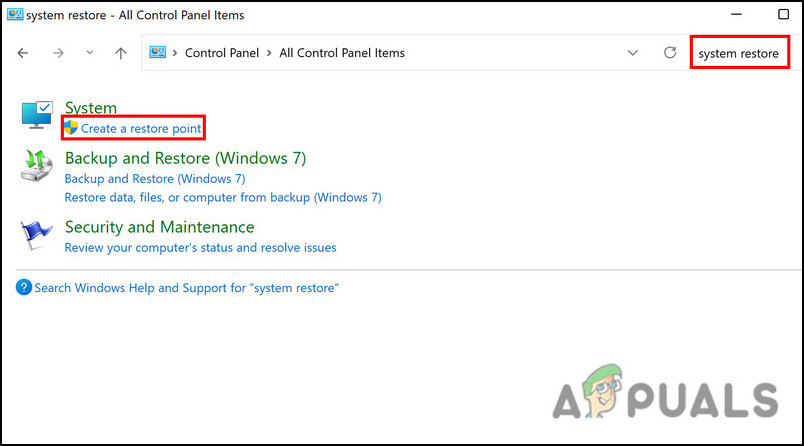
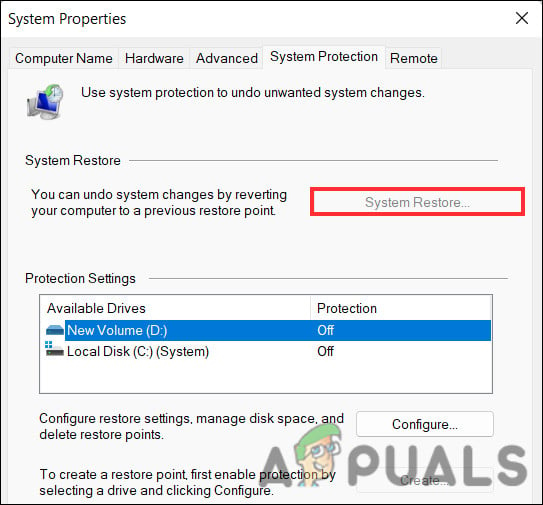
1. Use System Restore
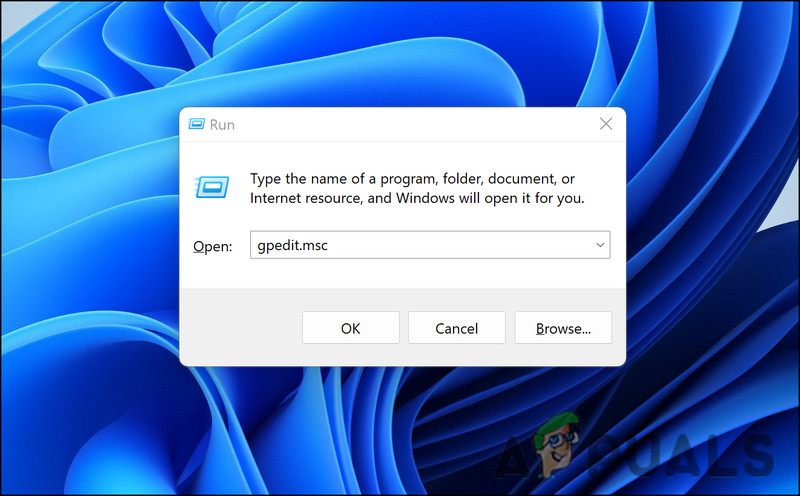
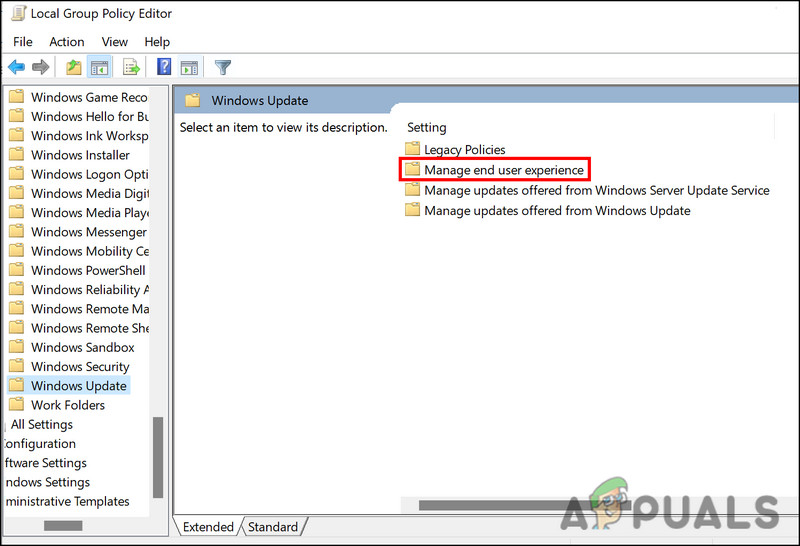
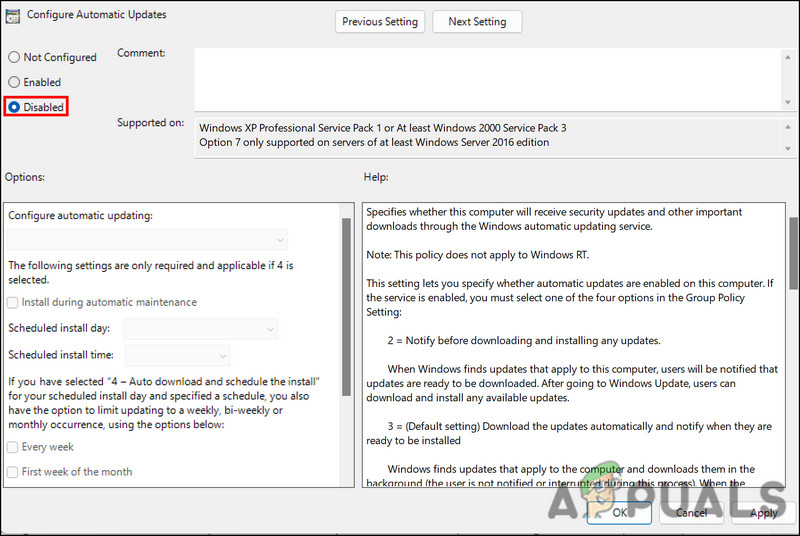
In Windows, a system restore utility creates restore points on Windows periodically. These restore points are snapshots of the system state at any given time, and users can use them to revert to a previous os state if something goes wrong. In this method, we will use the System Restore utility to revert the system to a state where the issue was not present. Follow the steps below to proceed: Once this is done, you must stop the system from installing the updates automatically. For this purpose, we will make changes within the Group Policy Editor, which is an administrative-level utility.
2. Uninstall the Update
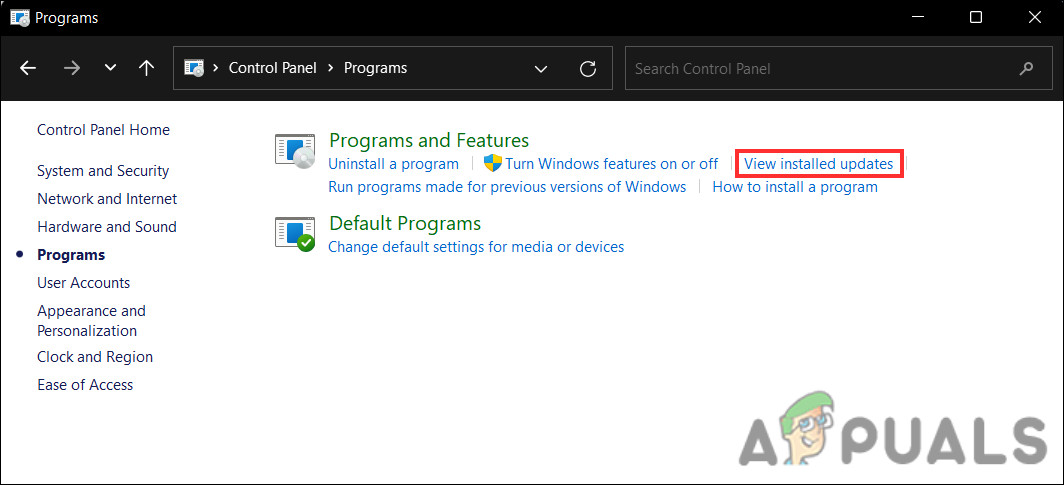
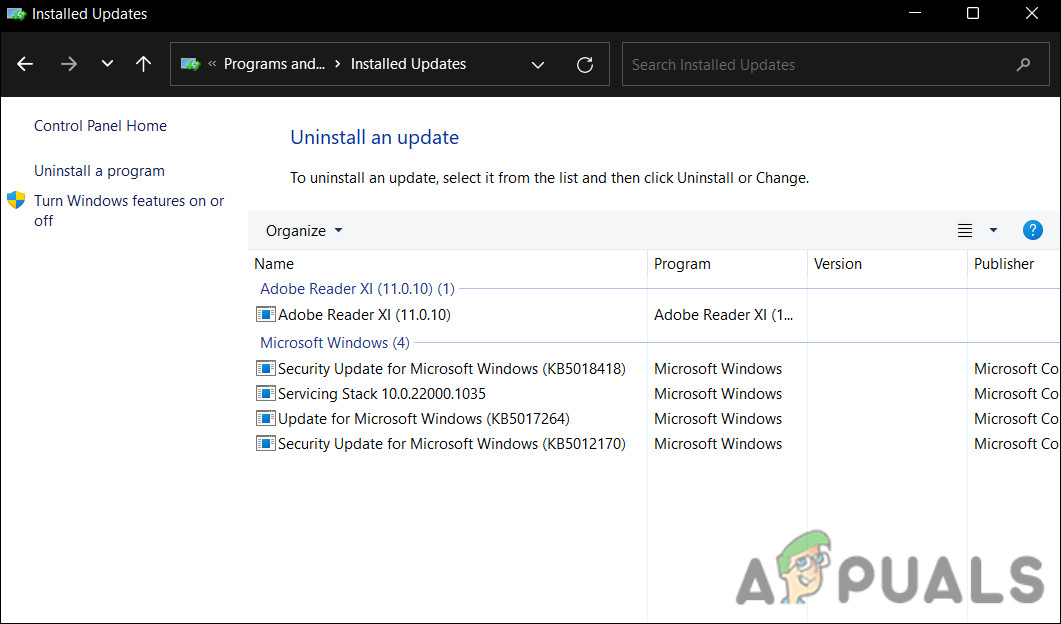
You can also uninstall the update directly if you do not want to use the system restore utility just yet. We will use the Control Panel to perform this action in this method. Follow these steps to proceed:
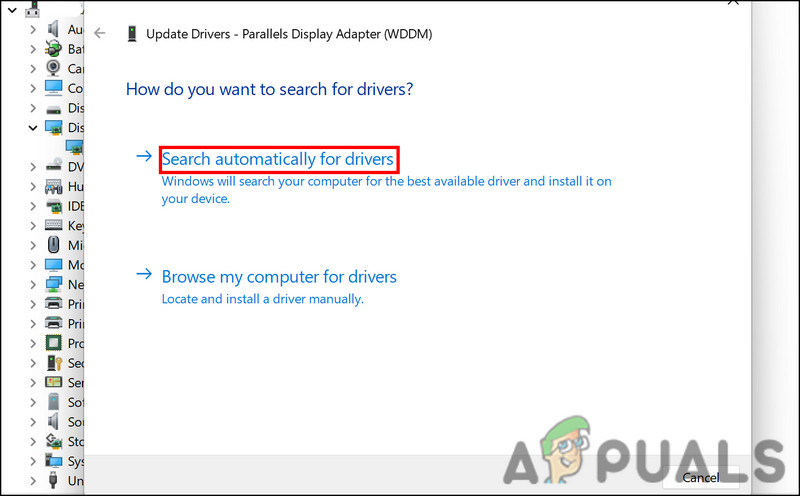
3. Update GPU Drivers
Another fix that worked for users was updating their graphics card drivers. This issue is common with Nvidia graphic card drivers, but other GPU drivers can also be affected by it. Several users reported that they managed to fix this problem by updating the graphics card driver, which is why we recommend you try it too. Here is how you can proceed:
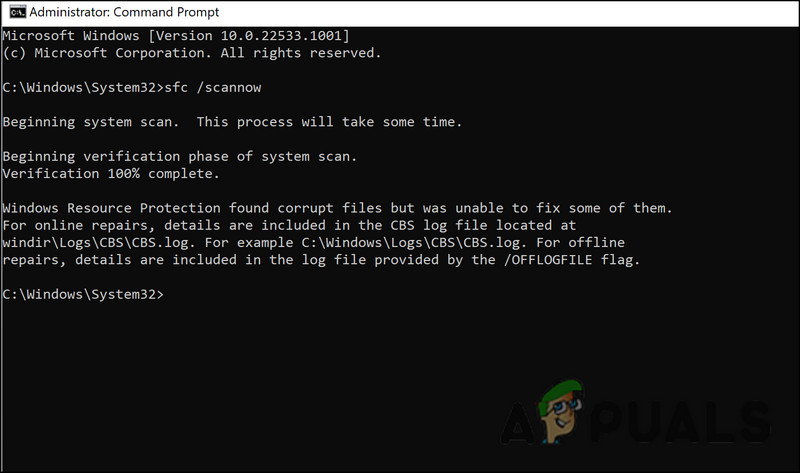
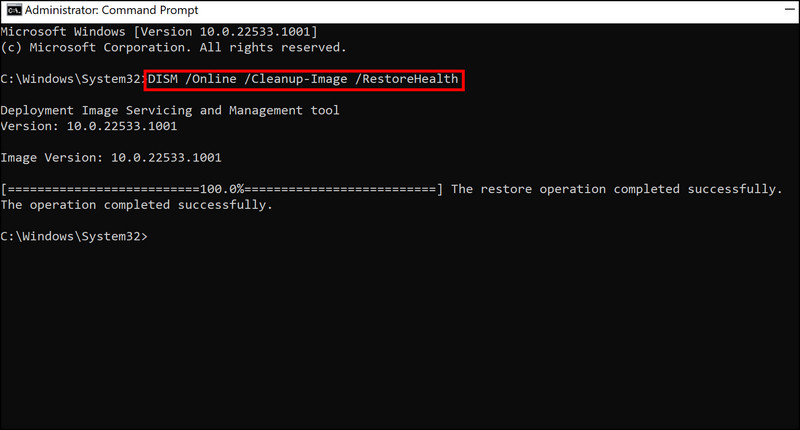
4. Run the System Scans
Your system files can also be dealing with a corruption error, which is affecting the speed of the syste. It is best to use the built-in troubleshooting utilities provided by Microsoft in this scenario. The most appropriate tools, in this case, will be the System File Checker (SFC) and Deployment Image Servicing and Management (DISM). These tools will identify the issues within the system and fix them without requiring any significant input from your side. Here is how you can proceed: Finally, restart your PC again. Hopefully, this will fix the system speed problem successfully.
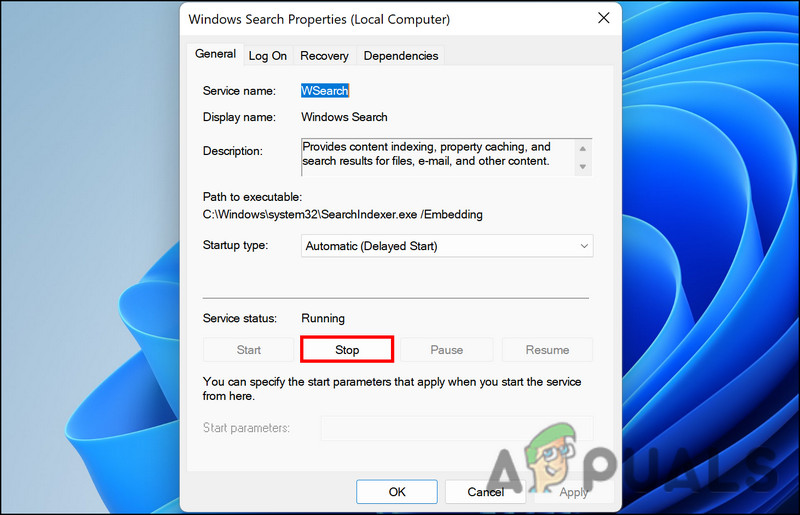
5. Disable Windows Search Indexer
In some cases, the Windows search indexer service was accessing the hard disk heavily, which was causing the entire system to slow down. If this service is working on your system, you can try disabling it to check if the problem is fixed. Here is how to proceed:
5. Perform a Clean Boot
Alternatively, a third-party program installed on the system can interfere with the system’s operation. You could blame a new program if the issue started occurring right after you installed it. A Clean Boot, which launches the system with only critical drivers and programs, is the best way to identify problematic applications. When the issue is not present in the Clean Boot state, it implies that a third-party program is indeed responsible. Here is how you can perform a Clean Boot in Windows. If a third-party app is causing the problem, this method should help you identify the culprit and get rid of it.
How to Fix a Slow and Lagging Windows 10 SystemHow to Speed up Your Slow and Lagging iPadHow to Fix Slow Wake-Up Speeds After Windows KB3201845 UpdateFix: Slow Context Menus after the Windows 10 Anniversary Update