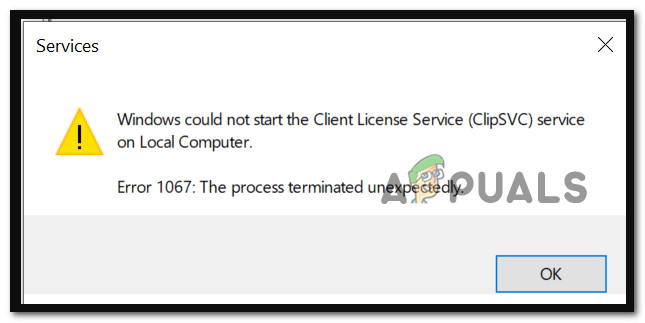
Note: CLIPSVC stands for Client License Service, and it’s utilized to give Microsoft Store Applications a licensing support structure. CLIPSVC must be enabled in order for the Windows Store apps to work. After investigating this particular issue, we realized that there are actually several different fairly similar scenarios that might be ultimately causing this type of error. Here’s a shortlist of potential issues that might be causing this error code: Now that we went over every potential cause that might be causing this problem, let’s go over every potential fix that was verified by at least one other affected user that was experiencing this problem on Windows 10 or Windows 11.
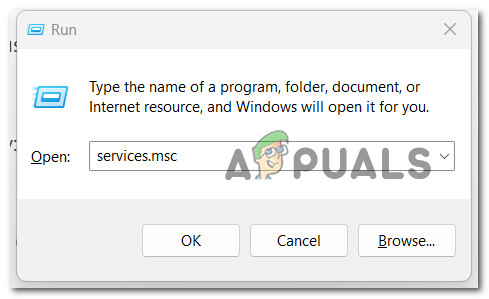
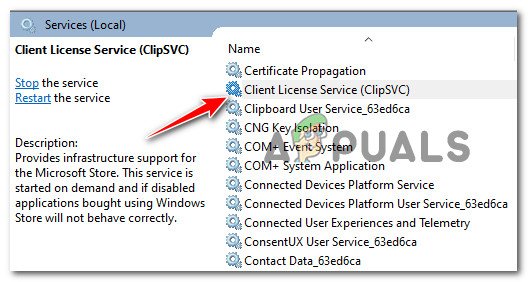
1. Start the CLIPSVC service manually
A scenario in which the principal service that is meant to handle the license support structure for Microsoft programs is deactivated is one of the most typical reasons for this problem. In this scenario, you should verify that the service is a startup and, if necessary, change the startup type. You can do all of this from the Services screen. Several affected users have confirmed that this method allowed them to ensure that the CLIPSVC service was correctly configured and available as a dependency when needed. Here’s what you need to do to start the CLIPSVC service manually: If you’re still experiencing the “Windows could not start the Client License Service (ClipSVC) service’ error, move down to the next method below.
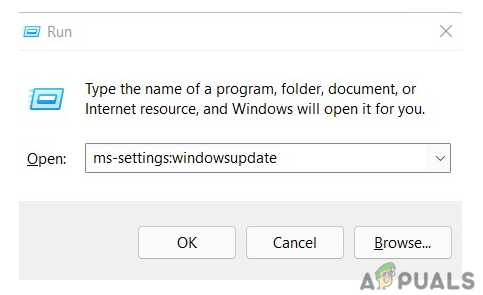
2. Update Windows build to the latest
As it turns out, Microsoft has addressed the great majority of underlying factors that could cause this issue on Windows 10. So, if you’re seeking a quick resolution for this issue, the first thing you should do is run a Windows Update check and apply any pending updates. Note: This issue arose as a result of this change, which prevented some services from indirectly authenticating machine accounts on clients (required when performing certain tasks in Store). Microsoft has since developed a fix for the issue, which you may apply by simply installing all pending updates from Windows Update. So, before you do anything else, check the Windows Update window for any outstanding updates (especially cumulative and feature upgrades). If Microsoft has recently announced a fix for this problem, installing all pending updates should address the problem right away. If you find yourself in this scenario, follow these procedures to complete the installation of all pending Windows Updates on your computer: If the problem persists, proceed to the next method listed below.
3. Uninstall KB5013942 & KB5011831 updates
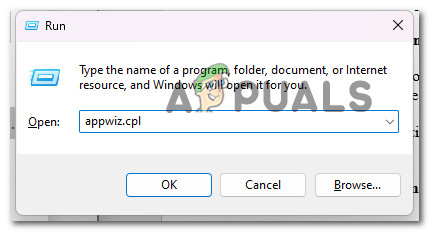
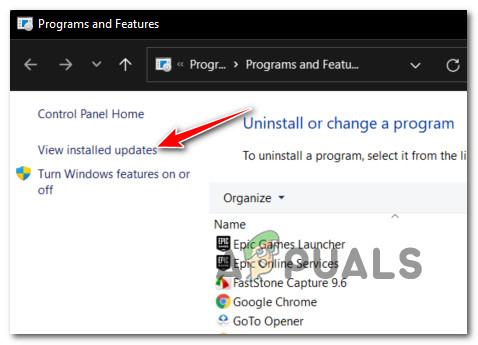
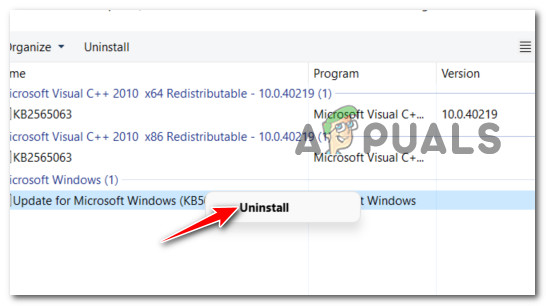
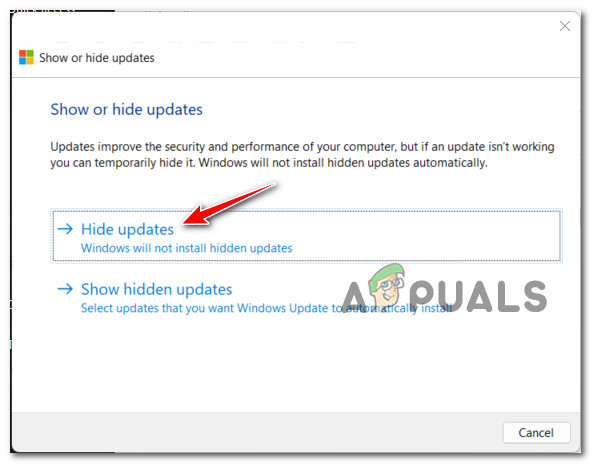
Keep in mind that if you’re having this problem on Windows 10, two faulty updates are almost certainly to blame for the failure of multiple Microsoft programs with this message. To resolve this issue, just uninstall the two problematic updates and use a tool to conceal them from Windows Update so that they are not reinstalled. Several affected users have reported that the problem was entirely resolved after they used the Windows Uninstall & Hide update to remove the KB5013942 & KB5011831 updates from their PC. Here’s what you need to do: Now that both updates are uninstalled, the next thing you should do is ensure that your OS doesn’t install them over once again. You can prevent this from happening by using the Microsoft Show or hide troubleshooter: If you didn’t have these updates installed and this method was not applicable, follow the next method below.
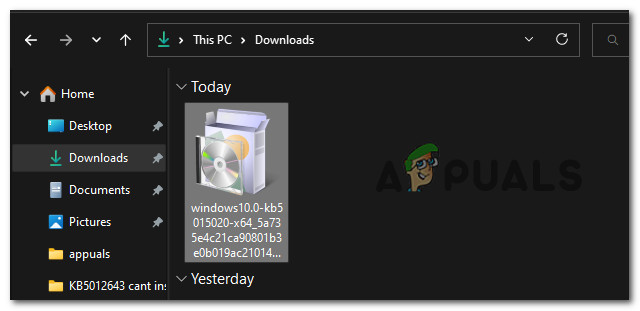
4. Install KB5015020 update from the Microsoft Update Catalog
Keep in mind that your Windows version may or may not automatically install the Microsoft update for this issue. You can manually install the missing update (KB5015020) from the Microsoft Update Catalog in this scenario. If this scenario sounds like it might apply to you, start by downloading the KB5015020 update for Windows 11 from this official download MSU link. After the download is finished, go to the folder where you downloaded the MSU hotfix, right-click it, and select Run as administrator. After that, follow the on-screen directions to complete the hotfix installation, and then restart your computer. Note: If you installed this hotfix, the “Windows could not start the Client License Service (ClipSVC) service’ error should have been resolved. If the problem persists, proceed to the next method below.
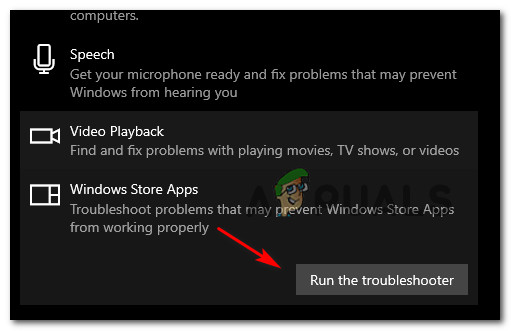
5. Run the Store Apps Troubleshooter
If an automated repair strategy has already been used to fix the “Windows could not start the Client License Service (ClipSVC) service” error, then the Windows Store Apps Troubleshooter should help you swiftly resolve the issue. Keep in mind that the principal store component has a set of requirements that all native apps operating on the Universal Windows Platform (UWP) must meet (Microsoft Store). In some cases (after a bad update, after some type of file corruption), you can expect these shared dependencies to become corrupted and affect the app retrieval process; in these cases, the best course of action is to run the Windows Apps Troubleshooter and let the automated repair component take care of the problem. Note: If a recognizable scenario is detected, the Windows Apps Troubleshooter provides a repair component with a ton of automated repair options that can be applied. Use the processes below to run the Windows App Troubleshooter and apply the recommended remedy to repair any shared dependencies if you haven’t previously done so: If you’re still having trouble getting around the “Windows could not start the Client License Service (ClipSVC) service” error, try the following way down below.
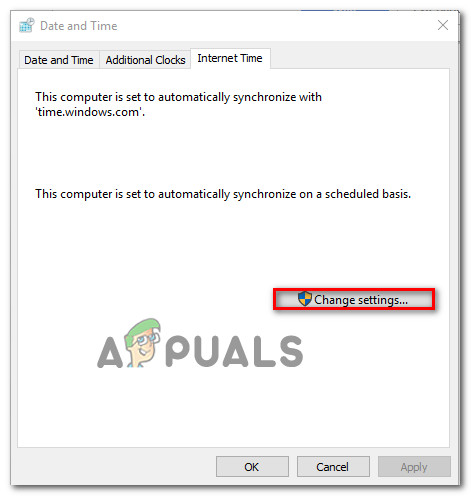
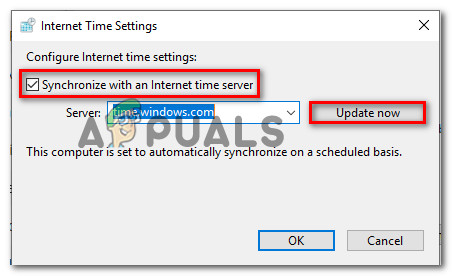
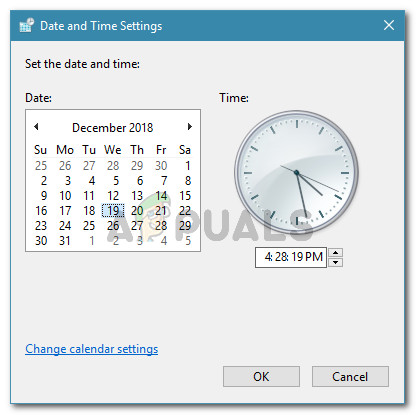
6. Set the Correct Time & Date
According to many impacted users, you can encounter this problem when the license support check fails because the validation server’s expected date and time differ from the one on your machine. If this scenario applies to you, all you need to do is make sure your computer’s date and time are correct. As it turns out, if your local system’s time and date settings change from those expected by the Microsoft Store server, you may be unable to access personalized listings of Windows Store apps and games – you will be able to get to the home screen, but not to the dedicated page. If you find yourself in this situation, the solution is simple: adjust the date and time to the correct numbers so that the MS server does not object to your connection. Follow the steps below if you don’t know how to set the date and time to the correct values: If the issue is still not fixed, move down to the next method below.
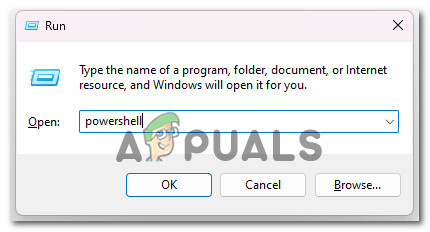
7. Re-Register the Store app
According to some impacted customers, this issue can also occur if the Windows Store software has been de-registered. If this is the case, re-registering the Windows Store app for all accounts will fix the problem. In this case, you should be able to fix the problem by using Powershell to re-register the Store app. This solution has been confirmed to work by several Windows 11 and Windows 10 customers who were experiencing the ClipSVC issue. Using an elevated Powershell window, here’s how to re-register the Store app: If the ClipSVC error recurs, move on to the next option listed below.
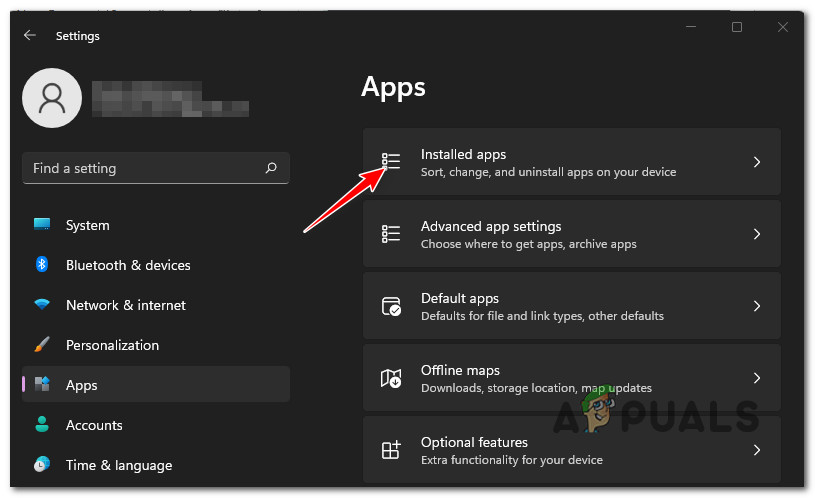
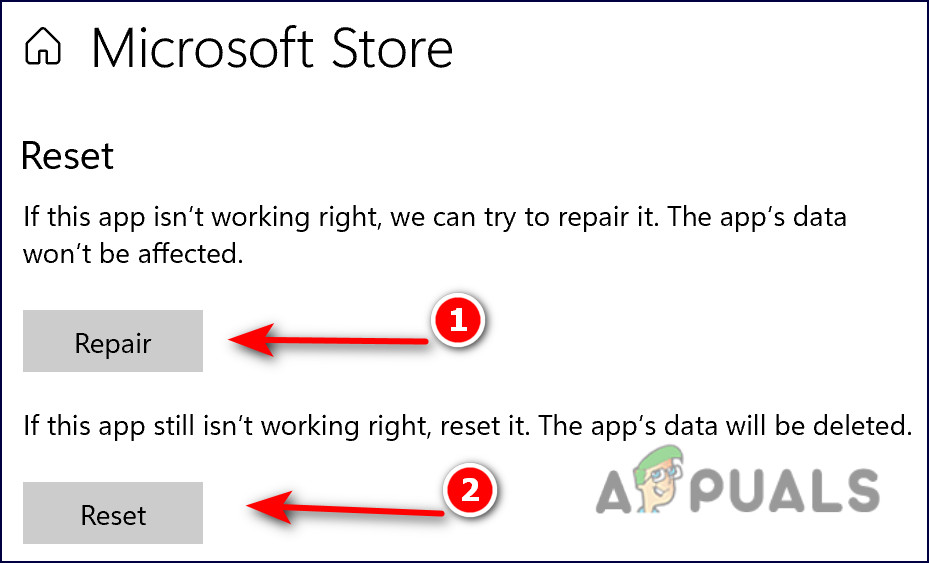
8. Repair, Reset, or Reinstall the Microsoft Store
If you only have this problem with a few Windows Store apps, it’s possible that you’re dealing with an inconsistency that the Windows Store Apps Troubleshooter can automatically correct. Simply run the troubleshooter and follow the instructions. If the problem doesn’t go away on its own, try repairing, resetting, or reinstalling the Microsoft Store. You should expect this problem to develop as a result of corruption in the Microsoft Store cache or the Microsoft Store installation files, depending on your situation. In this case, you should try to repair the Store Component first before resorting to a reset approach if the repair fails. Many users have reported that this update was the only thing that let them get rid of the annoying ‘We can’t get your tasks right now’ message. Note: Even if this issue is caused by a Microsoft Store component, the data stream is still handled by the Microsoft Store Service. This is why, in this case, fixing or resetting the Microsoft Store app may be beneficial. We propose forcing the Store to repair first, then using the reset feature as a safeguard. You can also try reinstalling the Microsoft Store if the first two options don’t work. This is what you must do in order to perform these repairs: If you’re still experiencing the same ‘Windows couldn’t start the Client License Service (ClipSVC) service’ error, move down to the next method below.
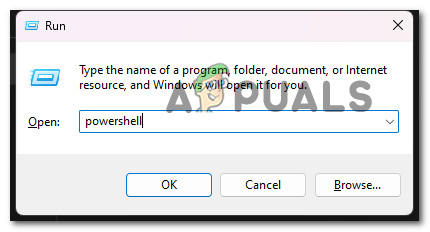
9. Reinstall Microsoft Store
If the reset and repair procedures above didn’t allow you to fix the ‘Windows couldn’t start the Client License Service (ClipSVC) service’ error, one final way to make sure that this problem is not caused by a corrupted Microsoft Store instance is to reinstall the entire component. In order to do this, you will need to do this from an elevated Powershell window. Several affected users have confirmed that this problem went away entirely after they followed the instructions below. Here’s what you need to do: If you’re still dealing with issues related to the ClipSVC service, move down to the next method below.
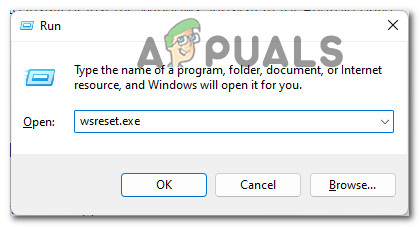
10. Deploy a WSReset.exe procedure
The most common reason for this type of behavior with the Microsoft Store on Windows 11 and Windows 10 is probably bad cached data. Despite the fact that cached files are required for your Microsoft Store installation (they increase reaction times and overall speed), removing them will not cause any underlying issues with the store component – after all, you can’t utilize Windows Store properly if you have this issue. If you don’t want to do it manually, you can use WSReset.exe, a troubleshooting tool, to reset and clear the Windows Store without altering your account settings or uninstalling your installed apps. Note: If you want to go for the manual route, follow the next method below. All you have to do is run this tool in an administrative environment, and all damaged cached data that may be influencing Windows Store behavior should be deleted. Follow the steps below to remove the Windows Store cache and refresh the Store component using the WSreset.exe application: If you’re still getting the ‘Windows couldn’t start the Client License Service (ClipSVC) service’ issue, try the next solution below.
11. Clear the Local cache of Microsoft Store
If the manual way above of clearing the cache wasn’t effective in your case (or you want to avoid it, you can always go for the automated way. According to many affected users, you can expect to run into this issue if the Microsoft Store’s LocalCache folder has broken data that prevents waiting for updates from being installed. Manually emptying the LocalCache folder should cure the problem in this case. If you still can’t get the problem to go away (even after doing the wsreset method), follow the steps following to manually remove the Windows Store cache folder: If the ‘Windows couldn’t start the Client License Service (ClipSVC) service’ error persists, proceed to the next method below.
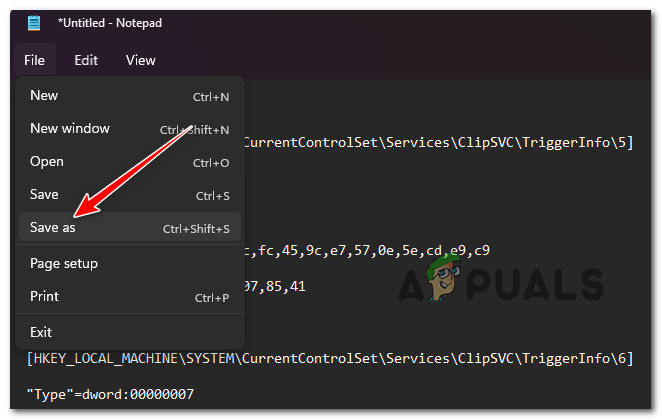
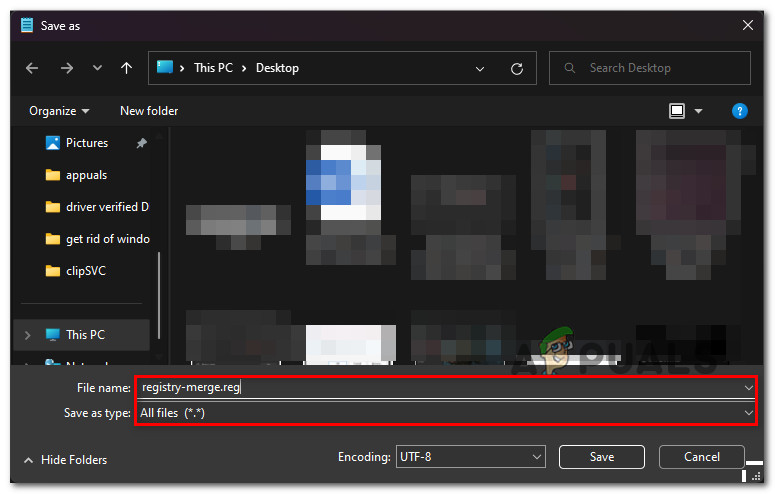
12. Merge a healthy Registry equivalent
As it turns out, there is a specific case in which a Windows 10 infrastructure upgrade caused this issue by breaking particular registry keys. If this is the case, you can fix the problem by replacing the corrupted registry keys with healthy replacements. The way to do this is to create a Registry Script, then merge it with the equivalent on your system in order to ensure that the ClipSVC has all the required services in order to run. Note: Before you start with the operation below, our advice is to create a system restore point first. This will allow you to revert back to a healthy Registry state in case something goes wrong with this operation. Once you have the backup in place, follow the instructions below to merge a healthy Registry equivalent with the existing one on your PC; If the same ‘Windows couldn’t start the Client License Service (ClipSVC) service‘ error is still occurring as the Client License Service refuses to start, move down to the next method below.
13. Perform a Repair Install
If you’ve followed every method in this article and are still getting the ‘Service Terminated Unexpectedly’ error, the issue is almost certainly caused by system file corruption that can’t be fixed using traditional methods. In this instance, refreshing every Windows component is the best approach to fix the problem without needing a full OS rebuild (including boot data). There are two alternatives available to you:
Repair Install – This is a more time-consuming technique (also known as in-place repair). It necessitates the use of installation media, but the benefit is that you can preserve all of your personal files (including personal movies, games, apps, and even some user preferences) without having to back them up beforehand.Clean installation – This is the simplest method. You don’t need any installation disk, and you can start it right from the Windows 10 start menu. If you don’t back up your data before starting this procedure, you will lose everything.
How to Fix Error 1067: ‘The process terminated unexpectedly’Fix: Virtual machine has terminated unexpectedly during startup with exit code 1…Fix: “PPP Link Control Protocol Was Terminated’ Error on WindowsError: MySQL Shutdown Unexpectedly? Here’s how to fix